The Trongate PHP Framework

Complete API Reference Guide Trongate CSS Trongate MX


Introduction

Welcome To The Revolution!

A Modern PHP Framework for Developers Who Love Pure PHP

PHP is the dominant server-side language of the web, powering millions of websites and applications. With a thriving community and countless frameworks, you might wonder: Do we really need another PHP framework? For a growing number of developers, the answer is clear: Yes, we do.

While PHP frameworks have brought innovation and convenience to web development, many fall short in key areas like performance, stability, and developer productivity. Furthermore, the broader web development community has increasingly encountered challenges stemming from a phenomenon known as rewrite culture.

What Is Rewrite Culture?

Rewrite culture refers to the frequent breaking, rewriting, and reversioning of frameworks and tools, often without clear benefits to the end user. This creates challenges for developers and clients alike, who may find their projects prematurely deemed "outdated" due to unnecessary versioning changes. One thing is for sure: No developer wants to tell a client, "Your site is now out of date because the framework it was built on just introduced breaking changes."

A Better Way

Trongate was built on the belief that there is a better way. By prioritising stability and continuous improvement without disruption, Trongate provides developers with a dependable foundation for building robust, future-proof applications. This commitment to stability is what sets Trongate apart.

Put simply, if there’s any PHP framework that prioritises stability more than Trongate, we haven’t found it!

In addition to prioritising stability, Trongate was also built with no third-party dependencies. To be clear, there’s nothing wrong with using third-party code; sometimes it’s positively beneficial. The key difference is that Trongate was built — from the ground up — with no third-party code at all.

This means that the framework is able to offer unparalleled levels of stability and security.

Whilst Trongate's approach to web development is a radical departed

A Fresh Approach To Web Development

Trongate isn't just another PHP framework—it's a fresh approach to web development, designed for developers who value stability, performance, and simplicity. It's lightweight, fast, and free of unnecessary dependencies, offering all the benefits of working with pure PHP while eliminating common frustrations.

The Problems Trongate Solves

  1. Performance Bottlenecks
    Heavy abstractions in some frameworks can slow down your application. Trongate's lightweight core ensures blazing-fast performance, even as your project scales.
  2. Unnecessary Complexity
    Overly complex frameworks can overwhelm developers. Trongate simplifies the development process with a clean, intuitive structure that allows you to focus on building applications.
  3. Bloated Dependencies
    Some frameworks rely heavily on third-party libraries, which can lead to compatibility and maintenance issues. Trongate avoids this with zero third-party dependencies, providing everything you need in one package.
  4. Slower Development Speeds
    Over-engineering can slow down development. Trongate is optimised for speed, helping you build and launch applications faster and more efficiently.

A Framework for the Modern Developer

Trongate is perfect for developers who want the freedom to work with pure PHP without the bloat and complexity of traditional frameworks. It's ideal for:

  • Web Developers building websites of any scale.
  • API Developers creating fast, reliable RESTful APIs.
  • Business Owners seeking dependable, high-performance software.

More Than Just a PHP Framework

Trongate has rapidly evolved into much more than a PHP framework. With Trongate, you gain access to a complete ecosystem of tools designed to enhance your development experience. These include, but are not limited to:

  • A powerful front-end JavaScript framework
  • A beautifully designed and intuitive CSS library
  • A free, feature-rich desktop application
  • A gorgeous content management system
  • And much more!

Whether you're an experienced developer or just starting out, Trongate provides the stability, simplicity, and performance you need to succeed. Welcome to the revolution. Welcome to Trongate.


How To Get Involved

The Best Way To Help

In the world of web development frameworks, success is often measured by GitHub stars. It's not a perfect system but - for better or for worse - that's the industry norm.

To help increase the momentum of Trongate and raise its profile please consider giving the Trongate PHP Framework repository a star on GitHub:

Give Trongate a Star on GitHub


Other Ways To Get Involved

Trongate is an open-source framework that thrives on community collaboration. If you discover any discrepancies, technical errors, or areas for improvement, contributions are highly encouraged. Whether it's submitting an issue, suggesting a feature, or providing a bug fix, your involvement is invaluable. Pull requests are always welcome!

Contribute to the Framework

The Trongate framework is hosted on GitHub, where all contributions are managed. If you're interested in contributing to the core framework, feel free to explore the repository and submit your changes:

Contribute to the Trongate Framework on GitHub

Contribute to the YouTube Channel

A new YouTube channel has been launched to provide tutorials, feature deep-dives, and insights into the Trongate framework. Those interested in contributing content or sharing knowledge via video are encouraged to get in touch:

Contact Form for YouTube Channel Contributions

Talk About Trongate

Regardless of what kind of presence you may have on the web, it would really help if you could spread the word about Trongate by telling people about it.

You can do this by:

  • Writing articles/blog posts
  • Posting video tutorials/reviews on places like YouTube
  • Discussing Trongate on podcasts
  • Telling your other developer friends and clients about Trongate
  • Mentioning Trongate on websites like X.com

All of the above things help enormously. So, if you enjoy using Trongate, we'd be really grateful if you could help to spread the word. Every contribution is appreciated and there's no need to ask for permission!

Have You Left A GitHub Star?

Apologies for labouring the point but it's really important for Trongate to acquire GitHub stars. If Trongate doesn't get GitHub stars then it will be regarded as being a "dead framework".

So, if you have a few moments to spare, we'd be really grateful if you could give Trongate a star on GitHub.

Every time Trongate gets a star on GitHub, it's one more person saying "yes!" to stability, "yes!" to open source and "yes!" to pure PHP.

Please do give Trongate a star on GitHub - if you can. It's all we ask.


Quick Start

Installing Trongate Using GitHub

The Trongate PHP framework is available from GitHub at the following URL:

https://github.com/trongate/trongate-framework.

However, the fastest and easiest way to obtain Trongate is by using the Trongate Desktop App. This Electron-based application, built with Node.js, is completely free and always will be. It is available for Mac, Windows, and Linux and can be downloaded from:

https://trongate.io/download.

Why Use the Trongate Desktop App?

The Trongate Desktop App provides several benefits, including:

  • Automatic framework downloads and setup
  • Automatic updates when new features are released
  • Automatic code generation
  • Built-in database management
  • A graphical query builder

...and much more!

Installing Without the Desktop App

For those who prefer not to use the Desktop App, Trongate can still be installed manually.

Configuring the Main Settings File

To begin, the primary configuration file, config.php, must be set up correctly. This file is located at:

The contents of config.php are as follows:

The most critical setting at this stage is the BASE_URL constant.

What is a Base URL?

The Base URL (BASE_URL) represents the root address of a website. For example, if the site is hosted at http://www.example.com/, the BASE_URL should be set as follows:

Always make sure the value that is assigned to BASE_URL ends with a forwardslash.

Ensuring that the base URL is correctly defined is essential for loading assets such as images and stylesheets and for proper navigation throughout the application.

After setting the BASE_URL, save the config.php file.

Note: All constants defined in the config directory can be accessed from both controller and view files. For example, the following code outputs the application's base URL:

Setting Up the Database

Users installing Trongate manually must create and configure a database.

Step 1: The Database Configuration File

Once a database has been created (using a database management tool such as PHPMyAdmin), the database configuration file (database.php) must be updated. This file is located at:

The setup.sql file can be imported into the database management software to create the required tables. Alternatively, the SQL statements from setup.sql can be executed manually.

The content of setup.sql is as follows:

This code should be executed, either by importing setup.sql or by copying and pasting the code above from within your database management software.

Once the database setup is complete, delete the setup.sql file to enhance security.


Installing The Trongate Desktop App

The Trongate Desktop App can be downloaded from; https://trongate.io/download.

Please Note: The Trongate Desktop App is free of charge (it will always be free) and 100% open source.

Proceed To Download Page GitHub Repository

Note: The Trongate Desktop App is built using Electron framework. As such, it operates as a headless browser environment. This architecture ensures a secure and controlled execution context for the application. Users can be assured that the app functions within these well-defined parameters.


More Info

About MariaDB And MySQL

PHP can work with a large variety of databases. This includes 'NoSQL' databases like MongoDB and also relational databases like Postgres. However, over the years, MySQL has been - by far - the database that is most often partnered with PHP. MySQL is popular because:

  • MySQL is incredibly fast
  • MySQL is open source
  • MySQL is relatively easy to learn
  • MySQL is battle-tested (no known bugs)

The association between MySQL and PHP dates back to the mid-nineties. For better or for worse, the names 'MySQL' and 'PHP' are so strongly associated that it seems almost impossible to imagine one without having the other. However, in the strictest of terms, change has come to PHP.

Back in 2008, Sun Microsystems purchased MySQL for $500 million. Two years later, Oracle bought Sun Microsystems - and therefore acquired ownership of MySQL - as part of a 5.3 billion dollar takeover.

Oracle's takeover of Sun Microsystems came as a surprise to the tech industry and no doubt would have inspired the creation of a new open-source 'fork' of MySQL by the name of 'MariaDB'.

At the time of writing, the PHP community is somewhat split when it comes to database choice. Some popular downloadable server environments are continuing to use MySQL whilst others have dropped MySQL completely in favour of MariaDB. For example, MAMP is still using MySQL whilst XAMPP has switched to MariaDB.

Fortunately, these two different databases are virtually indistinguishable in terms of how they are used.

For simplicity and consistency, this documentation will use the word 'MySQL' to refer to a relational database that is being partnered with PHP. This word is used with the understanding that many users may not be using 'MySQL' but may instead be using MariaDB or perhaps even another database type altogether.

Regardless of whether you're using MySQL or MariaDB, rest assured your choice won't affect how you use Trongate or how you build web apps with Trongate. Even though there are a few technical differences (between MySQL and MariaDB) under the hood, you don't have to worry about them!


Installing PHP and MySQL

Trongate is a PHP framework. To write PHP code on your computer, you'll need a PHP engine and also a database such as MariaDB or MySQL. One of the easiest ways to get building with PHP is to use a local web development environment, like XAMPP.

XAMPP is a downloadable web development environment. In other words, it's an assortment of software that has been bundled together into a package that you can download and install on your computer. XAMPP includes (but is not limited to) a PHP engine by the name of Apache and a database by the name of MariaDB. There are a variety of XAMPP alternatives and also an assortment of other, more exotic ways to get PHP working on your computer. However, if you're just starting out or if you are eager to get up and running quickly and without fuss then XAMPP is hereby recommended. XAMPP is recommended because:

  • It gives you the latest (major) version of PHP and MariaDB
  • It's available for Mac, Windows and Linux
  • It comes with an easy installation wizard
  • It also comes with a handy database management application called 'PHPMyAdmin'
  • It's 100% free

You can download a copy of XAMPP from here.

Mac Users: The makers of XAMPP have produced a "VM machine" and it has caused a little confusion for Mac developers. So, if you're a Mac user then there's a video for you that walks you through the whole XAMPP setup. The URL is: https://youtu.be/L2X6fDiqOC4?

Please go ahead and get XAMPP (or something similar) now!


Basic Concepts

Regarding Coding Style

The Trongate framework minimizes overheads to achieve best-in-class performance. This philosophy extends to its coding style, focusing on three primary goals:

  • Maximize Developer Productivity: Achieve more with fewer lines of code.
  • Embrace Pure PHP Syntax: Mirror the familiarity of native PHP conventions.
  • Minimize Ambiguity: Use clear naming conventions to reduce errors.

Modern PHP for Enhanced Web Development

The Trongate framework's core resides in the 'engine' directory. All functions and methods within this directory include doc blocks, access modifiers (public/private/protected), type hinting, and return types, ensuring well-documented, modern PHP syntax.

Despite this, Trongate introduces unique syntax nuances that distinguish it from other frameworks.

Aligning PHP with C Roots

Trongate aims to provide a coding experience akin to pure PHP. Code examples in this documentation follow the K&R (Kernighan and Ritchie) coding style.

K&R is a compact, unambiguous style commonly used in C programming. It is named after Brian Kernighan and Dennis Ritchie, authors of "The C Programming Language."

Note: PHP's origins in C influence its syntax, including the prevalence of snake_case function names—a convention Trongate adopts.

Key Characteristics of K&R Style

  • Indentation uses two spaces, not tabs, for consistency.
  • Opening curly braces '{' appear on the same line as the function or control statement.
  • Closing curly braces '}' align with the start of the controlling statement.

Example

Additional Coding Conventions

Trongate promotes the following practices:

  • Use snake_case for function, file, and directory names.
  • Prefer plural names for collections or groups.
  • Adopt two-space indentation for clarity.

Trongate's syntax mirrors PHP's core conventions, such as snake_case, ensuring familiarity and consistency for developers.

Snake Case for Clarity

Trongate's use of snake_case reduces ambiguity, unlike camelCase conventions in languages like JavaScript. For example, getElementById() versus getElementByID() can confuse developers. Snake_case eliminates such issues by using lowercase letters and underscores, e.g., get_element_by_id.

This approach simplifies development, reduces cognitive load, and prevents common errors.

Minimal Use of Namespaces and Access Modifiers

Trongate streamlines development by minimizing namespaces and access modifiers. This contrasts with traditional PHP frameworks but accelerates development processes.

While optional, many developers find this approach enhances efficiency once adopted.

Modern PHP Features

PHP 8 introduces features like type hinting, doc-blocks, return types, and constructor property promotion. These enhance code clarity and robustness but remain optional.

Trongate supports these features but generally avoids them in documentation to maintain simplicity and accessibility for new developers.

Developers familiar with modern PHP features are encouraged to use them to improve code quality and maintainability.

For example, consider the following PHP method:

The above syntax works without any issues. However, with modern PHP, it is possible to enhance the method by adding access modifiers, doc blocks, type hinting, and return types. For example:

To be clear, readers are encouraged to use modern PHP syntax where possible. However, for the purposes of brevity and clarity, code samples will be kept as simple as possible throughout this documentation.

Conclusion

Trongate's syntax differs significantly from other PHP frameworks through streamlined practices, unique naming conventions, and concise coding. These deliberate choices prioritize efficiency and error reduction.

By refining coding practices, Trongate enhances developer productivity and advances PHP development through thoughtful innovation.


The Underscore Naming Convention

Trongate employs the underscore naming convention as a mechanism to control method accessibility. This convention involves prefixing method names with an underscore character to prevent them from being accessed directly via a URL. For example:

Methods prefixed with an underscore are effectively restricted from public URL invocation, while still remaining accessible within the framework's modular architecture.

How It Works

In Trongate, modules are designed to be independent yet interoperable. Developers can easily load one module from another, as demonstrated in the example below:

Information regarding how modules can load and use other modules is provided within the, Modules Calling Modules chapter of this documentation.

While methods prefixed with an underscore cannot be accessed via a URL, they remain fully accessible within the framework. This ensures that developers can invoke methods across modules without exposing sensitive functionality to external requests.

Addressing Common Misconceptions

A common misconception is that the underscore naming convention renders methods "private" or "protected." However, this is not the case. In object-oriented programming:

  • Private methods can only be invoked within their containing class.
  • Protected methods can be accessed by their containing class and any classes that extend it.

Since modules in Trongate are entirely independent, invoking a method from one module in another would be impossible unless the method is explicitly declared as public. The underscore naming convention does not alter a method's visibility within the codebase; rather, it restricts direct URL access to ensure security and maintainability.

Some developers mistakenly associate the underscore naming convention with outdated practices, particularly because earlier PHP frameworks (e.g., Zend Framework 1, early versions of CodeIgniter, and Yii1) used similar approaches but later replaced them with full access modifiers. However, this assumption is incorrect and reflects a misunderstanding of Trongate's unique architecture. The underscore naming convention is a deliberate and integral part of the framework's design, not a relic of outdated practices.

Without this convention, developers would need to rely on additional configuration mechanisms, such as YAML files, to explicitly specify which methods can or cannot be accessed via URLs. The underscore naming convention simplifies this process, providing a clean and efficient way to secure methods from direct URL access.

More information pertaining to this topic is offered here.


Overview of Primary Directories

The Trongate Framework is a structured collection of directories and files designed to streamline the web development process. Below is a concise summary of each directory's purpose.

The contents of a basic Trongate web application
The contents of a basic Trongate Web Application.

The Engine Directory

The engine directory contains the core functionality of the Trongate framework, including files responsible for loading classes, handling routes, and providing helper functions. Modifying files within this directory is strongly discouraged unless absolutely necessary and fully understood.

The Config Directory

The config directory stores essential configuration settings for your application, such as the base URL, environment settings, and default controllers. These settings are globally accessible throughout the application.

Never deploy a Trongate web application with the "ENV" setting configured to "dev".

The Modules Directory

The modules directory organizes distinct components of the Trongate application, each referred to as a module. Modules encapsulate all functionality required for a specific feature, making them self-contained and reusable. Typically, a Trongate module includes the following subdirectories:

  • Controllers: Handle the business logic of the module.
  • Views: Manage the presentation layer and user interface elements.
  • Assets: Store related files such as CSS, JavaScript, and images.

The Templates Directory

The templates directory is used for storing HTML templates. Unlike other frameworks that rely on separate templating engines, Trongate leverages PHP itself as its templating engine. This approach simplifies the learning curve and enhances performance.

The Public Directory

The public directory serves as the primary entry point for a Trongate web application, containing the index.php file. It also houses assets such as CSS, JavaScript, and images that are directly served to clients. Entire HTML themes can also be stored within the public directory.

The public and engine directories contain essential license files. These files include specific framework version details and are critical for managing updates via the Trongate Desktop App. Modifying or removing these files may disrupt the update process and should be avoided to maintain system integrity.


Truly Modular Architecture

Trongate applications exemplify a truly modular architecture, setting them apart from traditional PHP frameworks that often rely on pseudo-modularity and intricate dependencies. Unlike frameworks that depend on a 'vendor' directory managed by Composer for library loading, Trongate directly and independently loads modules. This efficient design minimizes overhead, streamlines the initialization process, and delivers significant performance improvements, as validated by independent benchmarks.

Modularity in software design involves breaking down a system into independent, interchangeable modules. Each module encapsulates specific functionality, helping manage complexity, improve reusability, and enhance maintainability.

Understanding the Modules Directory

In the Trongate framework, the majority of developer-authored code resides within the "modules" directory. This directory implements Trongate's HAVC (Hierarchical Assets View Controller) architectural pattern, which enhances modularity and promotes clean, organized code.

What Is HAVC?

For developers familiar with the traditional MVC pattern, HAVC will feel intuitive. It retains core MVC components, such as controller files for application logic and views for presentation layers.

In Trongate, each module within the modules directory functions as an independent MVC cluster. These modules are self-contained but can interact with other modules and parts of the broader application. Additionally, HAVC supports the inclusion of modules within modules, offering enhanced modularity and flexibility to design scalable, maintainable applications.

The graphic below illustrates the typical structure of the modules directory. The two-way arrows indicate bidirectional communication between modules, allowing them to exchange information with both controller and view files.

Diagram of Trongate Modules Directory
A Visual Representation of Hierarchical Assets View Controller Architecture.

HAVC vs. HMVC

Trongate's modular architecture shares conceptual similarities with HMVC by introducing hierarchy through submodules within modules. However, Trongate's structure is more flexible and less rigid than the strict hierarchical design typical of HMVC. This flexibility allows Trongate to combine structured code organization with loosely coupled systems, providing developers with adaptability and efficiency. As a result, Trongate excels in delivering robust, straightforward solutions without the complex dependencies often associated with traditional HMVC frameworks.


Code Distribution and Management

Trongate developers can use Packagist for sharing code, just as with other PHP frameworks. However, Trongate modules are designed to be entirely self-contained, enabling seamless distribution without reliance on external platforms. This means modules can be copied directly from one project and pasted into another, making them highly portable and easy to integrate.

If a module includes an SQL file, Trongate activates a built-in Module Import Wizard. This wizard prompts the user to import SQL code with a single click, ensuring smooth integration of modules that depend on database structures. For more details, see the Module Import Wizard chapter.

Self-Contained Modules: A Key Strength

Trongate's modular architecture emphasizes independence and portability. Each module encapsulates all necessary components, including controllers, views, assets, and optional database configurations. This design allows developers to copy and paste modules between projects without additional setup or dependencies. Whether you're reusing modules within a single application or sharing them across multiple projects, the process is straightforward and efficient.

Trongate's Code Sharing Platform

For developers seeking pre-built modules, Trongate offers "The Module Market"—a platform tailored specifically for Trongate modules. While not required for module distribution, The Module Market provides a centralized location for discovering high-quality, open-source modules that meet Trongate's standards for integration and compatibility. Each module is maintained by a single developer, ensuring accountability and consistent quality.

Comparative Overview of Code Sharing Platforms

The table below compares popular web development technologies, highlighting their approaches to managing and sharing intellectual assets such as code.

Technology Platform Management Model Security and Stability Focus
Node.js NPM (Node Package Manager) Community-driven; multiple contributors Dependencies managed by versions; potential security risks from open contributions
Ruby on Rails RubyGems Community-driven; multiple contributors per gem Moderate; includes efforts to audit gems but remains open to community contributions
Other PHP Frameworks Packagist Community-driven; inter-version dependencies allowed Security audits are less centralized; relies on community vigilance and Composer's dependency management
Trongate Self-contained modules / Module Market Single point of accountability; one developer responsible per module Higher security and stability due to developer accountability and controlled updates

The Anatomy of a Trongate Module

A Trongate module is typically organized into three primary directories, each serving a distinct purpose:

  • Controllers: This directory contains the business logic of the module. It typically includes one or more PHP files, with at least one file defining a PHP class. While most modules contain a single PHP class file, some may require multiple files depending on complexity.
  • Views: The views directory houses presentational content, primarily HTML. These PHP files are designed to integrate seamlessly with HTML, focusing on the user interface rather than business logic. This directory is optional, as not all modules produce presentational output.
  • Assets: This directory stores additional resources such as CSS, JavaScript, images, and configuration files for API endpoints. Like the views directory, this is optional and only included when necessary.
The basic structure of a typical Trongate module
The basic structure of a typical Trongate module.

What About the 'Models' Directory?

To facilitate secure and efficient database interactions, all Trongate modules can utilize a centralized 'Model' PHP class. This class resides within the Trongate framework's 'engine' directory, rather than within individual modules. Centralizing the model simplifies maintenance, enhances security, and ensures consistent database interactions across all modules.

For more information regarding Trongate's Model class, please refer to the Database Operations chapter.


Dynamic Module Loading

Trongate’s dynamic module loading system is a standout feature of the framework, giving developers the ability to build scalable, modular applications with ease. With Trongate's module loading system, developers can use self-contained modules on demand, eliminating the need for excessive dependencies or cluttered codebases. Whether you're handling security, file uploads, or user management, modules integrate seamlessly, making it easier than ever to extend your application’s functionality. This page will walk you through how modules are dynamically loaded in Trongate.

How Dynamic Module Loading Works

In Trongate, modules are self-contained components that encapsulate specific functionality, such as security, file uploads, or user management. These modules can be loaded dynamically into your controllers, making it easy to extend the functionality of your application without modifying the core framework.

Step-by-Step Process

  1. Loading a Module:

    To load a module, simply call the module() method in your controller and pass the name of the module as a parameter. For example:

    This method delegates the loading process to the Modules class, which handles the instantiation and attachment of the module to your controller.

  2. Dynamic Property Attachment:

    Once a module is loaded, it is dynamically attached to the Trongate instance as a property. For example, after calling $this->module('trongate_security');, the Trongate Security module becomes accessible via $this->trongate_security.

  3. Using the Module:

    After loading the module, you can immediately use its methods. For example:

    This seamless integration ensures that modules are ready to use as soon as they are loaded, without any additional configuration.


Under the Hood: How Dynamic Module Loading Works

To truly understand the power of Trongate’s dynamic module loading, let’s take a closer look at the underlying mechanisms:

The Role of the module() Method

The module() method in the Trongate class acts as a bridge between your controller and the Modules class. When you call $this->module('trongate_security');, the following happens:

  1. The module() method creates an instance of the Modules class:
  2. It then calls the load() method of the Modules class, passing the name of the module to be loaded:

The Role of the Modules Class

The Modules class is responsible for dynamically loading and instantiating modules. Here’s how it works:

  1. The load() method constructs the path to the module’s controller file based on the module name:
  2. If the controller file exists, it is included, and the module’s controller class is instantiated:
  3. The instantiated module is stored in the $modules array within the Modules class, ensuring that it can be reused if needed. This caching mechanism prevents redundant instantiations of the same module during a single request, improving performance.

The Role of the Dynamic_properties Trait

Trongate's dynamic module loading system is made possible by the Dynamic_properties trait, which allows properties to be added to the Trongate instance at runtime. This is achieved using PHP's magic methods (__get() and __set()), enabling safe access and manipulation of dynamically added properties.

This is called at the top of the main Trongate class with the following line of code:

The remainder of this page contains information about how Trongate's dynamic module loading system works under the hood. However, it should be stressed that there's no requirement to understand how the internals of Trongate work to use the framework effectively.

The Dynamic_properties trait enables the Trongate class to handle properties that are not explicitly defined. Here’s how it works:

  1. When a module is loaded, the Dynamic_properties trait allows the module to be dynamically attached to the Trongate instance as a property. For example:
  2. This dynamic property attachment ensures that the module is accessible throughout the Trongate instance, allowing you to call its methods directly. For example:

The Dynamic_properties trait is essential for enabling this flexibility, as it allows properties like $this->trongate_security to be added dynamically without requiring explicit declarations in the Trongate class.


Benefits of Trongate’s Module Loading System

Trongate’s dynamic module loading system offers several advantages that make it a powerful tool for developers:

  • Modular Architecture: Trongate’s modular design promotes separation of concerns, making your codebase cleaner and easier to maintain.
  • Ease of Use: With just a single line of code ($this->module('module_name');), you can load and use any module in your application.
  • Flexibility and Extensibility: The ability to dynamically attach modules ensures that Trongate can adapt to the needs of your project.
  • Lightweight and Efficient: Trongate’s module loading mechanism is designed to be lightweight and efficient, ensuring that your application remains performant.
  • Developer-Friendly: The intuitive design of Trongate’s module loading system makes it accessible to developers of all skill levels.

In Summary

Trongate’s dynamic module loading system is a cornerstone of its architecture, providing developers with a powerful and flexible way to build modular applications. By leveraging the internal Dynamic_properties trait, Trongate ensures that modules can be seamlessly integrated into your controllers, enhancing both functionality and maintainability.

Whether you’re building a simple website or a large-scale, complex web application, Trongate’s module loading system empowers you to create clean, modular, and extensible code with minimal effort.

For more information on how to work with Trongate's dynamic module loading system please refer to the chapter, Modules Calling Modules.


Understanding Routing

Routing: An Overview

In web development, routing is the process of directing incoming web requests to the appropriate code that should handle those requests. Trongate's routing system manages this by mapping URLs (Uniform Resource Locators) to specific modules, controllers, and methods within your application.

Trongate uses a segment-based URL routing approach that creates clean, user-friendly URLs. This is in contrast to traditional PHP applications that often use query strings with symbols like question marks and ampersands.

Routing Example

Consider a product page on an e-commerce website. Using traditional PHP, you might see a URL like this:

With Trongate's routing system, you can create more readable and professional URLs like this:

Clean URLs like this offer several benefits:

  • They're easier for users to read, understand, and remember
  • They look more professional and trustworthy
  • They're more friendly for search engine optimization (SEO)
  • They hide implementation details of your application

Trongate provides three main ways to handle routing:

  1. Homepage Routing: Special rules for handling requests to your website's homepage
  2. Automatic Routing: URLs are automatically mapped to your code based on simple conventions
  3. Custom Routing: Define your own URL patterns for specific needs

The following pages will explore each of these routing methods in detail, showing you how to create clean, professional URLs for your web applications.


Homepage Routing

The homepage is often the most visited page of any website. Trongate provides a simple way to control what happens when users visit your website's homepage (the root URL of your site).

Homepage Configuration

Homepage routing in Trongate is controlled through three constants in your config.php file, which is located in the 'config' directory. Here are the default settings:

These three constants work together to determine what code runs when someone visits your homepage:

  • DEFAULT_MODULE: The module folder where your code is located
  • DEFAULT_CONTROLLER: The controller file that contains your code
  • DEFAULT_METHOD: The specific function that will run

With these default settings, visiting your homepage will:

  1. Look inside the 'welcome' module folder
  2. Find the 'Welcome' controller file
  3. Run the 'index' method inside that controller

In web development, the URL that maps to the homepage of an application is often referred to as the base URL. In Trongate, the base URL is declared, inside 'config.php', through a PHP constant named as BASE_URL. The last character of your base URL should always be a forwardslash.

Here's the contents of the config.php file that is being used for the this website (yes, really!):

Customizing Your Homepage

You can change what appears on your homepage by modifying the constants within config.php. This file is located in:

Example

For example, if you want your homepage to display a dashboard, you might use:

Important: Before changing these settings, make sure:

  • Your module folder exists
  • Your controller file exists inside the module folder
  • Your method exists inside the controller

Otherwise, users will see an error when they visit your homepage.


Automatic URL Routing

Trongate's automatic routing system follows a simple, predictable pattern to map URLs to your code. When Trongate receives a URL request, it breaks the URL into segments and uses these segments to determine which code to run.

How URL Segments Work

Consider this example URL:

Trongate splits this URL into three segments and uses them in a specific way:

Segment Example Purpose
First Segment members Names both the module folder and the controller to use
Second Segment profile Names the method to run
Third Segment 88 Passed as a parameter to the method (optional)

Given the URL above, Trongate will:

  1. Look for a 'members' module folder
  2. Find the 'Members' controller inside that folder
  3. Run the 'profile' method
  4. Pass '88' as a parameter to that method

Mapping URLs to Code

Here's what the corresponding code, based on our example, could look like:

Important Rules

  • Module folders should be lowercase (e.g., 'members')
  • Controller class names should have an uppercase first character (e.g., 'Members')
  • Method names should be lowercase (e.g., 'profile')
  • If no second segment exists, Trongate will look for an 'index' method

Custom URL routing will override automatic routing. If you have defined a custom route for a URL, that will take precedence over the automatic routing rules described here.

In Summary

Automatic routing makes it easy to add new functionality to your application - just create the appropriate module, controller, and methods, and Trongate will automatically make them accessible via URLs that follow this pattern.


Custom Routing: An Introduction

Custom routing allows you to create clean, intuitive URLs by mapping your desired URL patterns to specific controllers and methods. This feature is particularly useful for creating SEO-friendly URLs and intuitive navigation paths.

Configuration File

In Trongate, custom routes are defined within 'custom_routing.php'. This file is located in:

From a PHP/framework perspective, custom_routing.php does the following two things:

  1. Defines a PHP array named $routes.
  2. Assigns the value of $routes to a PHP constant named CUSTOM_ROUTES.

In normal usage, you (as the developer) will not need to reference the $routes array or CUSTOM_ROUTES directly after 'custom_routing.php' has been properly set up and saved.

Here is an example of PHP code you might typically find in custom_routing.php:

An Overview Of How Custom Routing Rules Are Defined

In Trongate, the $routes array maps incoming HTTP requests to code. Each item within the array is a key-value pair that defines a custom routing rule.

The key (i.e., the left side) for each rule is the desired URL pattern you want to match.

The value (i.e., the right side) defines what should be served when someone visits a URL that matches the left side.

Consider the following line of code from the example above:

Here, we are effectively telling Trongate:

"If someone visits shop, please behave as though they had just visited store/products."

Assume the base URL is defined like this:

In Trongate, the BASE_URL is defined in 'config.php'. Here is the file location:

In this case, a user who navigates to:

...would receive the same response from the website as if they had navigated to:

All of the leading PHP frameworks have some kind of custom routing functionality.

Unfortunately, some developers appear to find the general topic of custom URL routing to be challenging. The main difficulty often comes from confusion about how custom URL routing differs from concepts like URL rewriting.

Let's clarify the topic at hand.

Don't confuse custom routing with URL rewriting or URL redirecting!

Custom routing determines what content gets served when a user visits a given URL. Custom routing does not change the actual URL that appears in the browser's address bar.

Custom Routing vs. URL Rewriting:

Custom Routing

  • In PHP frameworks like Trongate, custom routing maps incoming requests (URLs) to specific controllers or actions without altering the visible URL.
  • URL rewriting, often handled by the server (e.g., Apache's .htaccess or Nginx rules), changes how URLs are processed internally by the server, sometimes hiding implementation details.

Redirecting

  • Redirecting sends an HTTP response (e.g., 301, 302) to instruct the browser to navigate to a different URL. This does visibly change the address bar.

In Summary

Custom routing determines what content gets served when a user visits a given URL. It does not change the actual URL in the browser's address bar.

With Trongate, custom routing is handled via the file 'custom_routing.php'.

Custom routing rules are established by creating a $routes array, where each item is a key-value pair:

  1. The keys represent desired URL paths.
  2. The values represent what should be served.

Now, let's learn about custom routing patterns...


Custom Routing Patterns

As discussed previously, custom routing is handled via the initialization of a $routes array within the file, 'custom_routing.php'.

Trongate offers two types of routing patterns that can be used to set up custom routing rules. These are:

  1. Basic Routing Patterns
  2. Dynamic Routing Patterns

Basic Routing Patterns

Basic routing patterns are static mappings. A basic routing pattern is designed to match an explicitly declared URL path to an explicitly defined response.

The matching process for these routes involves checking if the current URL matches one of the keys in the $routes array. If a match is found, the framework directs the request to the corresponding controller and method specified by the value of that key.

When Trongate is attempting to match URLs, the BASE_URL will be disregarded.

Basic Custom Routing Example

To create a basic custom routing rule, add a key-value pair to the $routes array. Here's an example:

With the code above, any request made to <base-url>login, will cause the following chain of events to occur:

  • The framework will attempt to locate a module named 'users'.
  • The framework will attempt to find a controller file, named 'Users.php' within the users module.
  • The framework will attempt to find and load a PHP class named 'Users', within the target controller file.
  • The framework will attempt to find a method named login(), within the Users class.
  • The framework will attempt to invoke the target login() method.

Put simply, if somebody was to go to:

...the address bar would not change but the website would behave as though the user had navigated to:

A Word Of Caution

Basic custom routing offers an easy way to effectively declare:

"If a user arrives on 'x', behave as though they have arrived on 'y'."

But beware!

Basic custom routing only works when the current URL can be precisely matched to the defined URL pattern. It should never be used to generally swap 'x' for 'y' across a range of URLs.

Suppose you'd like to have the following rule enforced:

"When a user lands on any URL with a first segment of 'nice-segment', respond as though they have landed on an equivalent URL, but with a first segment of 'ugly_segment'."

It might seem tempting to set up a simple custom URL routing rule like this:

However, this would be a blunder since basic custom routing patterns only work for exact matches.

The rule above would not account for any variations in the URL beyond the first segment. So, it's possible that the current URL could include additional segments beyond the first segment. Those kinds of URLs wouldn't be properly routed without a dynamic match.

The correct way to define such a rule would be:

This would be a dynamic routing pattern - which happens to be the topic of discussion for the remainder of this page.


Dynamic Routing Patterns

Dynamic routing patterns allow for more flexible routing by capturing variable segments in the URL. They use wildcard placeholders to match specific parts of the URL and pass those values to the controller method. This feature is essential when the URL structure involves dynamic parameters, such as IDs, names, or multi-segment paths.

Wildcard Types

Trongate provides three types of wildcards for capturing URL segments:

  • (:num): Matches only numeric values. This is useful for routes where you expect a numerical identifier, such as product IDs.
  • (:any): Matches any characters except the forward slash ('/'). This is useful for more general segments like categories or user names.
  • (:all): Matches all remaining segments in the URL. This wildcard captures everything following it, which is helpful for paths with multiple segments (e.g., documentation paths or multi-level categories).

Here's an example of how these wildcards can be used:

Wildcard Table

Pattern Matches Example
(:num) Numbers only 123
(:any) Any characters except '/' (the forwardslash) user-1
(:all) Captures all remaining segments docs/api/v2
Note: The (:all) wildcard must be the last segment in your route pattern as it captures everything that follows.

Controller Mapping

The right side of each route maps to a controller and method, and the placeholders from the left side are passed to the method as parameters. Here's an example of how it works:

In the example above, (:num) captures the numeric ID passed in the URL, and (:any) captures any string-based segment. The (:all) wildcard is used for capturing everything after a particular path segment.

Route Groups

Organizing your routes into groups makes the routing system more maintainable and readable. Here's an example of how to group related routes together:

Important Considerations

Important: Routes are matched in order of specificity. More specific routes should be placed before more general ones, especially before routes using (:all).

Best Practices

  • Keep URLs clean and meaningful
  • Use consistent naming patterns
  • Place more specific routes first
  • Group related routes together
  • Use appropriate wildcards for dynamic segments
  • Use (:all) when you need to capture multiple segments in a single route

Securing Methods

Trongate provides a straightforward way to protect controller methods from direct URL access while keeping them available for internal use. This is crucial for maintaining application security.

Using the Underscore Prefix

To prevent direct URL access to a method, prefix it with an underscore (_):

Method Access Rules

Method Type URL Access Internal Access Example Usage
Public Method ✓ Allowed ✓ Allowed function products()
Underscore Method ✗ Blocked ✓ Allowed function _process_form()

Common Use Cases

Form Processing

API Methods

Security Implications

Important: The underscore prefix only prevents URL access. These methods can still be called from within your application code using $this->_method_name().

Best Practices

  • Protect Data Processing: Use underscore prefix for methods that handle sensitive operations or data processing
  • Helper Methods: Internal helper methods should always use the underscore prefix
  • Form Handlers: Methods that process form submissions should be protected
  • API Internals: Internal API operations should use protected methods

Method Organization

A well-organized controller might look like this:

This organization makes it clear which methods are part of your public interface and which are for internal use only.


Controllers

Introduction to Controllers

Overview

Controllers are a fundamental component of the Trongate framework, acting as the operational core of each module within an application. They play a crucial role in managing the business logic that determines how applications respond to requests. By managing data, routing operations, and processing forms, controllers ensure operations are executed efficiently and accurately.

The Role of Controllers

In Trongate, controllers primarily handle server-side requests. They receive data from HTTP requests and process this data to make informed decisions about which views or templates to render. Controllers are also responsible for passing data into view files and templates, ensuring that each response is appropriately tailored to the user's actions and the current state of the application. Through Trongate's Model class, controllers fetch or update necessary data, facilitating robust and streamlined data management. Additionally, controllers can interact with and utilize controllers from other modules, enhancing modularity and reuse across the application. This capability allows for a flexible architecture where functionalities can be extended or modified without altering the core components of each module.

Key Responsibilities

  • Processing Requests: Controllers interpret requests made to the server, whether they arrive directly through URLs or are facilitated by forms and other interfaces.
  • Data Handling: Controllers manage interactions with the database through models, handling both data retrieval and updates.
  • Rendering Views & Templates: Based on the processed data and the business logic, controllers determine which view file or HTML template to present, effectively dictating the output of the application.

Conclusion

Controllers do more than just receive and send data; they orchestrate the logical flow of the application, ensuring effective communication and functionality across all components. Every module within a Trongate application must contain a sub-directory named 'controllers'. These 'controllers' sub-directories must house at least one PHP file, which serves as the main controller for the module. Controller files may be considered the command centers of Trongate modules. They are pivotal in making crucial decisions and managing the module's interactions with other parts of the application.


The Structure of a Controller

Within the Trongate framework, controllers are PHP classes that extend the built-in Trongate class. Extending this foundational class provides controllers with immediate access to all of Trongate's core functionalities, such as form validation, database interactions, URL helpers, and more, enabling them to efficiently manage application logic and user interactions.

Naming Conventions

It is crucial to adhere to the following naming conventions when working with Trongate controllers:

  1. File Naming: Controller file names should start with a capital letter, reflecting their importance and usage within the module.
  2. Class Naming: Similarly, controller class names should begin with a capital letter, aligning with PHP's best practices for class definitions.
  3. Module Naming: The controller class name should correspond to the name of its module, which can be in all lowercase. This consistency aids in maintaining a clear and logical structure within the project.

Example: The Dice Controller

Below is an example of a simple Trongate controller file named 'Dice.php', located within a hypothetical module named 'dice'. This example demonstrates how a controller can encapsulate specific functionalities:

Detailed Breakdown of the Dice Controller

The 'Dice' controller provides a demonstration of how controllers are structured and function within the Trongate framework. Let's examine each component of the controller:

PHP Opening Tag

This is the opening tag for any PHP script. It tells the server that the code following this tag should be interpreted as PHP code.

Class Declaration

This line declares a new class named 'Dice' which extends the 'Trongate' class. Extending a class in PHP is a fundamental aspect of object-oriented programming that allows the 'Dice' class to inherit all methods and properties of the Trongate framework's base class.

Function Declaration

The code above is the first line of a method named 'roll' within the Dice class. Methods are functions that are defined inside a class and describe the behaviors or capabilities of objects created from the class. In Trongate, as in many MVC frameworks, these methods can be linked to specific routes (URLs).

Note: For brevity, the example provided omits elements such as type hinting, return types, visibility modifiers (public, private, protected), and doc blocks. These are essential for production code to ensure clarity, type safety, and proper documentation. For additional information on this topic, please refer to the Trongate framework's coding style guide.

Method Functionality

Within the curly braces of the roll() method, we have this line of code:

The above line of code generates random number between 1 and 6 and assigns to the variable, $number.

The rand() function is a built-in PHP function used to generate random numbers.

Moving on, the next line of code - within the roll() method is as follows:

This line outputs the value of $number to the webpage. In the context of a controller within a framework like Trongate, this typically means sending the data back to the client's browser where it can be rendered as part of the HTML or handled via JavaScript.

Class and Method Closure

Finally, the roll() method is closed with a closing curly bracket:

In PHP, as in many other programming languages, curly braces are used to define the scope of classes, methods, and other control structures, ensuring that the code enclosed within them is associated with that specific class or method.

This breakdown highlights how the 'Dice' controller leverages both Trongate's and PHP's built-in functionalities to perform its tasks, generating a random number between one and six.

Accessing the Controller

The roll() method can be invoked by navigating to the following URL:

http://example.com/dice/roll

This URL structure would cause the 'roll' method to be invoked, generating a random number between one and six using PHP's inbuilt rand() function. The random number that has been generated would then be displayed on the screen.

Sample output
Sample browser output (zoomed in for clarity)

URL Mapping and Routing

The URL provided adheres to Trongate's rules for automatic URL routing. In the example above:

  • The first URL segment, dice, maps to a class named 'Dice'. This class is part of a module also named 'dice'.
  • The second URL segment, roll, specifies the method to be invoked. Thus, it triggers the roll() method within the loaded Dice class.

This structured URL pattern ensures that requests are routed efficiently to the appropriate controller actions, making URL management straightforward and intuitive within the Trongate framework.


Multiple Classes Within One Module

Typically, the 'controllers' directory within a given module will contain one PHP file. This file generally defines a single PHP class, named after the module itself, but with the first letter capitalized in both the filename and the class name to adhere to PHP naming conventions.

This section explores scenarios where a module's 'controllers' directory contains more than one PHP class, detailing the considerations and best practices for organizing multiple classes within a single 'controllers' directory.

This page addresses a hypothetical edge case where it might be desirable to have multiple controller files within a single 'controllers' sub-directory.

Under normal operational conditions, however, it is generally preferable to separate PHP classes into distinct modules, adhering to a 'one class per module' structure. It's worth noting that Trongate supports modular nesting, which allows the inclusion of modules within modules. This approach offers a more scalable and organized alternative compared to the methods described here. For more information, see the following chapter: Modules Within Modules.

Step 1: Creating an Additional PHP Class

To add a second PHP class within the 'controllers' directory of a Trongate module, create a new PHP file alongside your primary controller. The file name should clearly reflect its purpose, starting with a capital letter in accordance with PHP class naming conventions.

Example: Suppose you want to add a class named 'Greeting' within the 'controllers' directory of Trongate's default 'Welcome' module. The first step is to create a file named 'Greeting.php'. This file should be placed inside the 'controllers' directory of the 'welcome' module.

For demonstration purposes, the PHP class named 'Greeting' may be defined as follows:

Note: The example provided omits elements such as type hinting, return types, visibility modifiers (public, private, protected), and doc blocks for brevity. These are essential for production code to ensure clarity, type safety, and proper documentation. For additional information, please refer to the Trongate framework's Coding Style Guide.

This class provides a simple method to return a greeting message. By placing this class in the 'controllers' directory, it is organized alongside other related controllers, ensuring that your module remains tidy and manageable.

Step 2: Loading the Additional PHP Class

Once you have created an additional PHP class within the 'controllers' directory, the next step is to ensure that this class is properly loaded and accessible where needed. In Trongate, this typically involves using require_once or a similar include statement to ensure the class is available without causing redundancy or errors.

Why Use require_once? This PHP statement is crucial in situations where the same file might be included multiple times during a request. It ensures that the file is included only once, preventing errors and behavior anomalies that occur from multiple inclusions, such as redeclaration errors.

Example of Loading an Additional Class

Consider that you have the Greeting class in a file named 'Greeting.php' within the 'welcome' module's 'controllers' directory. To use this class in your main controller or anywhere within the module, you would include it using the following PHP statement:

This example demonstrates how to load the 'Greeting' class and use it within the 'Welcome' controller. The require_once statement is placed at the top of the file, ensuring that the 'Greeting' class is available to the 'Welcome' controller methods.

Best Practices for Loading Additional Classes

  • Location of Include Statements: Place all include statements at the beginning of the file. This practice makes it easier to track which dependencies are used in the file and prevents issues related to undeclared classes.
  • Avoid Overloading: Only include classes that are necessary for the functionality of the current PHP file. Overloading a file with unnecessary includes can lead to performance issues and complicates debugging.
  • Consider Use of Additional Modules: For larger projects, consider creating additional modules or child modules for situations where multiple PHP classes need to be called from a module.

By following these guidelines, you can efficiently manage and utilize multiple classes within your Trongate module, ensuring that each class is loaded appropriately and is ready to fulfill its role within the application.

Controllers vs. Ordinary PHP Classes: Not every PHP class within a 'controllers' directory qualifies as a 'controller' in the traditional sense. Typically, a controller is directly involved in handling HTTP requests, responding to user actions, managing the flow between the model and the view, and encapsulating the business logic required for these interactions.

The example provided on this page introduces the loading of a basic PHP class, rather than an additional controller. This distinction is important, and it should be noted that the example provided has been intentionally simplified to facilitate understanding.


Understanding Namespaces

Namespaces in PHP are essential for encapsulating identifiers like classes, functions, and constants. They prevent name collisions and organize code more efficiently, particularly in applications where the same class names might be used in different parts of the project.

This example builds upon the 'Greeting' example from the previous page. It is advisable to familiarize oneself with before proceeding to ensure a full understanding of the content discussed here.

Example: Applying Namespaces to Avoid Conflicts

This section expands on the 'Greeting' example from the previous page by modifying the existing class to include a namespace and introducing another 'Greeting' class under a different namespace. This demonstrates how namespaces enhance modularity and prevent conflicts.

Step 1: Modifying the Existing Greeting Class

First, update the existing 'Greeting.php' file to include a namespace. This adjustment organizes the existing class within a specific context in the application, clarifying its role and grouping.

Update the 'Greeting.php' file as follows:

Here's a more robust and modern version of the code that uses doc blocks, access modifiers, type hinting and return types:

This update encapsulates the 'Greeting' class within the 'FriendlyGreeting' namespace, clearly signaling its positive, welcoming intent within the application.

Step 2: Creating an Alternative Greeting Class

Next, create a new class that provides an unfriendly greeting. This class will be placed in its own file and namespace to demonstrate a different aspect of functionality.

Create a new PHP file named Unfriendly.php within the 'controllers' sub-directory of the 'welcome' module. Add the following code:

This alternative greeting class uses the UnfriendlyGreeting namespace, offering a stark contrast to the friendly version. Placing it under a different namespace ensures that both functionalities can coexist without conflict, despite sharing the same class name.

Step 3: Using the Namespaced Classes

These classes can now be utilized in other parts of the application. The following example demonstrates their usage within a single controller:

By using the use statement with aliases, both classes are accessible under the same controller without any naming conflict, demonstrating the power of namespaces in PHP.

When using namespaces to organize PHP classes, the use statement imports a specific class from a namespace. This maintains clarity and avoids naming conflicts when similar class names are used in different parts of a project.

  • Specifying the Class Name: The \Greeting in use FriendlyGreeting\Greeting as FriendlyGreeting specifies that the Greeting class is being imported from the FriendlyGreeting namespace. The part after the backslash indicates the exact class within that namespace that is being referred to.
  • Alias Usage: By stating as FriendlyGreeting, the class Greeting from the FriendlyGreeting namespace is given a local alias FriendlyGreeting in the file where it's used. This alias helps to distinguish it from other classes named Greeting, such as UnfriendlyGreeting\Greeting, which can be aliased as UnfriendlyGreeting.
  • Practical Example: When instantiating new FriendlyGreeting() or new UnfriendlyGreeting(), PHP knows exactly which class to use because of these use statements, avoiding any confusion with other similarly named classes in different namespaces.

Conclusion

Namespaces are a powerful feature in PHP, essential for maintaining a well-organized codebase and preventing conflicts between similarly named classes across different parts of an application. By using namespaces, classes are neatly packaged and do not interfere with others, even if they share the same name.

Understanding Namespace Conventions in Trongate: Trongate's approach to namespaces aligns with broader PHP practices by adopting PascalCase or camelCase. This supports several key objectives:

  • Alignment with PHP and C: Trongate aims to produce a syntax that resonates with pure PHP and its underlying language, C. Given that C does not have namespaces, Trongate's flexible stance on namespace naming in PHP helps bridge traditional and modern programming paradigms.
  • Standard PHP Practices: In normal operational conditions, namespaces are primarily used when incorporating third-party code from a 'vendor' directory (often managed by Composer and acquired via Packagist). It is common practice in the broader PHP community to use PascalCase for namespaces. This practice enhances integration with the broader ecosystem of PHP packages, where such naming conventions are standard.
  • Practicality and Functionality: Adopting widely recognized naming conventions for namespaces not only aids in clarity and functionality within complex applications but also ensures compatibility and ease of integration with external libraries and frameworks.

Therefore, while Trongate generally recommends snake_case for internal consistency, the use of PascalCase or camelCase for namespaces is a practical exception. This approach underscores Trongate's commitment to flexibility and pragmatism, supporting developers in creating applications that are both robust and compliant with external PHP standards.


Using Packagist With Trongate

This guide outlines the process for integrating third-party PHP libraries into Trongate applications using Packagist, the primary repository for Composer packages. For demonstration purposes, the instructions below specifically focus on downloading and utilizing Guzzle, a third-party PHP library that facilitates the sending and receiving of HTTP requests and responses.

System Requirements

Ensure that the system meets the following requirements:

  • PHP: PHP 8 or newer is required to use the latest version of Trongate with Packagist.
  • Composer: Composer must be installed on the system for managing library dependencies. If Composer is not installed, visit getcomposer.org to download and install it.
  • Internet Connection: An active internet connection is necessary to download packages from Packagist.

Step 1: Setting Up the Project with Composer

  1. Initialize Composer: If a composer.json file is not already present in the project, create one by running the following command in the project directory: Follow the prompts to configure the project. This setup helps manage project dependencies.
  2. Install Guzzle: Add Guzzle to the project by running: This command instructs Composer to find Guzzle on Packagist and install it along with any necessary dependencies.
  3. Verify Installation: Ensure that the Guzzle library has been added to the project by checking that the composer.json file includes Guzzle and that the vendor directory has been created with Guzzle files in it.

Step 2: Using Guzzle in a Trongate Application

  1. Autoload Dependencies: To use Guzzle, include Composer's autoloader in the PHP script. Add the following line at the top of the PHP file: This inclusion ensures that all dependencies, including Guzzle, are loaded and available for use.
  2. Create an HTTP Client: Instantiate a new Guzzle client to make HTTP requests:
  3. Make an HTTP Request: Use the client to send a request and retrieve the response:

Complete Example

Below is an example of using Guzzle within a Trongate controller file to fetch data from GitHub's API:

In the example above, the APPPATH constant is used to specify the location of the autoload.php file. All Trongate controllers, view files, and templates have access to the APPPATH constant, which references the application's root directory. This provides a reliable method for specifying file paths.

The example also utilizes PHP's require_once function, ensuring that the file is included only once, safeguarding the application's stability.

Conclusion

Although Trongate has its own code-sharing platform, there may be instances where downloading third-party code via Packagist is desirable. Packagist offers a vast repository of PHP libraries and packages that can significantly accelerate development and bring advanced functionality to projects with minimal effort.

However, the use of Packagist is not without challenges. Relying on Packagist can lead to potential issues with stability, versioning, and dependencies. Moreover, developers considering using code from Packagist should be aware of potential security vulnerabilities associated with Packagist.

The Trongate framework enables developers to selectively use Packagist for specific modules, providing precise integration without compromising the overall performance of the application. This targeted approach ensures that enhancements can be made where necessary without affecting the efficiency of the entire system.


Views

Understanding View Files

View files in Trongate are designated for presentation code, primarily HTML. These files may also include other types of code, such as JavaScript and CSS. Typically, each module within a Trongate application contains a directory named 'views' to store these files.

The directory structure within a typical Trongate module.

The 'views' directory, positioned at the same hierarchical level as the 'Controllers' directory within a module, is optional and depends on the module's purpose. For example, a module designed for data processing tasks, such as handling API requests or performing background data synchronization, typically does not require a 'views' directory since it operates without user interface elements.

Functionality of View Files

Within the Trongate Framework, view files are PHP files that contain primarily presentation code, most notably HTML. These files are typically invoked from controller files and are recommended to avoid complex PHP logic, adhering to the MVC best practices. This separation ensures that business logic remains within controllers, thereby keeping view files clean and focused solely on the user interface, enhancing maintainability and clarity.

View files are loaded through controller methods using Trongate's built-in view() method. For example:

This command is typically placed within a method of a controller class. When executed, it instructs Trongate to render (in this instance) the welcome.php view file located in the module's 'views' directory, thereby displaying the HTML and any associated presentation content.

Note: Trongate leverages pure PHP for its views instead of adopting separate templating engines like Blade or Twig. This decision aligns with the original purpose of PHP, initially developed by Rasmus Lerdorf as a templating tool for dynamic content management. Today, while PHP has evolved into a comprehensive programming language, Trongate capitalizes on its templating capabilities to enhance performance and reduce the learning curve. This approach not only streamlines development by removing additional abstraction layers but also optimizes execution efficiency, maintaining a focus on robustness and developer productivity.


Basic View File Usage

This section introduces fundamental concepts of view file management, using a basic installation of Trongate as a starting point.

Upon installation, Trongate automatically loads the default 'welcome' module and its associated controller. Below is the initial structure of the 'Welcome' controller:

If the index() method is invoked, as specified by the default homepage routing configuration, it loads a template and passes a $data array containing a 'view_file' property.

Implementing a Custom Method

To illustrate basic view file usage, we add a custom method to the 'Welcome' controller. Here's a simplified implementation of the 'greeting' method:

Introduction to the "View" Method

To load view files, Trongate utilizes an internal method named view() .

In the provided example, the view() method is invoked with the argument 'greeting'. This triggers a search in the 'views' directory of the current module for a file named 'greeting.php'. If found, the content of this file is rendered and displayed in the browser.

The view() method of Trongate accepts the name of the view file as an argument. It is essential to exclude the file extension, such as '.php', from this argument.

With the addition of the greeting() method, the 'Welcome' controller will be extended as follows:

Note: The example method named 'greeting' omits elements such as type hinting, return types, visibility modifiers (public, private, protected), and doc blocks for brevity. These are essential for production code to ensure clarity, type safety, and proper documentation. For additional information, please refer to the Trongate framework's coding style guide.

Creating a Simple View File

After defining the method to load a view file, the next step is creating a new PHP file named 'greeting.php' within the 'views' directory of the 'welcome' module. This file will contain basic HTML content for demonstration purposes. For example:

Rendering the View File

To render the view file in the browser, navigate to BASE_URL/welcome/greeting. If the greeting() method and the corresponding 'greeting.php' view file are correctly implemented, the browser will display output similar to the following:

Screenshot demonstrating the rendering of a simple view file.

Conclusion

This example provides a foundational overview of using view files within the Trongate framework. By adding the greeting() method to the 'Welcome' controller, we demonstrate how Trongate's view() method loads HTML content from a view file. Remember to specify the view file name without the '.php' extension to ensure proper functionality.


Passing Data Into View Files

Passing data into view files in Trongate involves initializing an associative array within a controller and passing it to the view() method. This array contains variables that can be accessed directly within the view for dynamic content rendering.

Basic Data Passing

The technique for passing data from controller files into view files comprises of the creation of an associative array of key-value pairs. This data array is then passed as the second argument to the view() method:

This example initializes $data with user information and renders the 'welcome' view, where variables like $first_name and $last_name can be accessed directly.

Complex Data Types

You can pass various data types such as arrays, objects, and booleans into view files. For instance, consider passing an array of cities and today's date to a view:

Accessing Passed Data

Within view files, accessed data is available as standard variables. For debugging or development purposes, you can use:

To display structured data in a formatted manner, use Trongate's json() method:

Example: Rendering Dynamic Content

Enhance the greeting() method to pass a name variable into a view file:

In the 'greeting.php' view file, you can directly echo the $name variable:

Output:

Screenshot showing greeting message with a name
Screenshot showing greeting message with a name.

When rendering data from untrusted sources like user inputs, always sanitize outputs to prevent security vulnerabilities. Trongate provides the json() function for safe output encoding, protecting against XSS attacks by properly formatting content for HTML, XML, JSON, JavaScript, and HTML attributes.


Returning View Output as a Variable

To capture the rendered output of a view file as a string variable in Trongate, developers can utilize the third argument of the view() method. This approach is useful when the output needs to be manipulated or processed further before being sent to the output stream.

Example Usage

Consider a scenario where you want to capture the HTML output of a 'information.php' view file:

The code sample above demonstrates capturing the rendered output of a view file and returning the view file output as a PHP variable named, '$html'.

Step-by-Step Guide

  1. Step 1: Assign the result of the view() method to a variable:
  2. Step 2: Include the boolean value true as the third parameter to return the output as a string:
  3. Step 3: Complete the method by returning the newly created variable:

If no data array is available when calling the view, simply pass an empty array (as a second argument) followed by the boolean, true:

This technique effectively returns the view content as a string, facilitating flexible handling within the application.


Assets

The Role of a File Asset Manager

In web development, managing various types of files - such as JavaScript, CSS, and images - alongside PHP files can be challenging. Traditional PHP frameworks often adhere to the MVC design pattern, which does not provide a clear solution for handling non-PHP assets. This can lead to confusion and inefficiency when developing complex modules that require a variety of file types. The File Asset Manager in Trongate solves this issue. It does so by letting web developers store all necessary file assets - for any given module - within an assets sub-directory. This means that Trongate modules can be self-contained, highly-portable, and reusable.

Example

Consider a scenario where an invoicing system needs to be developed. In this case, a module might be created to handle the creation and management of invoices. Developing and testing such a module could take several days. Thus, having the 'invoicing' module function as a self-contained unit would be advantageous. This modular approach would allow for easy reuse of the 'invoicing' module in future projects by simply transferring the directory from one site to another. Trongate facilitates this modularity.

A potential challenge in this scenario would involve serving non-PHP files, such as specific JavaScript libraries, CSS files for styling invoices, or images. For example, the invoicing system might require a CSS file for invoice styling, a directory for storing company logos, or badges and logos for affiliated governing bodies. Traditional PHP frameworks do not provide an efficient way to manage these assets within the MVC design pattern.

Fortunately, Trongate resolves this issue. As a truly modular framework, Trongate allows modules to be entirely self-contained. This means that all necessary files for a feature, such as an invoicing system, can be included within a single module. This includes CSS, JavaScript, images, and other assets.

Truly Modular

Trongate's true modularity ensures that modules are self-contained. When building features like the aforementioned invoicing system, all required files can be housed within one module. This approach simplifies the process of managing and deploying features across different projects.

The code responsible for serving non-PHP assets within Trongate modules is known as the File Asset Manager.

This chapter provides detailed instructions on utilizing Trongate's File Asset Manager.


Basic Example - Part 1

To clearly illustrate the purpose and functionality of the File Asset Manager, it is beneficial to examine a practical example. This section will guide through a straightforward example using the 'welcome' module that's included with all Trongate framework installations. The objective is to store a JavaScript file within the 'welcome' module and display a simple webpage that executes the module's internal JavaScript file.

The Starting Point

A fresh installation of a Trongate web application includes a module named 'welcome', which contains a controller file named Welcome.php. The 'Welcome' controller file comprises a class with a single method, as illustrated below:

The precise code contained within the 'Welcome' controller file will differ from the example shown. For brevity, elements such as access modifiers (e.g., public/private/protected), type hinting, return types, and doc blocks have been omitted.

Adding a New Method

Next, a new method will be added to the controller file. This method, named 'hello', will load a simple view file displaying the message 'hello world'. The updated controller code is as follows:

A Simple View File

Proceed by creating a view file containing basic HTML. The code sample below demonstrates a simple HTML template with the message 'Hello World' encapsulated within <h1> tags.

Displaying Content

To verify, open a web browser and navigate to the application homepage, followed by welcome/hello. The 'Hello World' message should be displayed on the screen.

browser screenshot
Screenshot taken from the URL, <base-url>welcome/hello

Basic Example - Part 2

Create an Assets Directory

Within the 'welcome' module, alongside the existing 'controllers' and 'views' directories, create a new directory named 'assets'.

Inside the 'assets' directory, create a subdirectory named 'js'. This 'js' directory will serve as the repository for JavaScript files within the module.

Create a JavaScript File

Next, create a JavaScript file named 'ahoy.js' that contains a single line of code: an alert command.

Save the 'ahoy.js' file inside the 'js' directory located within 'assets'.

The contents of a basic Trongate web application
Directory structure screenshot

Calling the JavaScript File

To include the JavaScript file in the 'hello' view file, use standard 'script' tags with the 'src' attribute set to . For example:

View File with JavaScript Integration

Below is the complete code for the 'hello' view file, incorporating the 'script' tags just before the closing body tag:

Testing the JavaScript File

Save the file and refresh the page in the browser. If a JavaScript alert box appears, it confirms that the JavaScript file has loaded successfully.

browser screenshot
Screenshot taken from the URL, <base-url>welcome/hello

The integration of a JavaScript file into a module containing PHP files marks a significant milestone. This capability enhances productivity by enabling the development of sophisticated, self-contained modules without reliance on third-party libraries.

In this example, a JavaScript file was included within the module. However, the same approach can be applied to incorporate images, PDFs, CSS files, or other non-PHP resources.


The Module Assets Trigger

In the example from the previous page, a JavaScript file was successfully served from deep within our 'modules' directory. The target JavaScript file was loaded by setting a source ('src') value of:

welcome_module/js/ahoy.js

Under normal circumstances, such a short and concise file destination would produce file loading errors. However, the JavaScript file could be loaded without issue by invoking Trongate's Module Assets Trigger.

Understanding the Module Assets Trigger

The Module Assets Trigger serves as a specific string included in website URLs or file paths. When encountered, the File Asset Manager initiates a process to locate the requested asset within a module's assets directory. Assuming the file exists, the File Asset Manager handles the necessary file retrieval and response headers, facilitating modular development.

By default, the Trongate framework's Module Assets Trigger is defined as the string '_module'. Any path containing this trigger prompts Trongate to identify and fetch files from the respective module's assets directory.

If any part of a URL or file path contains the Module Assets Trigger, Trongate's File Asset Manager will be invoked and the framework will attempt to serve files from within the application's 'modules' directory. This can lead to confusion and unwanted 404 errors. Therefore, it's advisable to exercise caution when naming modules and files. In particular, steps should be taken to ensure that modules and files do not contain the Module Assets Trigger within their assigned names.

Configuration and Usage

The Module Assets Trigger is configured within the config.php file using the following line:

This configuration instructs Trongate to detect and interpret URLs or file paths containing '_module' to fetch assets from the corresponding module's assets directory. For example, to reference a file within the 'cars' module, the path should begin with:

This indicates that the asset is located within the 'assets' subdirectory of the 'cars' module.

Customization Options

If customization of the Module Assets Trigger is necessary to suit specific preferences or naming conventions, simply modify the value assigned to MODULE_ASSETS_TRIGGER in the config.php file.

When developing applications that interact with user input, consider implementing validation rules to prevent inadvertent triggering of the File Asset Manager. For instance, ensure that user-generated URLs or paths do not inadvertently contain the Module Assets Trigger phrase.


Additional Considerations

Trongate's File Asset Manager introduces important considerations regarding application architecture. For instance, imagine developing a picture uploader for a 'members' module where members can upload pictures to their profile pages.

For developers building such a feature, the decision of where to store members' pictures becomes crucial. Let's explore two common approaches:

  • Storing Pictures in the Public Directory: This approach involves placing member pictures directly within the 'public' directory of the application, typically in a subdirectory like 'images' or 'member_pics'.
  • Storing Pictures in the 'Assets' Directory of the 'Members' Module: Alternatively, developers may choose to store these images within the 'assets' directory of the 'members' module itself.

Here are the pros and cons of each approach:

Storing Pictures in the 'Public' Directory

Pros:

  • Easily accessible and straightforward to link directly from web pages.
  • Reduces the likelihood of 404 errors caused by file or path naming conflicts.
  • Facilitates module reusability by maintaining a compact 'members' module size.

Cons:

  • Compromises module encapsulation as assets are dispersed across separate directories.
  • Imposes additional responsibility on developers to manage directory naming and access permissions.
  • Elevates the risk of unintentional image pollution within the designated directory.

Storing Pictures in the 'Members' Module

Pros:

  • Enhances module encapsulation by centralizing related assets within the 'members' module.
  • Reduces the risk of non-related images coexisting within the image directory.
  • Provides granular control over access permissions and asset visibility.

Cons:

  • Requires additional configuration to serve module-specific images through web requests.
  • Increases the potential for 404 errors due to conflicting file or path names within the application.
  • Possibility of creating overly large modules that are challenging to reuse efficiently.

In Conclusion

Web development often involves making critical decisions about where to store assets like pictures, which are pivotal to an application's architecture and scalability. There is no one-size-fits-all solution, and these choices are integral to the iterative process of web development. Trongate provides developers with flexible tools, encouraging the creation of applications that meet specific needs without imposing rigid methodologies.

Developers are encouraged to embrace these decisions as opportunities to optimize their application's performance and maintainability. It is the responsibility of developers - and not the framework - to determine the most effective architecture structures for their specific needs.

If developers find themselves pondering questions like "Where should I store x?" or "How should I structure my app?" - rest assured, these are common considerations in web development. The decision-making process should be guided by factors such as the specific requirements of the application, potential reuse of the module across different applications, whether there are plans to list the module on the Trongate Module Market, and the anticipated file size implications of choosing option 'A' versus option 'B'.


Modules Calling Modules

The Value of Module-to-Module Calls

Trongate is a robust and flexible PHP framework designed to facilitate efficient and maintainable web application development. One of its key features is the ability to load modules from other modules. This capability provides several significant benefits, enhancing both the architecture and functionality of your applications.

Throughout this documentation, you will encounter the terms 'calling module(s)', 'loading module(s)', and 'invoking module(s)'. These terms are used interchangeably and essentially mean the same thing: utilizing the functionality of one module within another module. This process involves making a module's methods and properties available in the context of another module to achieve a specific functionality or result.

Benefits of Loading Modules from Other Modules

Code Reusability

Loading modules from other modules promotes code reusability. By encapsulating specific functionality within modules, developers can easily reuse that functionality across different parts of the application without duplicating code. This leads to more efficient development processes and a reduction in potential errors.

Separation of Concerns

Separation of concerns is a fundamental principle in software development. By keeping different functionalities in distinct modules, developers can ensure that each module handles a specific aspect of the application. This modular approach makes the codebase more organized, easier to understand, and simpler to maintain.

Improved Maintainability

Maintaining a large codebase can be challenging. By dividing the application into modules, each handling a specific function, changes or updates can be made more easily. If a particular functionality needs to be modified, developers can focus on the relevant module without affecting other parts of the application.

Enhanced Collaboration

In a collaborative development environment, different team members can work on different modules simultaneously. This modular structure facilitates parallel development, as changes in one module are less likely to interfere with the work being done on other modules. It also makes code reviews and testing more manageable.

Scalability

As your application grows, the ability to load modules from other modules helps in scaling the application efficiently. New functionalities can be added as separate modules without disrupting the existing architecture. This modular approach ensures that the application remains scalable and manageable over time.

Flexibility

Loading modules from other modules provides the flexibility to create complex and feature-rich applications. Developers can combine various modules to build sophisticated functionalities while keeping the codebase clean and maintainable. This flexibility allows for rapid development and easy integration of new features.

Enhanced Performance

Trongate's module loading system offers significant performance advantages over the PSR-4 autoloading standard used in many PHP frameworks. Unlike PSR-4, which involves a round trip to a 'vendor' directory and introduces additional overhead, Trongate provides a more direct loading mechanism. This streamlined approach eliminates unnecessary processing steps, resulting in faster module retrieval and notably improved application performance.

Conclusion

The ability to load modules from other modules is a powerful feature of the Trongate framework. It offers numerous benefits, including code reusability, separation of concerns, improved maintainability, enhanced collaboration, scalability, and flexibility. By leveraging this capability, developers can create robust, efficient, and maintainable web applications that are well-organized and easy to scale.

Loading Modules From Controllers

Within the Trongate framework, there are two primary methods for a module to load another module.

The first method involves loading a module from within a controller file, while the second involves loading a module from a view file. This section focuses on loading a module from a controller file.

To load a module from a controller, use the following syntax:

As illustrated, only two lines of code are required to load a method from a different module.

Below is an improved example demonstrating how to call a 'Tax' module to calculate the final price after tax has been applied. This method first loads the 'Tax' module and then invokes its method to add tax to the base price.

Here is a more complex example that involves loading and using three different modules: 'Tax', 'Shipping', and 'Discount'. This method calculates the final price by applying tax, adding shipping costs, and then applying any available discounts.

In the example above:

  • The 'Tax' module's add_tax method is used to add tax to the base price.
  • The 'Shipping' module's add_shipping method calculates and adds the shipping cost to the price with tax.
  • The 'Discount' module's apply_discount method applies any available discounts to the price with shipping.
In this example, the modules are loaded together at the beginning of the method. This approach enhances code readability and maintainability by clearly showing which modules are being used.

Loading Modules From Views

Within the Trongate framework, it is possible to load another module from within a view file. This capability provides additional flexibility and allows for dynamic content generation within views.

To load a module from a view file, use the following syntax:

Why Use This Approach?

There are various scenarios where loading a module from within a view file can be advantageous. For instance, consider the need to include a 'Stripe' payment button on a webpage. When users click the 'Buy Now' button, a pop-up might appear, prompting the user to enter payment details. The implementation of such a feature can be complex and is best handled by a dedicated 'stripe' module.

Having a separate 'stripe' module that manages everything related to Stripe payments, including rendering the pop-up payment modal, allows you to maintain clean and organized code. This module can be easily called from any view file with a single line of code, as shown below:

Passing Arguments

When calling modules from view files, arguments can be passed to the methods. This is done by separating the arguments with commas. Below is an example where a variable called $name is passed as an argument:

The examples above use short PHP echo tags. However, it's important to note that use normal (long) opening PHP tags would work also. For example, the code below is valid:

With regards to working with view files and HTML templates, Trongate favors pure PHP.


Loading Modules From Controllers

Within the Trongate framework, there are two primary methods for a module to load another module.

The first method involves loading a module from within a controller file, while the second involves loading a module from a view file. This section focuses on loading a module from a controller file.

To load a module from a controller, use the following syntax:

As illustrated, only two lines of code are required to load a method from a different module.

Below is an improved example demonstrating how to call a 'Tax' module to calculate the final price after tax has been applied. This method first loads the 'Tax' module and then invokes its method to add tax to the base price.

Here is a more complex example that involves loading and using three different modules: 'Tax', 'Shipping', and 'Discount'. This method calculates the final price by applying tax, adding shipping costs, and then applying any available discounts.

In the example above:

  • The 'Tax' module's add_tax method is used to add tax to the base price.
  • The 'Shipping' module's add_shipping method calculates and adds the shipping cost to the price with tax.
  • The 'Discount' module's apply_discount method applies any available discounts to the price with shipping.
In this example, the modules are loaded together at the beginning of the method. This approach enhances code readability and maintainability by clearly showing which modules are being used.

Loading Modules From Views

Within the Trongate framework, it is possible to load another module from within a view file. This capability provides additional flexibility and allows for dynamic content generation within views.

To load a module from a view file, use the following syntax:

Why Use This Approach?

There are various scenarios where loading a module from within a view file can be advantageous. For instance, consider the need to include a 'Stripe' payment button on a webpage. When users click the 'Buy Now' button, a pop-up might appear, prompting the user to enter payment details. The implementation of such a feature can be complex and is best handled by a dedicated 'stripe' module.

Having a separate 'stripe' module that manages everything related to Stripe payments, including rendering the pop-up payment modal, allows you to maintain clean and organized code. This module can be easily called from any view file with a single line of code, as shown below:

Passing Arguments

When calling modules from view files, arguments can be passed to the methods. This is done by separating the arguments with commas. Below is an example where a variable called $name is passed as an argument:


Parent And Child Modules

Understanding Parent and Child Modules

The Trongate framework introduces the concept of Parent and Child Modules, a powerful feature that allows for modular and hierarchical organization of application components. This architecture enables developers to create complex, nested module structures, enhancing code reusability and maintaining a clean, organized codebase.

Key Concepts

  • Parent Module: A module that contains one or more child modules.
  • Child Module: A module that is nested within a parent module.

This hierarchical structure allows for the creation of self-contained, feature-rich components that can be easily integrated into Trongate applications.

Structuring Parent and Child Modules

When working with parent and child modules in Trongate, it's essential to understand the proper directory structure and naming conventions.

Directory Structure

In this structure, the child module is a subdirectory within its parent module, maintaining its own structure.

Naming Conventions

When referencing child modules, use the format: parent_module-child_module. This convention is crucial for proper routing and module loading.

Accessing Child Modules

Trongate provides multiple ways to access and utilize child modules within your application.

URL Routing

To access a child module via URL, use the following format:

Example #1

The code sample below demonstrates how to access the 'display' method of an 'accessories' child module within a 'cars' parent module:


Creating Links

Example #2

The code sample below demonstrates how to use the Trongate anchor() function to create links to child module methods:


Loading Child Modules Programmatically

To load a child module within a controller or another module:

Example #3

This example demonstrates how to load and use a child module named 'product_reviews' within a parent module 'shop'. We'll load the child module and then call its 'get_latest_reviews' method:

In this example, we first load the 'product_reviews' child module using $this->module('shop-product_reviews'). After loading, we can access the child module's methods using $this->product_reviews->method_name(). Here, we're calling the get_latest_reviews() method to fetch the five most recent reviews for a specific product.


Accessing Child Modules

Trongate provides multiple ways to access and utilize child modules within your application.

URL Routing

To access a child module via URL, use the following format:

Example #1

The code sample below demonstrates how to access the 'display' method of an 'accessories' child module within a 'cars' parent module:


Creating Links

Example #2

The code sample below demonstrates how to use the Trongate anchor() function to create links to child module methods:


Loading Child Modules Programmatically

To load a child module within a controller or another module:

Example #3

This example demonstrates how to load and use a child module named 'product_reviews' within a parent module 'shop'. We'll load the child module and then call its 'get_latest_reviews' method:

In this example, the 'product_reviews' child module is loaded using:

Thereafter, the child module's methods can be accessed using syntax of the following form:

In the line of code above, method_name would be replaced with a meaningful and valid method name. The method name would reference a method within the product_reviews module.

The example shown above fetches reviews, passing in the $product_id as an argument:

For a more robust and modern coding style, consider using access modifiers, doc blocks, type hinting and return types. For example:

In the code sample above we have a type hinting value set to 'mixed'. This is because the display_product() method is attempting to read the $product_id from the third segment of the URL. The expectation is that the $product_id will be an integer. However, if it's not then certainly don't want the code to break! For this reason, we set the type to an integer with:

The following line of code would have achieved the same effect (making sure $product_id is an integer:


Database Operations

Introducing The Model Class

Trongate comes with a fully featured PHP class for assisting with database interaction. The class is named 'Model' and is stored in a file named Model.php, inside the engine directory.

The Model class contains the following methods:

For Data Retrieval:

For Data Manipulation:

For Data Analysis and Management:

For Custom Database Querying:

The following pages will provide information on how to perform database operations using Trongate's Model class.


Using Debug Mode

The Trongate Model class includes a 'Debug Mode' feature that allows developers to inspect the raw SQL queries generated by their application. By default, Debug Mode is disabled. To enable it, follow these steps:

  1. Open the Model.php file located in the application's engine directory.
  2. Navigate to the top of the file where a private variable named $debug can be found.
  3. Change the value of $debug from false to true.

For example:

With Debug Mode enabled, PDO will display the SQL queries that will be executed by the application.

Debug Mode Screenshot

Diagram of Trongate Modules Directory
A screenshot demonstrating a webpage with Debug Mode enabled.
Trongate utilizes PDO (PHP Data Objects), a flexible and secure PHP extension, for interacting with databases. PDO supports multiple database systems, providing a consistent interface to query databases regardless of the backend. It offers prepared statements to help prevent SQL injection attacks and facilitates efficient database access and management. Debug Mode in Trongate allows developers to preview SQL queries before execution, aiding in debugging and optimizing database interactions.

Testing Debug Mode

This section demonstrates a practical example of Debug Mode in the Trongate Model class. A test database table named students will be created, and its records will be retrieved using the Model class. The goal is to fetch some database records and then inspect the raw SQL query by having debug mode set to true.

Step 1: Create a Test Database Table

Before testing Debug Mode, a test table must be created in the database. The table, named students, will contain the following columns:

  • first_name (varchar)
  • last_name (varchar)
  • email_address (varchar)

The following SQL statement can be used to create the table and insert sample data:

Executing this SQL statement in the database will create the table and insert five test records.

Step 2: Fetching Data from the students Table

Once the students table is set up, a method can be created in the Controller to fetch all records using the Model class.

In object-oriented programming, a method is a function that belongs to a class.

The following method retrieves all records from the students table:

In a Trongate application, methods such as test() should be placed inside the main controller file of a module. The Trongate framework follows a modular architecture, where each module is a self-contained directory housing its own controllers, views and other assets.

To invoke the test() method via a URL, the request must adhere to Trongate's routing convention. This means the base URL should be followed by a first URL segment corresponding to the directory name of the module, and a second URL segment specifying the method to be executed.

For example, if the base URL of your application is https://example.com/ and the test() method resides in the controller of a module named welcome, the correct URL to invoke the method would be:

This URL structure ensures that Trongate correctly maps the request to the appropriate module and method, facilitating clean and organised application logic.

This test() method invokes get() - which is part of the Model class - to fetch all records from the students table, ordered by id. The method then invokes json() to output the fetched rows in JSON format.

Step 3: Enable Debug Mode

To inspect the raw SQL query being executed, Debug Mode must be enabled. This is done by modifying the Model.php file and setting $debug = true; as shown below:

Step 4: Running the Test with Debug Mode Enabled

Once Debug Mode is enabled, the test() method should be executed by visiting the corresponding URL in a web browser. With Debug Mode active, the raw SQL query will be displayed at the top of the page, followed by the JSON output of the retrieved records.

For example, the displayed SQL query may resemble the following:

The JSON-encoded result set will be displayed below:

The raw SQL query is now visible, providing insights into the underlying database operations.

Step 5: Additional Methods in the Model Class

Debug Mode helps verify that queries are executed as expected. In this example, the get() method from the Model class was used to fetch database records.

The Trongate Model class includes several additional methods for database interaction. These methods will be covered in the next section.


Fetching Data

The Trongate Model class provides several methods for fetching data from your database tables. These methods are designed to retrieve records efficiently based on various criteria.

Video Tutorial: Basic Data Fetching

The following video demonstrates how to fetch data using Trongate's in-built data fetching methods.

YouTube tutorial

Data Manipulation

The Trongate Model class provides the following methods for inserting, updating, and deleting database data:

Creating Database Records With The Insert Method

The insert() method inserts a row of data into a database table. With this method, rows of new data are represented by a PHP array. This method accepts the following parameters:

  • $data (required) - an array of key-value pairs representing the table row that is to be inserted.
  • $target_table (optional) - the name of the database table where the new row is to be inserted. By default, the Model will assume the target table is equal to the value in the first URL segment.

What Gets Returned?

If the method results in a new table row being inserted, the 'id' of the newly inserted record will be returned.

Example

The syntax below shows the simplest insert example possible. In this example, we create an array of data that represents a new table row. Then, we invoke the insert method to add a new row to a database table using the array we created.

The code above will produce the following SQL query:

INSERT INTO tablename (first_name, last_name, trongate_user_id) VALUES ('Eric', 'Clapton', 91)

In a working example, 'tablename' would be replaced with the first segment from the URL.

Updating Database Records With The Update Method

The update() method updates a record in a database table. This method takes the ID of the record to update, an associative array containing column names as keys and their corresponding values, and an optional parameter specifying the name of the database table to update. It constructs and executes an SQL query to perform the update, returning true if the update was successful and false otherwise. This method accepts the following parameters:

  • $update_id (required) - the ID of the record to update.
  • $data (required) - an associative array containing column names as keys and their corresponding values.
  • $target_table (optional) - the name of the database table to update. By default, the Model will assume the target table is equal to the value in the first URL segment.

What Gets Returned?

If the method successfully updates the record, it returns true. Otherwise, it returns false.

Example

The code sample below demonstrates how to use the update() method to update a record in the database.

Deleting Database Records With The Delete Method

The delete() method deletes a record from a database table based on its ID. This method takes the ID of the record to delete and an optional parameter specifying the name of the database table. It constructs and executes an SQL query to delete the record, returning true if the delete operation was successful and false otherwise. This method accepts the following parameters:

  • $id (required) - the ID of the record to delete.
  • $target_table (optional) - the name of the database table. By default, the Model will assume the target table is equal to the value in the first URL segment.

What Gets Returned?

If the method successfully deletes the record, it returns true. Otherwise, it returns false.

Example

The code sample below demonstrates how to use the delete() method to delete a record from the database.

Video Tutorial: Creating, Updating & Deleteing Records

The video below demonstrates how how to create, update and delete database records using Trongate's Model class.

YouTube tutorial

Data Analysis and Management

The Trongate PHP framework provides essential methods within its Model class for efficient data analysis and management tasks. These methods encompass functionalities such as counting records, verifying table existence, describing database tables, and more. Below is a comprehensive list of methods available for data analysis and management:

For detailed guidance on each method's purpose and usage instructions, simply click the 'info' icon located next to the respective method name.


Understanding The Resequence IDs Method

While most methods in Trongate's Model class operate predictably and align with standard database operations, the resequence_ids() method stands out as somewhat esoteric. Therefore, the video below has been created to assist developers in understanding the Resequence IDs Method, covering both its purpose and general usage.


Custom Database Queries

Custom database queries provide developers with the flexibility to execute SQL commands tailored to specific needs beyond the basic CRUD operations. This capability is essential for scenarios where predefined methods may not suffice, such as complex data retrievals, advanced analytics, or specialized data manipulations.


Executing Custom SQL Queries with The Query Method

The query() method allows developers to execute custom SQL queries directly. This method is versatile, accepting any valid SQL statement as its input. It returns the query results based on the specified return type, either as an array or an object.

Exercise caution when using the query() method to prevent SQL injection vulnerabilities. Always sanitize user input and validate SQL queries before execution to avoid potential security risks.


Executing Custom SQL Queries with Query Binding

The query_bind() method enhances security by utilizing parameter binding in SQL queries. Instead of directly embedding values into the SQL statement, it binds parameters separately, mitigating the risk of SQL injection attacks.

This method is particularly advisable when handling user input or dynamic data, where parameterized queries provide robust protection against malicious SQL injections.


Advanced Table Joins

Effective database management in modern web development often requires performing advanced table joins. These operations are essential for combining data from multiple database tables efficiently.

The Trongate Graphical Query Builder provides a powerful solution for simplifying the creation of complex table joins. This tool is an integral part of the Trongate framework ecosystem, offering robust functionality designed to streamline database querying processes.

The video below demonstrates how to create advanced database table joins using The Trongate Graphical Query Builder.

YouTube tutorial

Model Class Reference

Method Description
count() Counts the number of rows in a database table.
count_rows() Counts the number of rows based on a single condition.
count_where() Counts the number of rows based on custom conditions.
delete() Deletes a record from the database by its ID.
describe_table() Describes the structure of a database table.
exec() Executes a SQL statement (development use only).
get() Retrieves rows from a database table with optional ordering, limit, and offset.
get_all_tables() Retrieves all table names from the database.
get_max() Retrieves the maximum 'id' value from the specified table.
get_many_where() Fetches multiple records based on a column value.
get_one_where() Fetches a single record based on a column value.
get_where() Fetches a single record by its ID.
get_where_custom() Fetches rows based on custom conditions with optional ordering, limit, and offset.
get_where_in() Fetches records where the column's value is within a specified array of values.
insert() Inserts a new record into the database and returns the new ID.
insert_batch() Inserts multiple records into the specified table in a batch.
query() Executes a custom SQL query.
query_bind() Executes a custom SQL query with parameter binding.
resequence_ids() Resequences the IDs of a specified table.
table_exists() Checks if a table exists in the database.
update() Updates a record in the database by its ID.
update_where() Updates records based on a specific condition.

Modules Within Modules

Understanding Parent Modules and Child Modules

The video tutorial below shows you everything you need to know about parent modules and child modules.

YouTube tutorial

What Are Parent And Child Modules?

Previously, child modules required additional code in order to work. Specifically, they required a constructor and destructor. You may have even seen tutorials going over this. However, the additional code for child modules is no longer a requirement. Ordinary modules can work inside ordinary modules.

The Trongate framework gives developers the ability to have modules contained within modules. When a module contains one or more modules, the parent module is referred to as being a parent module. In Trongate, child modules (i.e., modules that are contained within parent modules) are called child modules.

There's no command line required and definitely no need for any Packagist, Composer or vendor/autoload!

Imagine being able to drop just one directory into your app and immediately having:

  • A complete invoicing system
  • A complete online shop
  • A complete discussion forum
  • Or, any other advanced feature that you care to imagine!

Trongate makes this possible.

All you have to do - to take advantage of parent modules and child modules - is add a module inside an existing module and also be aware of a few rules that will assist you in calling your child modules.


Accessing Child Modules Via The URL

The process of accessing parent modules - either via the URL or via other modules - is entirely unchanged. So, nothing new to learn there! Just access your parent modules the way you would normally access any normal Trongate modules.

Child Modules are a little different.

To access child modules via the URL, prefix the first segment of the URL with the name of the parent module followed by a hyphen. For example, let's assume that we want to access our accessories child module. More specifically, let's assume that we'd like to invoke the 'display()' method. We could invoke this by navigating to the URL:

http://localhost/app_name/cars-accessories/display

This would, of course, be assuming that 'accessories' is inside a parent module called 'cars'.

Creating Links

To create a text link that invokes the display() method, inside accessories, we could use the following code:

Again, notice how the first segment of the URL contains the parent module (in this case, 'cars') followed by a hyphen.


Loading View Files From Within Child Modules

There may be situations where you'd like to load a view file from within a child module - specifically, by calling (invoking) the view from within a child module's controller. As a reminder, Trongate offers two methodologies for loading of view files. They are:

  • To load a view file and have it display inside a template.
  • To load a view file on its own - without loading a template.
  • LOADING VIEWS WITHIN TEMPLATES

    Normal Trongate usage usually has view files displayed by defining a 'view_file' property, loading a template and passing the 'view_file'. property into the template request as part of a data array. To achieve this from within a child module, the following two steps are required:

    STEP 1: Declare a 'view_module' property, as part of a $data array, within your child module controller file. Make sure your view module contains the name of the parent (super) module then a forward slash followed by the name of the sub (child) module.

    STEP 2: Declare a 'view_file' property, as is normal, within your controller file.

    EXAMPLE #1

    Let's assume you have a super (parent) module called 'forums' and a sub (child) module called 'forum_threads'. Below is an example of syntax that could be used to load a view file from the 'forum_threads' controller.


    The code sample above would be a method contained within a 'forum_threads' controller file. The URL for invoking the method above would be the BASE_URL followed by forums-forum_threads/create.

    LOADING VIEWS WITHOUT LOADING TEMPLATES

    The example above show how to load a view file whilst loading a template. However, there may be instances where you'd like to load a view file without loading a template. Trongate's default blue page (with the headline "It Totally Works") is an example of scenario where a view file is being called without loading a template.

    To achieve this from a child module, the following three steps should be followed:

    STEP 1: At the top of your controller file (within your child module), declare a parent and child module inside a constructor method. The parent module should be the name of the module that contains your child module. The child module should be the name of the module from where you are calling your view file.

    STEP 2: At the bottom of your controller file (within your child module), use a destructor method to reset the parent and child modules.

    STEP 3: Load your view file, from within a method inside your child module, as normal.


    EXAMPLE #2

    Let's assume you have a super (parent) module called 'paypal' and a sub (child) module called 'shopping_basket'. We'll further assume that our goal is to invoke a method called '_draw_basket()'. The purpose of the _draw_basket() method is to display a view file. Below is an example of syntax that could be used to load a view file from the 'shopping_basket' controller.

    The parent::construct(); declaration - within the constructor - is required if you intend on making database queries from within your child module.


    Accessing Child Modules From Other Modules

    From Controllers

    To call (invoke) a child module from another Trongate module (that's any other kind of Trongate module!) we simply continue with our 'parent with a hyphen' policy when we are loading our child modules. Once the child module class has been successfully loaded, we no longer need to reference the parent module when invoking methods from the child module.

    Below is an example of our display() method - inside 'accessories' - being called from within our 'cars' module:

    From Views

    Child Modules may be called from view files by following our convention of referencing the parent followed by a hyphen, when calling our child modules. For example:


    Templates And Themes

    Introduction to Templates

    Trongate uses pure PHP for rendering web pages, providing a straightforward and flexible approach to templating. This section explains the role of templates, how they differ from views, and how they operate within the Trongate framework.

    What Are Templates?

    In Trongate, a template is a PHP file that defines the complete structure of an HTML web page. Templates ensure consistency across an application by incorporating common elements—such as headers, footers, and navigation menus—into every page.

    Templates vs. Views

    It is essential to understand the distinction between templates and views:

    • Templates: Define the full structure of a web page, including the <!DOCTYPE>, <html>, <head>, and <body> tags. They often include reusable components like headers, footers, and sidebars.
    • Views: Contain partial content that is injected into a template. A view typically represents a specific section of a page rather than the entire layout.

    Templates can load views, but views do not load templates. This separation ensures that templates maintain a consistent page structure while views handle dynamic content.

    Where Templates Are Stored

    Templates in Trongate are organized within a dedicated module named templates, located in the root directory of your application.

    Directory structure of the 'templates' module
    The 'templates' directory in a Trongate application

    The Templates Module

    The templates directory functions as a standard Trongate module, ensuring global accessibility while maintaining the framework's modular architecture. This module typically includes:

    • controllers/: Contains Templates.php, the controller responsible for loading templates.
    • views/: Stores the template files that define the structure of web pages.

    In this documentation, the terms template module and template directory refer to the same entity: the templates folder at the root of your Trongate application.

    Design Philosophy

    Trongate's approach to templates is guided by the following principles:

    • Stability: Trongate emphasizes long-term stability, allowing developers to build applications with confidence.
    • Performance: Templates are designed to minimize overhead, ensuring efficient page rendering.
    • Flexibility: Trongate provides developers with the freedom to implement custom designs or integrate third-party libraries as needed.

    Independence from Third-Party Dependencies

    Trongate does not impose dependencies on external CSS or JavaScript libraries. Unlike some frameworks that are tightly coupled with specific frontend tools (e.g., Bootstrap or Tailwind), Trongate allows developers to choose their preferred technologies. This approach avoids common issues such as dependency conflicts, security vulnerabilities, and design limitations.

    In Summary

    Trongate's templating system offers developers a flexible and robust foundation for building web applications. By combining pure PHP with a modular structure, Trongate enables the creation of consistent, reusable templates without imposing unnecessary restrictions. Whether you prefer to build from scratch or integrate third-party tools, Trongate provides the tools and flexibility to meet your needs.


    Loading Templates

    In Trongate, templates are loaded from within controllers using the template method. This technique ensures that pages can follow a defined layout while having dynamic content to be inserted as needed.

    Basic Syntax

    To load a template, use the template method within a controller:

    In this example:

    • The first parameter ('public') specifies which method should be invoked from the Templates class
    • The second parameter ($data) is an optional associative array containing variables to be passed into the template

    How Templates Work

    When you call $this->template(), Trongate looks for a corresponding method in the Templates class. Here's an example of how the Templates class is structured:

    The load() method is responsible for:

    • Loading the template file from the templates/views/ directory
    • Making the $data array variables available to the template
    • Handling the rendering of the template content

    Trongate includes an internal class named Template (singular), which will be discussed in more detail later in this chapter. However, this is an entirely different class and the two should not be confused.

    To be clear, Template and Templates are two separate and distinct PHP classes within the Trongate framework.

    • The Template class is an internal class, within Trongate's 'engine' directory. It is responsible for manages loading and displaying of content within HTML templates.
    • The Templates class is part of a 'templates' module that exists within the root directory. It contains the templates that are to be used within a given Trongate application.

    Template File Structure

    Template files are PHP files stored in the templates/views/ directory. Usually, most of the content within a template file will be HTML code. However, one of the strengths of PHP is that it can be seamlessly integrated with HTML. Therefore, it's normal for template files to also contain some PHP code, as well as HTML. Here's an example of a template file (named as 'public.php'):

    Key points about the template file:

    • The template provides the overall HTML structure for your pages
    • Template::display($data) is where your view content will be injected
    • Template files have access to framework constants like BASE_URL and helper functions like anchor()

    Dynamic Template Selection

    Trongate allows templates to be dynamically switched at runtime based on context. For example, different templates can be loaded depending on a user's authentication status or access level.

    Example: Loading a Template Based on User Level

    In this case:

    • Admins see the template defined in admin() method of the Templates class
    • Other authenticated users see the template defined in members_area() method
    • Non-authenticated users are redirected to the login page

    Templates provide the structural foundation of your pages, while views contain the specific content that gets injected into these templates.

    The relationshp between templates and views is explored in the next section.


    How Templates Work With Views

    When working with templates in Trongate, it's important to understand how they work with view files, and how data is passed between templates and views. This section explains the mechanisms that templates use to locate, load and inject content from view files.

    How Templates Locate View Files

    When you call the template() method, Trongate needs to determine which view file to load into the template. This process is governed by two key properties in your $data array:

    • view_module: Tells the template which module contains the view file
    • view_file: Specifies the name of the view file to load

    View File Resolution Process

    Let's examine how a template locates a view file through a practical example. Consider this URL:

    And the corresponding controller code:

    In this case:

    • When the template is loaded, it looks for the view file based on view_module
    • Since view_module is set to 'inventory', the template will look in that module's views directory
    • The view file will be loaded from: modules/inventory/views/product_details.php

    Default View Module Resolution

    If view_module is not specified in the $data array, the template will use the first URL segment to determine where to look for the view file. For example:

    In this case, since the URL begins with 'products', the template will look for the view file at:

    It's recommended to always specify view_module explicitly in your $data array, even when it matches the URL segment. This makes your code more maintainable and allows for easier implementation of custom routing rules in the future.

    Data Passing Between Templates and Views

    Templates in Trongate automatically make variables from the $data array available to both the template file and the loaded view file. This happens through an automatic extraction process.

    Example: Data Extraction

    The template system will make first_name available directly in both the template and view file:

    This automatic extraction removes the need for manually unpacking variables from the $data array, making your template and view files cleaner and more intuitive to work with.

    Even though $data arrays are automatically extracted, the original array remains available from within the view file or template. This is particularly useful for debugging purposes. For example, if you are working with a view file and you'd like a reminder of what variables have been passed into the view file, you could use Trongate's json() method, like so:

    The Template Display Method

    Within your template files, use the display() method to specify where the view content should be inserted.

    The display() method is a static method that exists within Trongate's internal Template class. Within a template file, this can be invoked with the following line of code:

    Below is an example of a template file that uses the display() method to inject view file content into the page.

    The Template::display() method:

    • Loads the appropriate view file based on view_module and view_file
    • Makes all $data variables available to the view
    • Injects the rendered view content into the template

    This approach to template and view integration allows for a clean separation between your page's structure (defined in templates) and its specific content (defined in views), while maintaining a simple and intuitive way to pass data to both.


    Template Partials

    Partials are reusable pieces of code that represent specific sections of a web page. They allow developers to break down complex templates into smaller, more manageable components. Common examples of partials include:

    • Headers
    • Footers
    • Navigation bars
    • Sidebars
    • Login forms

    By using partials, you can maintain a consistent design across your application while reducing code duplication.

    The use of partials in templates is entirely optional and not required.

    While Trongate does support partials, this feature has been included primarily to accommodate developers who are accustomed to their use in other frameworks. We understand that transitioning to alternative methodologies can sometimes be challenging, but rest assured, there are other approaches that can be equally effective and more suited to modern development practices.

    For those seeking alternatives to partials, Trongate offers the option to load entire modules directly from view files or templates.

    How to Use Partials

    In Trongate, partials are loaded using the partial() method. This method allows you to include a partial file from the templates/views/ directory. Here's a basic example:

    In this example, the footer.php file located in templates/views/ will be included in the template.

    Passing Data to Partials

    Partials can receive and display data passed from the calling module. You can pass data to a partial by including a $data array as the second argument:

    Inside the partial, all variables in the $data array are automatically extracted and can be accessed directly. For example, if $data['year'] = 2023, you can use $year inside the partial.


    Nested Partials

    Partials can include other partials, allowing you to create complex, nested structures. For example, a footer.php partial might itself include a social_links.php partial:

    This nesting capability makes partials a powerful tool for building modular and reusable templates.

    Example: Template Without Partials

    Here's an example of a template that does not use partials:

    Example: Template With Partials

    Here's the same template, but with the footer being loaded as a partial:

    Organizing Partials into Subdirectories

    If you prefer to organize your partials into subdirectories (e.g., templates/views/partials/), you can do so by specifying the full path when calling Template::partial(). For example:

    This would look for templates/views/partials/footer.php.

    In Summary

    Partials are a powerful feature in Trongate that allow you to break down your templates into reusable components. Whether you're building a simple website or a complex web application, partials can help you maintain a clean and organized codebase. By using Template::partial(), you can easily include global or module-specific partials, pass data to them, and even nest partials within each other.


    Additional Includes

    HTML templates often need to load different JavaScript or CSS files depending on the specific page being rendered. Trongate provides a flexible system for handling these additional includes through the _build_additional_includes() method in the Templates class.

    Understanding Additional Includes

    Additional includes allow you to dynamically add CSS and JavaScript files to your templates. These includes can be placed either in the header (top) or footer (bottom) of your HTML document.

    Basic Structure

    The Templates class processes additional includes using two key variables:

    • $additional_includes_top: For files that need to be included in the document head
    • $additional_includes_btm: For files that need to be included at the bottom of the body

    Implementation in Templates

    Here's how to implement additional includes in your template method:

    Template Usage

    In your template file (e.g., admin.php), you can place the includes variables where you want the files to be loaded:

    Adding Files from Controllers

    To add additional files from your controllers, pass them in the $data array:

    How It Works

    The _build_additional_includes() method processes the files based on their extension:

    • For .js files: Generates <script src="..."></script> tags
    • For .css files: Generates <link rel="stylesheet" href="..."> tags
    • For other file types: Includes the file path as-is

    The method also maintains proper HTML formatting by:

    • Adding appropriate indentation
    • Handling newlines for clean source code
    • Ensuring proper closing of HTML tags

    When working with additional includes, consider the following best practices:

    1. Group Your Includes Logically

    Organize your includes based on their purpose and loading requirements:

    2. Use Conditional Loading

    Load files only when they're needed for specific functionality:

    Remember to verify that all file paths are correct relative to your application's base URL. Incorrect paths may result in resources failing to load properly.


    Creating Custom Templates

    Trongate allows you to create custom HTML templates to define the structure and layout of your web pages. This guide will walk you through the process of creating your own template.

    Template Location

    Templates in Trongate are stored within the 'templates' module, which is located in your application's root directory. This module follows the standard Trongate module structure, containing both 'controllers' and 'views' directories.

    Creating a Custom Template

    Step 1: Define Your Template Name

    Choose a meaningful name for your template that reflects its purpose. Template names should be in snake_case format and clearly indicate the template's intended use. Some examples of good template names include:

    • public_template
    • admin_dashboard
    • member_portal
    • auth_pages
    • sales_backend

    Step 2: Create the Template Method

    Open the Templates.php controller file in your templates/controllers directory and add a new method for your template:

    Step 3: Create the Template View

    Create a new PHP file in your templates/views directory with the same name as your template method. For example, if your method is named 'custom_template', create custom_template.php:

    Key Template Components

    Your template should include several important elements:

    • The base tag with BASE_URL for proper path resolution
    • Core stylesheet includes for your application
    • The Template::display($data) call where page content will be injected
    • Placeholders for additional includes ($additional_includes_top and $additional_includes_btm)

    When creating a new template, ensure it's properly integrated with Trongate's core features by including the base href tag and Template::display() method. This ensures your template works seamlessly with the framework's routing and view management systems.

    Using Your Template

    To use your new template from any controller, specify it when calling the template method:

    Always ensure your template name is unique within the Templates class to avoid conflicts with existing templates like 'admin' or 'public'.


    Introducing Themes

    While templates provide a way to structure individual pages, Trongate's theming system offers a more comprehensive approach to managing your application's appearance. Themes allow you to package templates together with assets such as; stylesheets, fonts, images and JavaScript files to create cohesive design packages.

    Beyond Templates

    A template is essentially an HTML file with embedded PHP code that defines a page's structure. However, modern web applications often require more sophisticated styling solutions that go beyond simple HTML templates. You might need:

    • Multiple coordinated color schemes
    • Custom typography and fonts
    • Comprehensive icon sets
    • Standardized UI components
    • JavaScript enhancements
    • Theme-specific assets and images

    This is where Trongate's theming system comes into play, providing a structured way to manage all these design elements.

    Theme Architecture

    In Trongate, a theme is more than just a collection of templates - it's a complete design package. Themes are defined in the themes.php configuration file and are structured to provide flexible, reusable design systems.

    The Default Admin Theme

    Trongate ships with a built-in 'admin' theme, which serves as an excellent example of the theming system's capabilities. This theme is implemented through the admin() method in the Templates class:

    While this method appears similar to standard template loading, it actually triggers Trongate's theme loading mechanism, pulling resources from the themes directory rather than the standard templates directory.

    Theme Configuration

    Themes are defined in config/themes.php. Here's how the admin theme is configured:

    The configuration specifies:

    Color Scheme Management

    The admin theme demonstrates one of Trongate's powerful theming features: easy color scheme switching. By modifying the dir path from default_admin/blue to default_admin/red, you can instantly switch the entire admin interface to a different color scheme.

    Color schemes in Trongate themes are complete packages that include coordinated colors for all UI elements, ensuring consistency across your application.

    Theme Structure

    A typical Trongate theme directory contains:

    • Template files (.php)
    • Stylesheets (.css)
    • JavaScript files (.js)
    • Theme-specific assets (images, fonts, icons)
    • Color scheme variations

    This structured approach allows themes to provide comprehensive design solutions while maintaining clean separation between different visual aspects of your application.

    The next section will explore theme loading mechanics and how to create custom themes for your Trongate applications.


    Theme Implementation

    This section covers the practical aspects of working with themes in Trongate, including theme structure, asset management, and theme creation.

    Theme Location and Structure

    Themes in Trongate are stored in the public/themes/ directory. Within this directory, you have complete flexibility to structure your themes as needed for your application.

    Example: Admin Theme Structure

    The default admin theme demonstrates one possible way to organize theme variations:

    Alternative structures are possible. For example, a theme with shared assets might use:

    Managing Theme Assets

    Trongate provides the THEME_DIR constant for referencing theme-specific assets. This constant becomes available when a theme is loaded.

    Example: Loading Theme-Specific and Shared Assets

    This approach allows you to:

    • Share common assets across theme variations
    • Override specific styles for each variation
    • Maintain a clean separation between shared and variation-specific assets

    Registering Themes

    Themes are registered in the config/themes.php file. Each theme requires two key properties:

    • dir: The theme's directory path relative to public/themes/
    • template: The primary template file for the theme

    Example: Theme Registration

    Theme keys (e.g., 'admin', 'desktop_app_mx') should be unique and descriptive, as they'll be used to reference the theme in your application code.

    Theme Loading Process

    When a theme is loaded via the template() method, Trongate:

    1. Checks if the requested template exists in THEMES
    2. If found, constructs the theme path using the theme's directory and template file
    3. Defines THEME_DIR for asset referencing
    4. Loads the template file with any provided data
    • Asset Organization: Consider separating shared and variation-specific assets
    • Theme Variations: Use consistent directory structures across variations
    • Asset References: Always use THEME_DIR for theme-specific assets
    • Theme Registration: Use clear, descriptive keys in themes.php
    • Directory Structure: Choose a structure that makes sense for your specific needs - there's no mandatory layout

    The Benefits of Using Themes

    While templates serve their purpose for basic page layouts, themes offer several significant advantages that make them invaluable for modern web applications:

    • Portability: Entire design packages can be contained within a single folder, making them easy to transfer between projects or share with the community
    • Complete Design Systems: Themes can include everything needed for a consistent look and feel:
      • Templates
      • Stylesheets
      • JavaScript files
      • Images and icons
      • Fonts
      • Color schemes
    • Easy Switching: Change the entire appearance of your application by modifying a single line in your theme configuration
    • Version Control: Keep entire design packages under version control as a single unit, making it easier to track design changes
    • Resource Management: The THEME_DIR constant provides a reliable way to reference theme-specific assets, eliminating path management headaches
    • Multiple Variations: Support different color schemes or design variations without duplicating your entire codebase
    • Clean Separation: Keep design assets separate from your application logic, improving maintainability
    • Rapid Deployment: Quick implementation of new designs by switching themes, perfect for A/B testing or seasonal changes

    These benefits make themes particularly valuable for applications that require flexible styling, multiple design variations, or the ability to quickly change their appearance.


    Creating Custom Themes

    Trongate's theming system allows you to create comprehensive design packages that include templates, stylesheets, JavaScript files, and other assets. This guide will walk you through the process of creating your own custom theme.

    Theme Location

    Themes in Trongate are stored in the public/themes directory of your application. Each theme gets its own subdirectory where all its resources are contained.

    Creating a Custom Theme

    Step 1: Plan Your Theme Structure

    Before creating your theme, plan its structure and organization. Consider what elements your theme needs:

    • Template files (.php)
    • Stylesheets (.css)
    • JavaScript files (.js)
    • Images and icons
    • Other assets (if needed)

    Step 2: Create the Theme Directory

    Create a new directory in public/themes for your theme. Choose a descriptive name that reflects its purpose. For example:

    Step 3: Create the Template File

    Create your main template file (e.g., dashboard.php) in your theme directory:

    Step 4: Register Your Theme

    Open config/themes.php and add your theme configuration:

    Key Theme Components

    Your theme should include:

    • A well-organized directory structure for assets
    • The base tag with BASE_URL for proper path resolution
    • Proper use of THEME_DIR for asset references
    • The Template::display($data) call for content injection
    • Support for additional includes ($additional_includes_top and $additional_includes_btm)

    When creating shared assets, consider placing them in a common directory at the theme root level. This allows multiple variations of your theme to access the same base resources while maintaining their unique styles.

    Using Your Theme

    To use your new theme from any controller, specify it when calling the template method:

    Creating Theme Variations

    To create variations of your theme (e.g., different color schemes):

    1. Create a new directory within your theme folder for each variation
    2. Include variation-specific assets (CSS, images, etc.)
    3. Register each variation in themes.php
    4. Keep shared assets in a common location

    Always use unique, descriptive names for your themes to avoid conflicts with existing themes in the application or third-party theme packages.

    By properly structuring your theme and its variations, you create a maintainable and portable design package that can be easily shared across projects or with the community.


    Helpers Explained

    An Introduction To Helpers

    The Trongate framework comes with a variety of useful classes, functions and methods that can help you to carry out common tasks quickly and easily. From here onwards, we'll use the word 'helper' to refer to any one of these three types of entities.

    Many PHP frameworks force developers to actively declare which helpers should be loaded, by use of a 'config' file. Trongate is different. Trongate comes with everything loaded and ready to go. So, it's one more thing that you don't have to worry about!

    By default, Trongate comes with everything loaded. That means, connecting to a database, initialising sessions and loading up an assortment of helper classes. However, even with everything loaded, Trongate is still five times faster than Lumen. That's Lumen - the micro-framework.

    All the Trongate helpers are available upon every page load. There now follows details about the various helpers that are available for users of the Trongate framework.


    The URL Helper

    The URL Helper is a class, stored inside the 'engine' directory, that helps you to perform tasks related to page URLs. The following features are available inside the URL helper:

    [url-helper-grid]


    The Form Helper

    The Form Helper is a class that has been created to assist with rapid creation of online forms. The following features are available from the Form Helper:

    [form-helper-grid]


    The Form Validation Helper

    Trongate's validation helper uses server side validation to assist developers in validating submitted form values.

    All form validation procedures these following three steps:

    • Submitted form values are passed through some validation test.
    • The results from the validation tests are assigned a boolean value of true (if the submitted form passes validation tests) or false (if there was at least one form validation error).
    • The user is then presented with either a 'success' message or some validation errors, based on the results of the validation tests.
    A complete walk-through of how form validation works is available in the 'Form Handling' chapter of these docs.

    How To Set Form Validation Rules

    Form validation rules can be set by calling upon the validation helper and then invoking Trongate's inbuilt 'set_rules' method. This should be used on a line-by-line basis, whereby each form field that requires validation is processed via a line of code which takes the form:

    How To Pipe Multiple Rules Together

    Trongate lets you apply multiple validation rules to a submitted value by joining rules together by use of the pipe symbol. For example:

    Running Form Validation Tests

    The form validation tests that you have created can be applied by calling the validation helper's run() method. Calling run() will produce true if the values passed validation tests and false if there was at least one form validation error.

    Displaying Validation Errors

    If there are validation errors, they can be displayed by calling Trongate's in-built validation_errors() method from within a view file. For example:

    Formatting Validation Errors

    By default, each validation error is displayed as a paragraph with red text. However, you can modify the appearance of validation errors by adding opening and closing tags inside your validation_errors() declaration. For example:

    Validation Rules Reference

    form-validation-table


    The Flashdata Helper

    Trongate supports 'flashdata'. Flashdata is session data that will only be available for the next request, before being automatically removed. This can be useful for one-time informational messages (for example: 'The record was successfully created').

    To Set Flashdata

    Flashdata can be set using the set_flashdata() function, like so:

    This is assuming that you have a message which, in this instance, has been assigned to a $msg variable. For example.

    Of course, you can save a line of code by passing your message directly into your flashdata declaration. For example:

    Displaying Flashdata

    Flashdata can be displayed by calling flashdata() from within a view file.

    By default, flashdata messages will be displayed as green text within a paragraph. However, you can change the format of your flashdata by adding optional opening and closing tags as arguments. For example:

    Below is an example of a view file that contains the flashdata() method.

    screenshot
    Screenshot form a text editor, demonstrating flashdata being added below page headline.

    The File Validation Helper

    Trongate is loaded with a variety of features that can assist with the uploading of files such as images. Before exploring Trongate's file validation helper, let's have a reminder of how to draw a file uploader form using Trongate:

    The code above could be used to produce a form that looks like this:

    screenshot
    Screenshot showing example of file uploader form.
    The example shown in the screenshot contains some CSS and a little additional HTML to improve the appearance of the uploader form.

    Understanding The Uploader Form

    The uploader form, above, starts by invoking the form_open_upload() method.

    As can see, an argument has been passed into the method. The argument represents the destination for the uploader form. The destination is the URL where the user is sent to when the form is submitted. The opening line produces the following HTML code:

    The assumption being made with this example is that an $update_id variable has been passed into the view file. We're also assuming that the BASE_URL value is set to:

    .

    Next, we invoked Trongate's validation_errors() method.

    The validation_errors() method displays form validation errors, if there are any.

    After displaying some text-based instructions, the next important part of our form is:

    The form_file_select method displays a form file uploader field. As you can see, the argument 'picture' has been passed into the method. The 'picture' argument represents the name of the file uploader form field. The HTML code that gets generated from the form_file_select() method is shown below:

    The form_file_select method can accept the following three arguments:
    • name
    • attributes

    What these two attributes represent and how they behave is identical to how ordinary form_input() methods work. See the Form Helpers API Reference for details.

    The 'submit' button has been assigned with a name of 'submit' but the word 'Upload' appears inside the button.

    The uploader form is closed by invoking form_close() .


    The Pagination Helper

    The Trongate framework includes a built-in Pagination class for generating numbered navigation links when displaying multiple pages of content. Below is an example of the pagination output generated by Trongate:

    screenshot
    Pagination screenshot.

    How It Works

    Trongate's pagination helper is available for immediate use and can be implemented in three steps:

    1. Define Pagination Data - Create an array in the controller.
    2. Pass Data to View - Send the pagination data to a view file.
    3. Invoke Pagination - Call the pagination helper from the view file.

    Defining Pagination Data

    The following example demonstrates how to configure pagination data:

    The pagination helper does not interact directly with the database. Instead, it uses predefined data from a results set.

    Required Properties

    The following properties must be included in the $pagination_data array. If any are missing or have an incorrect type, the script will terminate with an error message (e.g., "Pagination Error: Missing required property: total_rows (expected type: int)").

    • total_rows: The total number of records available. Type: int
    • limit: The maximum number of records per page. Type: int
    • record_name_plural: Specifies the plural label for the records. Type: string

    Optional Properties

    These properties are optional and have default values if not specified. They allow customization of the pagination behavior and appearance.

    • page_num_segment: The URL segment number indicating the current page. If not specified (default: null), the last URL segment is used if numeric; otherwise, it defaults to page 1. Type: int
    • pagination_root: The base URL for pagination links. If not specified (default: null), it is derived from the current URL, removing the last segment if numeric, and ensuring a trailing slash. Type: string
    • include_showing_statement: Determines whether a "Showing x to y of z" statement is displayed above the pagination links. Default: false. Type: bool
    • include_css: Determines whether default CSS styles are included in the output as a <style> block. Default: false. If omitted or false, you must style the pagination links yourself. Type: bool
    • num_links_per_page: The maximum number of numbered pagination links to display. Default: 10. Links are centered around the current page. Type: int
    • settings: An array to customize the HTML structure, labels, and ARIA attributes of pagination links. Default: an empty array ([]), which uses predefined defaults (see "Customizing Pagination with settings"). Type: array

    Customizing Pagination with settings

    The settings property allows you to override the default appearance and behavior of pagination links. If not provided, the class uses a predefined $default_settings array. You can specify custom values for any of the following keys:

    • pagination_open: Opening tag for the pagination container. Default: <div class="pagination">
    • pagination_close: Closing tag for the pagination container. Default: </div>
    • cur_link_open: Opening tag for the current page link. Default: <a class="active">
    • cur_link_close: Closing tag for the current page link. Default: </a>
    • num_link_open: Opening tag for numbered links. Default: '' (empty string)
    • num_link_close: Closing tag for numbered links. Default: '' (empty string)
    • first_link: Text for the "First" button. Default: First
    • first_link_open: Opening tag for the "First" button. Default: ''
    • first_link_close: Closing tag for the "First" button. Default: ''
    • first_link_aria_label: ARIA label for the "First" button. Default: First page
    • last_link: Text for the "Last" button. Default: Last
    • last_link_open: Opening tag for the "Last" button. Default: ''
    • last_link_close: Closing tag for the "Last" button. Default: ''
    • last_link_aria_label: ARIA label for the "Last" button. Default: Last page
    • prev_link: Text for the "Previous" button. Default: «
    • prev_link_open: Opening tag for the "Previous" button. Default: ''
    • prev_link_close: Closing tag for the "Previous" button. Default: ''
    • prev_link_aria_label: ARIA label for the "Previous" button. Default: Previous page
    • next_link: Text for the "Next" button. Default: »
    • next_link_open: Opening tag for the "Next" button. Default: ''
    • next_link_close: Closing tag for the "Next" button. Default: ''
    • next_link_aria_label: ARIA label for the "Next" button. Default: Next page

    Example:

    If any required keys are missing from your custom settings array, the script will terminate with an error (e.g., "Pagination Error: Missing required settings property: pagination_open").

    Default CSS with include_css

    When include_css is set to true, the following CSS is injected into the HTML output as a <style> block:

    This provides a clean, responsive design with hover effects, an active state, and larger touch targets on mobile devices. If you prefer custom styles, set include_css to false and define your own CSS.

    Derived Properties

    The Pagination class calculates the following properties automatically and adds them to $pagination_data. These are not set manually but are available for reference:

    • root: The full base URL for pagination links (e.g., http://example.com/books/manage/).
    • current_page: The current page number (e.g., 2).
    • start: The first page number in the link range (e.g., 1).
    • end: The last page number in the link range (e.g., 10).
    • num_links_to_side: Half of num_links_per_page for link distribution (e.g., 5).
    • num_pages: Total number of pages (e.g., ceil(total_rows / limit)).
    • prev: Previous page number or empty string if on page 1.
    • next: Next page number or last page number if on the last page.
    • showing_statement: Text like "Showing 11 to 20 of 100 books." if include_showing_statement is true.

    Passing Pagination Data to a View File

    The example below demonstrates how to declare and pass pagination data in a controller:

    Invoking Pagination from a View File

    Once the pagination data has been passed into a view file, pagination elements can be rendered by invoking the display() method:

    Mobile-Friendly Pagination

    When viewed on smaller screens, pagination components can extend beyond the screen width, leading to usability issues. The default CSS (with include_css set to true) includes a media query for screens under 550px, increasing padding for touch targets. For further customization, consider these approaches:

    • Using CSS media queries to hide or modify pagination elements on smaller screens.
    • Implementing a simplified mobile format (e.g., "Previous" and "Next" buttons only).
    • Using JavaScript to dynamically adjust pagination based on screen width.

    Below is an example JavaScript solution for mobile pagination:

    The JavaScript code shown above is structured around three main functions:

    1. managePagination(): The central function that coordinates everything
      • Sets opacity to 0 during manipulation
      • Checks viewport width and applies the appropriate view
      • Reveals the pagination after changes are complete
    2. applyMobileView(): Handles the mobile view (screens < 840px)
      • Adds the "pagination-mobile" class for styling hooks
      • Shows only essential elements: active page, previous («), and next (»)
      • Hides all other pagination links
    3. applyDesktopView(): Handles the desktop view (screens ≥ 840px)
      • Removes the "pagination-mobile" class
      • Shows all pagination links

    The code also includes debounced resize handling to prevent performance issues during browser resizing.

    This approach gives us the best of both worlds - a fully featured pagination on desktop and a simplified, touch-friendly version on mobile, all while maintaining the core functionality of the Trongate framework.

    For the above JavaScript to work, wrap each pagination element in a <div class="pagination-container"> with initial opacity: 0:

    The .pagination-mobile class is added on mobile devices, allowing custom styling:

    Final Thoughts

    Trongate's Pagination class provides a flexible way to add pagination to webpages. Recent enhancements include automatic URL segment detection, customizable settings, and ARIA attributes for accessibility. Whether using the default styles with include_css or tailoring the output with custom settings, the class offers a robust solution for developers.


    Other Helpful Features

    Trongate includes several useful features that are not part of any specific helper file or class but play an integral role in streamlining web development. These features can be accessed from within any module controller or view file.

    The Anchor Function

    The anchor() function generates a clickable text link pointing to a URL relative to BASE_URL.

    For instance, if the website example.com has a homepage located at:

    A contact page at https://example.com/contact can be linked using:

    This function accepts up to three parameters:

    • $target_url ~ The destination URL.
    • $text ~ The displayed link text.
    • $attributes (optional) ~ An array of key-value pairs added to the opening 'a' tag.

    This function supports both internal and external links by providing a full URL as an argument.

    Security Note: The anchor() function does not escape the link text. For user-generated or database content, consider combining with the out() function to prevent XSS attacks:

    When using HTML in links (such as Font Awesome icons), make sure the content is from a trusted source:

    For user-generated content, use in combination with the out() function. For example:

    The IP Address Function

    The ip_address() function returns the IP address of the current visitor. Syntax:

    Example usage in a view file:

    Generating Random Strings

    The make_rand_str() function generates random strings. Example:

    The first argument specifies the string length. Passing true as a second argument ensures uppercase output:

    Characters prone to misinterpretation (e.g., '0', '1', 'l') are excluded for clarity, particularly in scenarios where users read codes aloud.

    APPPATH

    The APPPATH constant returns the absolute file path of the application directory. Example:

    Within a view file, the APPPATH can be rendered using PHP short tags, like so:

    The BASE_URL constant is also available, returning the main website URL as defined in config.php:

    The JSON Function

    The json() function provides a visual representation of data within controllers or views. Syntax:

    The optional second argument, when set to true, terminates script execution after displaying the data.

    Example usage in a view file:

    Sample output:

    screenshot
    Screenshot showing sample output after having invoked the json() function.

    The Out Function

    The out() function escapes and formats strings for safe output in different contexts. Parameters:

    • $input ~ The string to escape.
    • $encoding (optional) ~ Character encoding (default: 'UTF-8').
    • $output_format (optional) ~ Output format: 'html' (default), 'xml', 'json', 'javascript', or 'attribute'.

    Example 1: Safe Output from JSON Data

    Example 2: Securing Database Output

    More details pertaining to the out() function are available from here.


    Form Handling

    Creating Forms

    Trongate contains a wide assortment of in-built form helpers to assist with form building. Form helpers are a set of PHP functions designed to simplify the process of creating and managing HTML forms within your application.

    With Trongate, all form helpers are available immediately and with no requirement to load anything. There is also no need to update any configuration files if you want to use Trongate's form helpers. In short, they just work "out of the box".

    A comprehensive list of Trongate's form helper functions is available from the Trongate API Guide.

    Opening A Form

    The creation of an HTML form that posts data to an endpoint (URL) requires a form opening tag. A form opening tag typically contains:

    1. A method property
    2. A form location

    In normal (vanilla) HTML, this could be written like so:

    The above form opening tag has an action property with a value of 'tasks/submit'. This means that the form is going to submit an HTTP request to the URL tasks/submit.

    The form opening tag (above) also has a method property with an assigned value of 'post'. This means that submission of the form will result in an HTTP POST request being made.

    Trongate's Form Open Function

    With Trongate's form_open() function, an opening form tag can easily be rendered from within a view file. For example:

    Having this code inside a view file will result in the following HTML being rendered:

    When using Trongate's form_open() function, it's a good practice to declare the form location from within a controller file and to then have the form location passed into the corresponding view file. For example:

    When Trongate's view() method is invoked, the second argument (i.e., the $data array) is automatically extracted, making the following syntax possible:

    Don't forget to use opening and closing PHP tags when adding PHP to a view file! For example:


    Rendering Form Elements

    Having produced a form opening tag, your next goal should be to render form elements such as form input fields. A full breakdown of all available form elements can be viewed here. In the meantime, and for brevity, here are some commonly used form helpers that can be used to generate form elements.

    Input Fields

    The form_input() helper function can be used to create an HTML form input element, for text input. For example:

    In the code sample above, the first parameter represents the 'name' attribute, and the second is the default value. This means that the above code snippet would render a form input field that has been pre-populated with the username, 'John'.

    The PHP code above would render the following HTML:

    Form helpers automatically handle proper escaping. Therefore, do not combine form helpers with the out() function or manual escaping functions.

    Textareas

    The form_textarea() function mirrors form_input() in every way except that it creates a "textarea" element.

    In the code sample above, the first parameter represents the 'name' attribute, and the second is the default value for the textarea. In the code snippet above, the default value has been set to an empty string. This would produce an empty textarea element, like so:

    Dropdowns

    The form_dropdown() helper function generates an HTML select (dropdown) element with multiple options. For example:

    In the example above, the first parameter represents the 'name' attribute, the second is an associative array of options, and the third is the selected option.

    Here's the HTML that would be rendered by the above code sample:

    Checkboxes and Radio Buttons

    The form_checkbox() and form_radio() helper functions are used to create checkbox and radio button elements, respectively. For example:

    In the code above, the first parameter represents the 'name' attribute, the second is the value, and the third is a boolean indicating whether the element should be checked by default.

    Here's the HTML code that would be produced from the form_checkbox() code snippet, as shown above:

    Here's the HTML code that would be produced from the form_radio() code snippet, as shown above:

    File Input

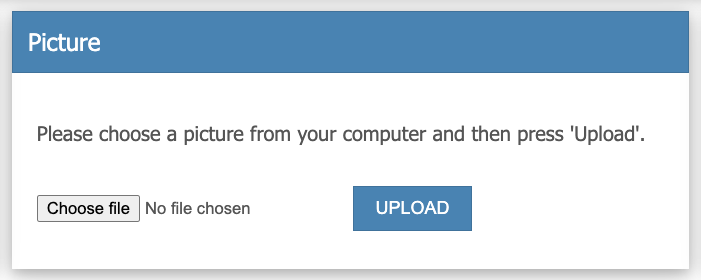
    The form_file_select() helper function generates an HTML file input element for file uploads. For example:

    In this example, the first parameter represents the 'name' attribute of the file input element.

    Here's the HTML code that would be produced from the above code snippet:

    Submit Button

    The form_submit() helper function creates an HTML submit button for submitting forms. For example:

    In the example above, the first parameter represents the 'name' attribute, and the second is the button's label text.

    Here's the HTML code that would be produced from the above code snippet:


    Closing the Form

    The form_close() helper function is used to close an open form. It not only generates the closing form tag but also includes a hidden CSRF token field for enhanced security. For example:

    Here's the HTML code that would be produced from the above code snippet:

    Note: The [random_token] placeholder represents a dynamically generated CSRF token value for security purposes.

    Trongate's inbuilt CSRF protection is activated when:

    1. The form_close() function has been used to render a form close tag
    2. The run() , within Trongate's Validation class has has been invoked

    Always use form_close() , and validate submitted form fields using the run() method from Trongate's Validation class, to ensure proper form closure and CSRF protection. This is especially important for forms that handle sensitive data.

    A full explanation of how Trongate's in-built CSRF protection works - under the hood - can be found in the Trongate MX Guide.


    Form Attributes

    Most of Trongate's form helper functions can accept an array of attributes to customize form elements:

    This will generate an input field with the specified class and style attributes.

    In PHP, there are several different types of syntax that can be used to initialize arrays. The following examples produce precisely the same output though with very different (though perfectly valid) PHP syntax:

    Example 1

    Example 2

    Example 3

    Defining Attributes Within Helpers

    For brevity, you can also define an array of attributes from within a form helper function. For example,

    All of the different types of coding styles shown above are valid.


    Complete Form Example

    Below is a complete example of how to create a form in Trongate. This example includes a controller method and a corresponding view file.

    Controller Method

    The controller method initializes the form data and passes it to the view file:

    View File

    The view file contains the HTML and PHP code to render the form:

    This example demonstrates how to create a form for adding a new task. The form includes fields for the task title, description, and a checkbox to mark the task as complete. The form also includes a submit button and a cancel link.


    The Benefits of Using Trongate's Form Helpers

    Trongate's form helper functions offer several advantages over raw HTML:

    • Automatic Security: Values are escaped using HTML entity encoding to prevent XSS vulnerabilities.
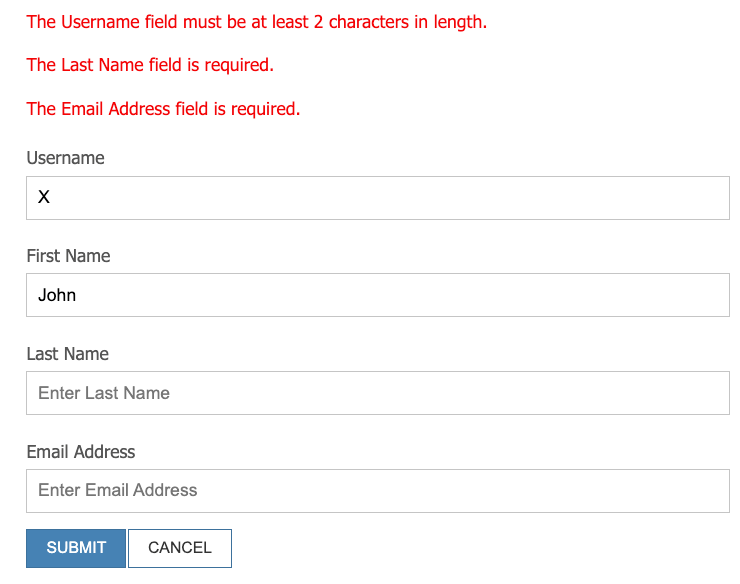
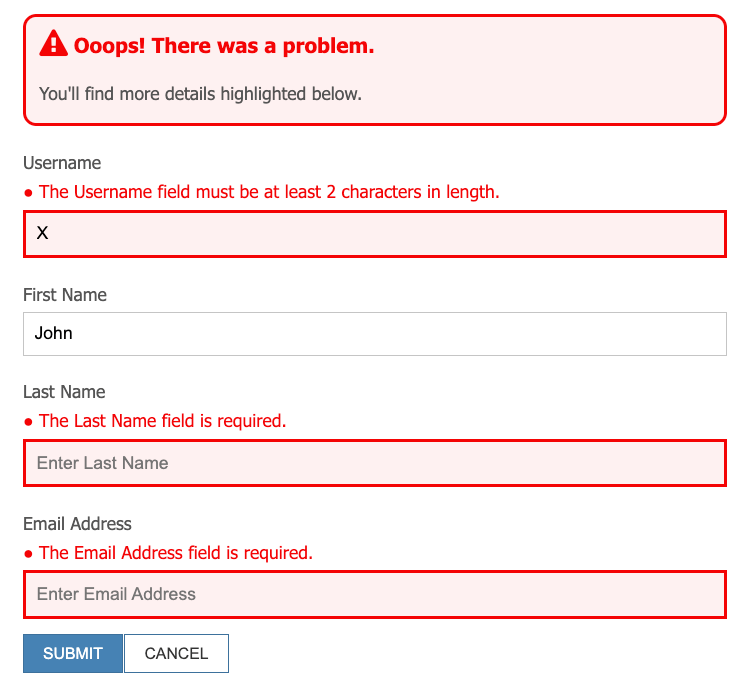
    • Validation Integration: Seamless error highlighting and repopulation after form validation failures.
    • CSRF Protection: Built-in CSRF token generation through the form_close() function.
    • Consistent Syntax: PHP-based helpers reduce context switching between HTML and PHP.
    • Reduced Boilerplate: Simplified creation of complex elements like dropdowns and checkboxes.

    Example using form helper:

    Equivalent raw HTML:


    Retrieving Form Data

    In Trongate, retrieving data submitted through HTML forms is both straightforward and secure. The framework provides a range of tools to help you access, clean, and process form data effectively. Whether you're working with standard form submissions or JSON payloads, Trongate ensures consistency and simplicity in handling user inputs.

    Form Data Handling in Trongate

    Trongate supports retrieving data across all HTTP methods (GET, POST, PUT, PATCH, DELETE). Form data can be retrieved seamlessly, whether it is submitted via form-encoded content or as JSON payloads. Additionally, the framework includes features to clean and normalise user input where required.

    The post() Function

    The post() function is a powerful tool for accessing form data. It allows you to retrieve data from any HTTP request and works with both form-encoded and JSON payloads. The function also includes an optional cleanup mechanism for trimming whitespace and normalising internal spaces.

    Basic Usage

    To retrieve the value of a specific form field, call the post() function with the field name:

    This will return the value of the task_title field. If the field does not exist, the function will return an empty string.

    Cleaning Up Data

    By passing true as the second argument to post() , you can clean up the retrieved data. This process trims any leading or trailing spaces and reduces multiple spaces within the string to a single space:

    Clarification: The second argument (true) ensures that the retrieved value is cleaned up. This means:

    • Leading and trailing spaces are removed.
    • Multiple internal spaces are replaced with a single space.

    Therefore, if a user submits a value of:

       Michael           Jackson   

    The cleaned result will be:

    Michael Jackson

    Working with Form Data in Controllers

    Below is an example of how you might retrieve and process form data in a Trongate controller:

    Conclusion

    Retrieving form data in Trongate is designed to be straightforward, secure, and efficient. By using tools like the post() function, you can handle user input with confidence, whether it originates from standard HTML forms or complex JSON payloads. This consistent approach ensures a smooth development experience for handling form submissions across different scenarios.


    Setting Form Validation Rules

    Form validation is a crucial aspect of web development, ensuring that user-submitted data meets the required criteria before being processed or stored. Proper validation not only improves user experience by providing immediate feedback but also protects your application from common security threats such as SQL injection, cross-site scripting (XSS), and data corruption. The Trongate PHP framework provides a robust and flexible validation system that simplifies the process of validating form inputs.

    Overview of Trongate's Validation System

    Trongate's validation system is designed to be intuitive and easy to use. It allows developers to define validation rules for form fields, automatically handle error messages, and ensure that only valid data is processed. The validation process is managed by the Validation class, which provides methods for setting rules, running validation checks, and handling errors.

    Key Features of Trongate's Validation System

    • Flexible Rule Definition: You can define validation rules for each form field, including required fields, minimum and maximum lengths, numeric values, email validation, and more. For example, you can easily set rules like required|min_length[2]|max_length[255] to ensure a username is between 2 and 255 characters long.
    • Automatic Error Handling: The system automatically generates and displays error messages for invalid inputs, making it easy to provide feedback to users. Error messages can be displayed either as a block at the top of the form or inline next to each field.
    • CSRF Protection: Trongate includes built-in CSRF (Cross-Site Request Forgery) protection to secure your forms against malicious attacks. Each form submission is automatically checked for a valid CSRF token, ensuring that the request originated from your application.
    • Custom Validation: You can create custom validation rules and callbacks to handle specific validation requirements. For example, you can enforce rules like "The last name cannot be 'Rambo'" by defining a custom validation method.

    Implementing Form Validation in Trongate

    Let's walk through the process of implementing form validation in a Trongate application.

    Step 1: Define Validation Rules

    In your controller (e.g., Tasks.php), you can define validation rules for each form field using the set_rules method. This method takes three parameters:

    1. Field Name: The name of the form field.
    2. Field Label: The label used in error messages.
    3. Validation Rules: A string or array of rules to apply to the field.

    For example, in the submit method of the Tasks controller, the following rules are defined for the task_title and task_description fields:

    $this->validation->set_rules('task_title', 'Task Title', 'required|min_length[2]|max_length[255]');
    $this->validation->set_rules('task_description', 'Task Description', 'required|min_length[2]');

    These rules ensure that:

    • The task_title field is required, has a minimum length of 2 characters, and a maximum length of 255 characters.
    • The task_description field is required and has a minimum length of 2 characters.

    Step 2: Run the Validation

    After defining the validation rules, you can run the validation checks using the run method. This method returns true if all validation rules pass, or false if any validation errors occur.

    $result = $this->validation->run();
    
    if ($result === true) {
      // Validation passed, process the form data
    } else {
      // Validation failed, redisplay the form with error messages
      $this->create();
    }

    If validation fails, the form is redisplayed with error messages, allowing the user to correct their inputs.


    An Alternative Syntax for Setting Form Validation Rules

    While the pipe symbol syntax, as demonstrated earlier, is efficient and concise, it can become unwieldy when dealing with forms that contain multiple fields and complex validation rules. To address this, the Trongate framework offers an alternative syntax for setting form validation rules: Array-Based Rule Setting. This approach provides a more structured, readable, and maintainable way to define validation rules for your forms.

    How It Works

    In the Array-Based approach, instead of chaining validation rules using the pipe symbol |, you define each rule as part of an associative array. In this syntax, the keys represent the form field names, and each field is assigned an array of validation rules. This provides better organisation and flexibility, especially for forms with many fields and complex requirements. Here's an example:

    Now, let's compare the two approaches for setting validation rules:

    Using the Pipe Symbol to Chain Validation Rules:

    Using Array-Based Syntax to Define Validation Rules:

    While the array-based syntax requires more lines of code, it offers a more organised structure and takes up less horizontal space compared to the pipe symbol approach. Ultimately, the choice between these two methods depends on your project's needs and your preferred coding style.

    When performing form validation, the framework ensures consistency between the validation process and subsequent data processing by automatically applying data cleaning rules through the post() function.

    Consider the following:

    With the above code, the validation system will evaluate the result of:

    For this reason, to maintain consistency and prevent validation bypasses, values should be retrieved after validation using the same approach:

    In situations where it's not acceptable to fetch posted values - after validation - using post($str, true), it's advisable to consider using custom validation. This ensures that your validation rules can properly account for any special data handling requirements.

    Key Points Regarding Setting Validation Rules

    • Each form field is assigned its own set of validation rules within a sub-array.
    • Validation rules are defined as key-value pairs within each field's sub-array.
    • The main $validation_rules array uses field names as keys.

    All of the validation rules that have been used in this page are built into the framework. In other words, the inner workings of the various validation rules have been written into the Trongate framework. In the next section, we'll explore how to set your own custom form validation rules.


    Custom Form Validation Rules

    In certain scenarios, you may need to implement form validation checks that go beyond the built-in rules provided by Trongate's Validation class. In such cases, custom form validation callbacks become invaluable.

    General Concept

    When using Trongate's Validation class to apply form validation checks, the set_rules method plays a crucial role in defining the validation rules for specific form fields. For instance, the following code ensures that both the 'first_name' and 'last_name' fields must:

    • Not be empty
    • Be at least 2 characters long
    • Be no more than 255 characters long

    Adding Custom Validation Checks

    To implement validation rules not covered by Trongate's default tests, you can create custom validation callbacks. For example, let's say you want to enforce the rule: "The last name cannot be 'Rambo'". To do this, follow these steps:

    1. Declare the custom validation check.
    2. Create a method to define the behavior of the custom validation check.

    Declaring a Custom Validation Check

    To declare a custom validation rule, prepend the rule name with 'callback_', followed by the name of the method that will handle the validation logic. For example, if you have a method called check_last_name() for this custom validation, you would append it to the set_rules declaration for 'last_name' field, like so:

    This means the block of code for applying form validation rules would now look like this:

    While it's not required, it's recommended to adhere to Trongate's Underscore Naming Convention whenever creating custom methods.

    Creating a Custom Validation Method

    Custom validation methods automatically receive the posted form field value as an argument and should return either a boolean true (indicating validation success) or an error message (as a string). The following demonstrates the basic structure of a typical custom validation callback method:

    Custom form validation callback methods should only return one of the following two things:

    1. A string with a form validation error message, if the submitted value fails the validation test.
    2. A boolean of true, if the submitted value passes the validation test.

    The behaviour of custom form validation callbacks may be described more fully by adding access modifiers, doc blocks, type hinting and return types, like so:

    To implement the custom rule where the last name cannot be "Rambo", the method would look like this:

    If the submitted last_name fails the custom validation check, the following error message will be returned:

    We don't want guys like you in this town.

    On the other hand, if the submitted last_name passes the custom validation, the method will return true, and no error message will be generated.

    For enhanced code clarity and functionality, consider using doc blocks, access modifiers, type hints, and return types in your validation callback methods. Though optional, these practices improve code readability and maintainability. For example:

    To learn more about docblocks, type hinting, and return types check out this YouTube tutorial.

    By the way, there appears to be some ambiguity, in the PHP community, about how to write 'doc blocks'. Should it be two words, one word or something to do with camelCase? If you know the answer, please let us know!

    In the next section, we will explore how display form validation errors.


    Validation Rules Reference

    The following table lists all of Trongate's built-in form validation rules, including those for file and image uploads.

    Rule Parameter Description Example
    allowed_types Yes Specifies the allowed file extensions (e.g., gif, jpg, png). allowed_types[gif,jpg,jpeg,png]
    decimal No Returns FALSE if posted value is not numeric with at least one decimal place. decimal
    differs Yes Returns FALSE if form element matches another specified form element. differs[name]
    exact_length Yes Returns FALSE unless posted value has a string length equal to specified value. exact_length[12]
    greater_than Yes Returns FALSE unless posted value is greater than specified value. greater_than[17]
    integer No Returns FALSE if posted value is not an integer (i.e., not a whole number). integer
    less_than Yes Returns FALSE unless posted value is less than specified value. less_than[31]
    max_height Yes Specifies the maximum height for images (in pixels). max_height[1200]
    max_length Yes Returns FALSE if posted value has a string length greater than specified value. max_length[75]
    max_size Yes Specifies the maximum file size in kilobytes (e.g., 2000 for 2MB). max_size[2000]
    max_width Yes Specifies the maximum width for images (in pixels). max_width[1200]
    matches Yes Returns FALSE if posted value does not match another specified form element. matches[password]
    min_height Yes Specifies the minimum height for images (in pixels). min_height[100]
    min_length Yes Returns FALSE if posted value has a string length less than specified value. min_length[3]
    min_width Yes Specifies the minimum width for images (in pixels). min_width[100]
    numeric No Returns FALSE if posted value is not numeric. numeric
    required No Returns FALSE if posted value is empty. required
    square No Ensures the image is square (width equals height). square
    valid_datepicker_eu No Returns FALSE if posted value is not a valid datepicker value of the European format dd-mm-yyyy. valid_datepicker_eu
    valid_datepicker_us No Returns FALSE unless posted value is a valid datepicker value of the United States of America format mm-dd-yyyy. valid_datepicker_us
    valid_datetimepicker_eu No Returns FALSE if posted value is not a valid datetime picker value. valid_datetimepicker_eu
    valid_datetimepicker_us No Returns FALSE if posted value is not a valid datetime picker value. valid_datetimepicker_us
    valid_email No Returns FALSE if posted value is not formatted like an email address. valid_email
    valid_time No Returns FALSE if posted value is not a valid time. valid_time

    Displaying Validation Errors

    When a form is submitted and validation errors are produced, it is standard practice to re-present the form to users. It's also standard practice to present users with form validation errors in those instances. This approach gives users an opportunity to correct their input without losing the information they have already entered.

    The typical technique for re-presenting forms to end users is to invoke the method responsible for displaying the previous page (i.e., the page that renders the HTML form). For example:

    By immediately re-invoking the create() method, as shown above, the entire page that renders the HTML form will be re-rendered.

    The example above assumes that there is a create() method within the containing controller file. When invoked, this create() method would render a webpage that contains the form to be filled out and submitted.

    Of course, there's no obligation to name the method 'create'. Here's a very basic example of a method that could be added to a controller file with the purpose of rendering a 'contact us' form:

    As you can see, not only is the method declaring a view file name ('contact_form') and loading a template, it's also retrieving submitted form data and passing it into the view file. This means that the form being rendered will be prepopulated with previously submitted values. The code for a form that is rendered by the contact() method shown above could look like this:

    When forms that produce validation errors are re-presented to the end user, an array of form validation errors will be made available.

    There are two techniques that can be used to display validation errors:

    1. Traditional
    2. Inline

    1. Traditional Validation Errors Display

    This approach involves displaying all validation errors at once, typically at the top of the form.

    normal form validation errors
    A screenshot depicting form validation errors being presented as a block of text.

    How to Implement:

    • Use the run() method to execute form validation checks.
    • If the run() method returns a value of true (boolean), you may assume that the submitted form field values have passed all of the form validation checks.
    • On the other hand, if the run() method returns a value of false (boolean), this means that one or more form validation errors have been produced.
  • In your view file, use the validation_errors() function to display all validation errors. The code below demonstrates how to render validation errors using PHP short tags:
  • The validation_errors() method will display all of the form validation errors together. The line of code responsible for rendering the validation errors is usually placed inside a view file and above the corresponding form.

    By default, the validation_errors() function renders error messages as red text within <p> tags. However, Trongate offers flexibility in customizing the appearance of these error messages:

    1. Custom HTML wrapping: You can pass optional arguments to validation_errors() to control the HTML wrapping of individual error messages. For example:
    2. Global configuration: For site-wide customization, you can define the PHP constants ERROR_OPEN and ERROR_CLOSE in your config.php file. When set, these constants will be used as the default HTML wrapping for all validation errors. For example:

    These options allow you to easily integrate validation error displays with your site's design and CSS, ensuring a consistent look and feel across your application.

    2. Inline Validation Errors Display

    Trongate offers an alternative methodology for displaying form validation errors: inline validation errors.

    With inline validation errors applied, individual form validation errors are displayed next to their respective form fields, providing what some consider to be a more modern user experience.

    inline form validation errors
    A screenshot depicting inline form validation errors.

    How to Implement:

    1. Add the class highlight-errors to your form tag.
    2. For each form field, use the validation_errors() function with the field name as an argument.

    For example:

    This method will display errors inline, next to their respective fields.

    In situations where inline form validation errors appear, an alert will appear at the top of the page that:

    1. Makes the user aware that something went wrong.
    2. Informs the user that more details are 'highlighted below'.

    This alert is contained within a CSS class named .validation-error-alert. If you do not wish the alert to appear, simply apply a CSS rule to the page that forces the element to remain hidden. For example:

    By effectively utilizing these validation error display techniques, you can create user-friendly forms that provide clear feedback, improving the overall user experience of your Trongate application.

    For those aiming to give users an even better experience, please check out Trongate MX - Trongate's new front-end framework. Trongate MX gives Trongate developers the ability to build extremely sophisticated and fully interactive forms, without writing any JavaScript. All of this is covered in the Form Handling chapter.


    Processing Form Submissions

    In Trongate, after form validation is complete, the next crucial step is processing the submitted data. This section covers the implementation patterns for handling validated form data.

    The Data Processing Workflow

    A typical form processing workflow in Trongate follows this pattern:

    Processing Valid Submissions

    When handling validated form data, you'll typically need to:

    1. Collect the submitted data
    2. Determine the operation type (insert or update)
    3. Perform the database operation
    4. Provide user feedback
    5. Direct the user to the next appropriate page

    Here's a real-world example that demonstrates this workflow:

    Data Collection Strategies

    The get_data_from_post() method is crucial for organizing form data. Here's an example that includes data transformation:

    When performing form validation, the framework ensures that the data being validated matches the data that will be processed. This is achieved through the integration of the post() function in the validation process.

    For example, when the following validation rule is declared:

    The validation system will internally evaluate:

    The post() function, when called with a second argument of true, performs two cleaning operations:

    • Removes whitespace from the beginning and end of strings
    • Normalizes internal spacing (multiple spaces become single spaces)

    Therefore, to maintain consistency between validation and data processing, values should be retrieved after validation using post($str, true). In situations where this cleaning behavior is not acceptable, it's advisable to consider using custom validation.


    Best Practices For Handling Data

    Handling data securely is a cornerstone of building robust web applications. This page outlines best practices for managing user input, database interactions, and data rendering in the Trongate PHP framework, ensuring your application remains secure and efficient.

    Escaping Data: What and Why?

    Escaping data is the process of converting potentially harmful characters into safe equivalents to prevent security vulnerabilities like Cross-Site Scripting (XSS). For example, converting < and > into &lt; and &gt; ensures that user input is treated as plain text, not executable code.

    Example of XSS Vulnerability

    Consider a forum where a user posts:

    Without escaping, this script would execute in users' browsers, redirecting them to a malicious site. Proper escaping ensures the input is rendered as harmless text.

    Common Misconceptions

    A frequent mistake is escaping data before inserting it into the database. This corrupts the original data and limits its usability. Instead:

    • Store raw data in the database.
    • Escape data at the point of rendering to ensure it's safe for display.

    Risks of Improper Data Handling

    Failing to handle data securely can lead to:

    • Cross-Site Scripting (XSS): Malicious scripts executed in users' browsers.
    • SQL Injection: Unauthorized database access or manipulation.
    • Data Corruption: Loss of critical information due to premature escaping.

    Best Practices for Secure Data Handling

    1. Validate Input

    Ensure user input meets expected formats and values. Always validate on the server side, as client-side validation can be bypassed.

    2. Sanitize Input

    Remove unwanted characters (e.g., stripping HTML tags) to prevent injection attacks.

    3. Escape at Rendering

    Escape data when rendering it to the user, ensuring it's safe for the intended context (HTML, JavaScript, etc.).

    4. Use Trongate's Model Class

    The Trongate framework has a built-in Model class that has been designed for safe and effortless database interaction. If you use the Model class, you'll never have to worry about SQL injection attacks!


    How To Safely Display Submitted Data

    Trongate provides the out() function to safely escape and format data for various output contexts. It ensures that user-submitted data can be displayed securely, preventing issues such as Cross-Site Scripting (XSS).

    The out() function supports the following output formats:

    • HTML (default)
    • XML
    • JSON
    • JavaScript
    • HTML Attributes

    When To Use out()

    It's important to know when to use the out() function. Trongate's built-in helpers, such as form_input() , already handle escaping for you when generating form elements. This means that there is no need to use out() when rendering form elements by usage of Trongate's form helper functions. However, in other contexts, you should use the out() function, especially when manually outputting user-submitted data. Examples include:

    • Displaying dynamic content directly in an HTML document
    • Inserting user-submitted data into JavaScript, JSON, or XML
    • Escaping data for use in custom HTML attributes

    Example Usage:

    Here's how you can use the out() function to escape user-submitted data for safe inclusion in an HTML context:

    Other Output Formats:

    You can specify the desired output format using the third parameter:

    JSON:

    JavaScript:

    Best Practices:

    • For dynamic content outside of form_helpers (e.g., displaying raw user input in HTML, JSON, or JavaScript), use the out() function to ensure proper escaping.
    • When using Trongate's **form_helpers**, such as form_input() , you don't need to use out() for attributes, as escaping is already handled internally.
    • Specify the appropriate output format for the context where the data will be used (e.g., JSON, JavaScript).

    By using the out() function appropriately and relying on Trongate's built-in helpers where applicable, you can ensure your application remains secure while following best practices.


    Database Interaction with Trongate's Model Class

    Trongate's Model class simplifies secure database interactions. Use it to insert, update, and query data without compromising security.

    Example: Inserting or Updating Records

    Full documentation regarding Trongate's Model class is offered in the Database Operations chapter.

    In addition, all of the methods available within Trongate's Model class are detailed in the API Reference Guide.

    In Summary

    By following these best practices, you can ensure your Trongate application handles data securely and efficiently:

    • Validate and sanitize user input.
    • Escape data at the point of rendering using the out() function.
    • Interact with the database securely using Trongate's Model class.

    Adhering to these principles will help to keep your applications both robust and secure.


    Working With Files

    File Handling with Trongate

    Trongate provides robust support for file handling and image manipulation through its built-in File and Image classes. These classes are designed to make file operations secure, efficient, and easy to manage. Whether you need to upload files, resize images, or perform other file-related tasks, Trongate has you covered.

    File Class

    The File class is a comprehensive file management tool that supports a wide range of file operations. It includes functionalities for reading, writing, and managing directories. The class is designed with security in mind, preventing access to critical directories and ensuring that file operations are performed safely.

    Image Class

    The Image class is specifically designed for handling image files. It supports various image formats (JPEG, GIF, PNG, WEBP) and provides functionalities for loading, resizing, and saving images. The class leverages PHP's GD library to perform these operations efficiently and securely.

    Security Considerations

    When handling files and images in a web environment, it is crucial to be aware of the security implications. Trongate's File and Image classes include measures such as validating upload paths to ensure they are within the application's directory structure and not in restricted areas. This helps mitigate risks associated with unauthorized access and directory traversal attacks. Always ensure that sensitive directories are protected and that file operations are performed within the application's scope. Additionally, consider the following best practices:

    • Use validation rules to restrict the types and sizes of uploaded files.
    • Set appropriate permissions for upload directories to prevent unauthorized access.
    • Regularly review and update your security measures to protect against emerging threats.

    Next Steps

    In the following sections, we will delve deeper into the specific methods and functionalities provided by the File and Image classes. You will learn how to use these classes to perform various file handling tasks and manipulate images effectively.


    Understanding The File Class

    The Trongate File class provides a comprehensive suite of methods for efficient and secure file management within your application. This class supports functionalities like uploading, deleting, reading, writing files, and managing directories. Access restrictions are in place to prevent unauthorized access to critical directories such as 'config', 'engine', and 'templates', as well as any files directly under the root application level (e.g., '.htaccess').

    Getting Started

    To use the Trongate File class, you need to instantiate the class and then call its methods. Here’s a basic example of how to use the read() method:

    In the above example, the APPPATH constant is used to return the absolute file path of the application's root directory. Additional information about this and other helpful features are available from here.

    The example also uses Trongate's out() function to remove potentially dangerous characters from rendered output.

    Available Methods

    Below is a table listing all the available methods in the Trongate File class, along with a brief description of each method:

    Method Description
    copy() Copies a file from one location to another.
    create_directory() Creates a new directory at the specified path.
    delete() Deletes a file from the filesystem.
    download() Initiates a file download or displays inline from the server or an external URL.
    exists() Checks whether a file or directory exists at the specified path.
    info() Retrieves metadata about a file.
    list_directory() Lists files and directories within a specified directory.
    move() Moves a file from one location to another.
    read() Reads the contents of a file.
    upload() Handles the file upload process with specified configuration.
    write() Writes or appends data to a file.

    Image Manipulation

    The Trongate Image class provides a comprehensive suite of methods for efficient and secure image manipulation within your application. This class supports functionalities like loading, resizing, and saving images. It uses PHP's GD library and supports JPEG, GIF, PNG, and WEBP image formats. Access restrictions are in place to prevent unauthorized access to critical directories such as 'config', 'engine', and 'templates', as well as any files directly under the root application level (e.g., '.htaccess').

    Getting Started

    To use the Trongate Image class, you need to instantiate the class and then call its methods. Here’s a basic example:

    This example demonstrates how to load an image from a specific directory, resize it, and save the resized image to another directory, all while using Trongate's APPPATH constant for path management.

    In the above example, the APPPATH constant is used to return the absolute file path of the application's root directory. Additional information about this and other helpful features are available from here.

    Available Methods

    Below is a table listing all the available methods in the Trongate Image class, along with a brief description of each method:

    Method Description
    crop() Crops the image to specified dimensions from a selected position.
    destroy() Frees up memory allocated to the image resource.
    get_header() Gets the MIME type header for the currently loaded image.
    get_height() Retrieves the height of the currently loaded image.
    get_width() Retrieves the width of the currently loaded image.
    output() Outputs or returns the image content directly.
    resize_and_crop() Resizes and crops the image to specified dimensions.
    resize_to_height() Resizes the image to a specified height while maintaining the aspect ratio.
    resize_to_width() Resizes the image to a specified width while maintaining the aspect ratio.
    save() Saves the currently loaded image to a file.
    scale() Scales the image by a given percentage.
    upload() Handles the upload and processing of an image file.

    File Uploading - An Overview

    Trongate provides the necessary tools to build custom file uploaders. The process of building a file uploader is similar to building any other form, but with a few additional steps to handle the file itself.

    Here is a list of the main components that make up a custom file uploader:

    • A webpage with a file upload form: This is the user interface that allows users to select a file and submit it to the server.
    • A method for receiving post requests from the uploader: This is the server-side code that handles the file once it has been submitted by the user.
    • Some validation tests: These ensure that the submitted file meets the requirements set by the application (e.g., file type, size).
    • A means of gracefully dealing with errors: This includes handling errors that occur during validation, as well as errors that may happen during the file upload process.
    • A destination directory where files are to be uploaded to: This is the location on the server where the uploaded file will be saved.
    • A little bit of configuration: This includes setting up the destination directory and any other settings that the application requires.
    • A success message or page: This is the message or page that is displayed to the user once the file has been successfully uploaded.

    Most of these components are similar to what you would expect in any form-building scenario. The upcoming sections of this chapter will provide a detailed guide on how to build each of these components and put them together to create a custom file uploader using Trongate.


    Trongate’s Two Upload Methods

    The main Trongate class (Trongate.php) contains two distinct methods for handling file uploads: upload_file() and upload_picture() . While both methods facilitate file uploads, they serve different purposes and are optimized for different scenarios.

    The upload_file() Method

    The upload_file() method is designed for general-purpose file uploads. It handles the basic process of moving a file from a temporary location to its final destination on your server. This method is ideal when you need to:

    • Upload non-image files (PDFs, text files, documents, etc.)
    • Upload images without requiring any additional processing
    • Perform basic file operations without any specialized handling

    The upload_picture() Method

    The upload_picture() method is specifically designed for handling image uploads that require additional processing. Beyond the basic upload functionality, this method can:

    • Automatically resize images to meet specified dimensions
    • Generate thumbnails of uploaded images
    • Handle image-specific validation and processing

    Choosing the Right Method

    When building a file uploader, selecting the appropriate method is crucial. Here's a guide to help you make the right choice:

    Use upload_file() when:

    • You're uploading non-image files (documents, PDFs, etc.)
    • You need to upload images but don't require any resizing or thumbnail generation
    • You want simple, straightforward file handling without additional processing

    Use upload_picture() when:

    • You're working specifically with image files (JPEG, PNG, GIF, etc.)
    • You need automatic image resizing capabilities
    • You want to generate thumbnails automatically
    • You require image-specific processing or validation

    Handling Mixed File Types

    If your application needs to handle both image and non-image files, you can implement logic to determine which method to use based on the file type. Here's an example:

    While it might be tempting to use upload_file() for all uploads to keep things simple, it's recommended to use upload_picture() when working with images that require processing. This ensures you get the benefit of Trongate's built-in image handling capabilities and keeps your code clean and maintainable.

    In the next sections, we'll look at practical examples of how to implement both types of uploaders and explore their configuration options in detail.


    File Uploader Example

    Let's walk through building a document uploader using Trongate's upload_file() method. This example will demonstrate creating a secure PDF document uploader with proper validation and error handling.

    The following example pertains to a hypothetical custom module named as 'documents'.

    Step 1: Create the Upload Form

    Create a view file (e.g., upload_form.php) in your module's views directory:

    The 'accept' property is an HTML attribute for specifying acceptable file types for uploads. Here's how you can use it:

    Step 2: Create the Controller

    Create a controller (e.g., documents.php) in your module's controllers directory:

    Step 3: Create the Success View

    Create a success view file (e.g., upload_success.php):

    Directory Structure

    Your module structure should look like this:

    Understanding the Configuration Options

    Option Description Default
    destination Directory where files will be uploaded Required
    upload_to_module If true, files are uploaded to the module's assets directory false
    make_rand_name If true, generates a random filename for uploaded files false

    File Upload Validation Rules

    Trongate provides several validation rules specifically for file uploads:

    • required: Ensures a file was selected
    • allowed_types[type1,type2]: Specify allowed file extensions (e.g., pdf,doc,txt)
    • max_size[size_in_kb]: Maximum file size in kilobytes
    • Always validate file types to prevent unauthorized file uploads
    • Use make_rand_name to prevent filename conflicts and increase security
    • Set appropriate file size limits to prevent server overload
    • Ensure your upload directory has correct permissions (typically 755)

    Handling the Upload Response

    On successful upload, upload_file() returns an array containing:

    • file_name: The name of the uploaded file
    • file_path: The complete server path to the uploaded file
    • file_type: The MIME type of the uploaded file
    • file_size: The size of the uploaded file in bytes

    In the next section, we'll explore using the upload_picture() method, which provides additional features specifically for handling image uploads.


    Image Uploader Example

    Let's walk through building an image uploader using Trongate's upload_picture() method. This example will demonstrate creating a secure image uploader that includes automatic image processing capabilities.

    The following example pertains to a hypothetical custom module named as 'products'.

    Step 1: Create the Upload Form

    Create a view file in your module's views directory:

    Step 2: Initialize Picture Settings

    Create a method in your controller to define image settings:

    Step 3: Create the Upload Handler

    Add the upload handler method to your controller:

    Directory Structure

    Your module structure should look like this:

    Understanding Picture Settings

    Setting Description Default
    destination Directory where pictures will be uploaded Required
    upload_to_module If true, pictures are uploaded to the module's assets directory false
    make_rand_name If true, generates a random filename for uploaded pictures false
    target_column_name The database column that stores the filename Required
    • Always validate file types to prevent unauthorized file uploads
    • Set appropriate file size limits to prevent server overload
    • Organize images in subdirectories by record ID
    • Store only the filename in the database, not the full path

    In the next section, we'll take a closer look at how file validation, including image validation, is handled with Trongate.


    File Validation in Trongate

    Trongate provides a robust validation system for file uploads, ensuring that uploaded files meet specific criteria such as file type, size, and image dimensions. This guide focuses on the validation aspects of file and image uploads, building on the foundational knowledge from the previous section.

    Key Validation Rules for File Uploads

    When handling file uploads, Trongate allows you to define validation rules to ensure that uploaded files meet your application's requirements. These rules are applied using the set_rules() method in the Validation class.

    Common Validation Rules

    Here are the most commonly used validation rules for file uploads:

    • allowed_types: Specifies the allowed file extensions (e.g., jpg, png, gif).
    • max_size: Specifies the maximum file size in kilobytes (e.g., 2000 for 2MB).
    • max_width: Specifies the maximum width for images (in pixels).
    • max_height: Specifies the maximum height for images (in pixels).
    • min_width: Specifies the minimum width for images (in pixels).
    • min_height: Specifies the minimum height for images (in pixels).
    • square: Ensures the image is square (width equals height).

    Example Validation Rules

    Here’s an example of how to define validation rules for an image upload:

    In this example:

    • The file must be one of the following types: gif, jpg, jpeg, or png.
    • The file size must not exceed 2000 KB (2MB).
    • The image width and height must not exceed 1200 pixels.

    Security Checks

    Trongate includes built-in security checks to ensure that uploaded files do not contain malicious content, such as PHP code or other dangerous patterns. These checks are automatically performed when using the upload_picture() method.

    Handling Validation Errors

    If a file fails validation, Trongate will automatically add an error message to the form_submission_errors array. You can display these errors in your view using the validation_errors() helper function.

    Summary of Validation Tests

    Below is a table summarizing all the available validation tests for file uploads, sorted alphabetically:

    Validation Test Description
    allowed_types Specifies the allowed file extensions (e.g., gif, jpg, png).
    max_height Specifies the maximum height for images (in pixels).
    max_size Specifies the maximum file size in kilobytes (e.g., 2000 for 2MB).
    max_width Specifies the maximum width for images (in pixels).
    min_height Specifies the minimum height for images (in pixels).
    min_width Specifies the minimum width for images (in pixels).
    square Ensures the image is square (width equals height).

    More information pertaining to Trongate's in-build validation tests is available from the Validation Rules Reference.

    • Always validate file types to prevent unauthorized file uploads.
    • Set appropriate file size limits to prevent server overload.
    • Use image dimension rules to ensure uploaded images meet your application's requirements.

    Securing File Uploads

    Built-in Security Features

    Trongate provides a comprehensive suite of security features designed to ensure that file uploads are handled safely and efficiently.

    File Validation

    Trongate's Validation class offers extensive control over allowed file types and characteristics. For example:

    Trongate implements several security measures during file validation, including:

    • MIME type verification using PHP's finfo_file()
    • Automatic path traversal protection to prevent directory manipulation
    • Built-in protection against upload-based PHP code execution
    • Automatic file extension normalization and validation
    • Content scanning to detect potential security threats in the file

    File Upload Settings

    Settings pertaining to upload behavior can be declared inside modules. The framework includes several built-in protections, such as:

    • Automatic validation of upload destinations for proper permissions and security
    • Prevention of uploads to restricted system directories
    • Memory usage monitoring for safe image processing
    • Secure file naming system that prevents naming conflicts

    Example settings configuration:

    Framework Philosophy

    Trongate's approach to file uploading is designed to provide essential security features out of the box while allowing flexibility for additional measures. The framework emphasizes:

    • Robust security features to protect against common vulnerabilities
    • Efficient and maintainable core implementation
    • Flexibility to extend and customize security measures as needed

    Example Implementation

    Here's a typical implementation:

    Making Security Decisions

    When evaluating if you need additional security measures, consider:

    • Who can upload files?
    • What types of files are allowed?
    • How sensitive is your application?
    • What are the consequences of a malicious upload?

    Based on these answers, you can determine if Trongate's built-in features are sufficient or if you need additional security measures.


    The Module Import Wizard

    What Issue Does the Module Import Wizard Address?

    It seems almost unbelievable but until now PHP developers have not had a means of easily sharing code without having to go through third-party, privately owned websites like Packagist or GitHub.

    Trongate Changes Everything

    Trongate was built with the belief that developers should be in full control of their own code. The Module Import Wizard makes this possible. With Trongate's Module Import Wizard, it's easy to move features from an old app into a new app. As a matter of fact, it's as simple as good old copy and pasting. No command line is required and you don't have to install anything. Now, isn't that a nice idea?

    Modularity Matters

    Thanks to Trongate's unique architecture, PHP developers can now have features (including very advanced features!) self-contained within a single directory called a 'module'. Don't forget, Trongate lets you have modules within modules. So, there's no limit to how advanced your modules can be. This means that PHP developers now have an opportunity to take a feature from one app then add it onto another, simply by copying and pasting. Yes, it's that easy!

    Simple But Very Important

    The importance of giving web developers full control over their own code cannot be stressed enough. Trongate is the only PHP framework with this kind of functionality. So, with Trongate, developers can enjoy improved security because all of their modules have a single point of accountability. This puts Trongate in stark contrast with a system like Packagist where perfectly anonymous developers have the ability to mess with your code without you even knowing who they are or what they're doing!

    What The Module Import Wizard Does

    The Trongate module import wizard helps developers to literally copy and paste entire features from one app onto another. If you have a module that depends upon some SQL code then that's no problem - the Module Import Wizard can help with that too. In the next page, there's a short video demonstration of the Module Import Wizard in action.

    Please do take a few moments to have a look.


    Using The Module Import Wizard

    There's actually not much to say here! It's very easy. Suppose you want to take a module from 'site A' and add it onto 'site B'. In that kind of situation all you have to do is copy and paste. That's it.

    Here's a video demonstration:

    YouTube tutorial
    Never use the Module Import Wizard on a live website. For improved security it's best to carry out module imports on your 'localhost' environment and then upload once you're happy with your new module.
    If you have a module that requires database tables, export SQL files (from your donor database) and add those (.sql) files into the new module. The activate the wizard, simply navigate to your base URL followed by the name of your new module directory.

    Authorization And Authentication

    Section Overview

    Authorization and authentication are foundational pillars of secure web development, ensuring that users can access the resources they need while protecting sensitive data from unauthorized access. While these terms are often used interchangeably, they serve distinct purposes:

    What is Authentication?

    Authentication is the process of verifying the identity of a user. It answers the question: "Who are you?" In most applications, this involves a user providing credentials, such as a username and password, to prove their identity. Once authenticated, the system recognizes the user and grants them access to protected areas or resources.

    What is Authorization?

    Authorization, on the other hand, determines what an authenticated user is allowed to do. It answers the question: "What are you permitted to access or perform?" For example, a regular user might be able to view their profile, while an administrator might have the authority to manage user accounts or modify system settings.

    Trongate's Approach to Authorization & Authentication

    Trongate provides a robust and flexible system for handling both authentication and authorization through its built-in modules. At the heart of this system lies the concept of tokens, which are unique strings representing a user's authenticated session. These tokens are generated upon successful login and stored securely, either in the session, a cookie, or passed via HTTP headers. The token system is designed to work seamlessly with a variety of database tables, enabling developers to define and enforce granular access control.

    Key Components of Trongate's Token System

    Trongate's token-based security system revolves around three primary database tables, each playing a critical role in managing user access:

    • trongate_user_levels: Defines various user levels within the application, such as 'admin' or 'member'. These levels determine the scope of a user's permissions.
    • trongate_users: Stores user credentials and associates each user with a specific user level. This table acts as the bridge between users and their roles.
    • trongate_tokens: Manages the generation, storage, and validation of authentication tokens. Tokens are time-limited and automatically purged when expired, ensuring a high level of security.

    In addition to these core tables, Trongate integrates with other modules to provide a comprehensive security framework. For instance, the Trongate Security module enforces access control based on predefined scenarios, while the Trongate Tokens module handles token generation and validation. Together, these components ensure that only authorized users can access specific parts of the application.

    Understanding Scenarios

    A scenario in Trongate refers to a specific context or condition under which access control is enforced. For example, accessing the admin panel might require a different level of authorization compared to viewing a members-only page. Scenarios allow developers to define granular rules for different parts of the application, ensuring that users are granted access only to the resources they are permitted to use. By leveraging scenarios, Trongate provides a flexible and modular approach to authorization, making it easy to adapt to the unique needs of your application.

    How Trongate's Token System Works

    Trongate's token system operates in a database-driven manner, requiring a connection to a MySQL database for full functionality. When a user successfully logs in, a token is generated and stored in the trongate_tokens table. This token is then used to authenticate the user across subsequent requests, whether submitted via HTTP headers, cookies, or sessions. The system validates the token against the database, checking its expiration date and associated user level to determine whether access should be granted.

    One of the key strengths of Trongate's token system is its flexibility. Developers can define which events trigger token generation—such as completing a registration form, subscribing to a service, or clicking a confirmation link. Additionally, the system is designed to be future-proof, allowing integration with various authentication mechanisms beyond traditional username/password methods. Whether you're building a web application, a mobile app, or an API-driven service, Trongate's token system provides a secure and scalable foundation for managing user access.

    In the following sections, we will delve deeper into the mechanics of Trongate's token system, exploring how these components interact and how you can leverage them to build secure, user-friendly applications.


    Understanding Trongate&#8217;s Token System

    Core Components of Trongate’s Token System

    At the heart of Trongate’s authorization and authentication framework lies a trio of database tables that work together to manage user access securely. These tables form the backbone of the token system, enabling granular control over user roles, permissions, and session management.

    trongate_user_levels

    This table defines the various user levels (e.g., admin, member) within the application. Each user level corresponds to a specific set of permissions, determining what actions a user can perform. For example:

    By defining user levels here, developers can enforce role-based access control across the application.

    trongate_users

    The trongate_users table serves as a bridge between users and their roles. It links each user to a specific user level via the user_level_id field. Additionally, it generates a unique code for each user, which can be used for secure identification. For instance:

    This table ensures that every user is associated with a role, enabling seamless integration with the token system.

    trongate_tokens

    The trongate_tokens table manages the generation, storage, and validation of authentication tokens. Each token is tied to a specific user (user_id) and has an expiration date (expiry_date). For example:

    Tokens are automatically purged from the database once they expire, ensuring a high level of security.

    The user_id column establishes a relational link to the id column in the trongate_users table through a foreign key relationship.

    To visualize how these tables interact, refer to the following table joins screenshot, which illustrates the relationships between trongate_tokens, trongate_users, and trongate_user_levels.

    The contents of a basic Trongate web application
    How the database tables involved in authorization and authentication are related.

    How Tokens Enable Secure Access

    Tokens play a pivotal role in Trongate’s security framework by acting as proof of authentication. Once a user successfully logs in, a token is generated and stored securely—either in the session, a cookie, or passed via HTTP headers. This token is then used to authenticate the user during subsequent requests.

    For example, when a user submits a request to access a protected endpoint, Trongate validates the token by checking its expiration date and ensuring it matches a valid user. If the token is valid, access is granted; otherwise, the request is denied.

    Token Lifecycle Overview

    While upcoming pages will delve deeper into the specifics of token generation, validation, and cleanup, here’s a high-level overview of the token lifecycle:

    • Generation: Tokens are created upon specific events, such as successful login or account creation. Developers can customize parameters like expiry_date and whether the token should be stored in a cookie.
    • Storage: Tokens can be stored in multiple locations, including:
      • Session: Ideal for server-side applications.
      • Cookies: Useful for client-side persistence.
      • HTTP Headers: Commonly used for API-based interactions.
    • Validation: Trongate validates tokens by querying the trongate_tokens table, ensuring the token is active and associated with a valid user.
    • Expiration and Cleanup: Tokens have a default lifespan of one day (86,400 seconds). Expired tokens are automatically purged from the database to maintain system integrity.

    Token Generation

    Guiding Principles

    When a user is granted authentication or authorization rights, a token—a randomly generated string—is created and stored in the trongate_tokens database table.

    The trongate_tokens table contains a column named user_id, indicating that every generated token must be assigned to a specific user.

    In the context of building large-scale web applications, a "user" could represent various entities, such as:

    • A website administrator
    • A record from a members table
    • A record from a trongate_administrators table
    • ...and more!

    While your definition of a "user" may vary depending on the application's requirements, within Trongate's authentication and authorization framework, a "user" specifically refers to a record in the trongate_users table.

    Therefore:

    When working with token-based authentication and authorization, every individual who requires a token must be represented in the trongate_users database table.

    If the above explanation is unclear, don't worry—examples will be provided later in this chapter.

    Token generation is a core feature of Trongate's authentication and authorization system, managed by the Trongate Tokens module. This module provides a robust mechanism for creating secure tokens that represent authenticated user sessions. At the heart of this process lies the _generate_token() method.

    This method is responsible for generating unique tokens based on provided data. Below is the method signature and a detailed explanation of how it works:

    How It Works

    The _generate_token() method performs the following steps:

    1. Generate a Random String: A 32-character random string is created using the make_rand_str() helper function.
    2. Set Expiration Date: If no expiration date is provided, the default lifespan of 86,400 seconds (1 day) is applied.
    3. Insert into Database: The token details are inserted into the trongate_tokens table, associating the token with the specified user ID and expiration date.
    4. Store Token: Depending on the set_cookie parameter, the token is either stored in a cookie or the session.
    5. Return Token: The generated token is returned as a string for further use.

    Key Parameters

    • user_id (required): Integer representing the user's ID in the trongate_users table.
    • expiry_date (optional): Unix timestamp for token expiration. If omitted, the default lifespan of 86,400 seconds (1 day) is used.
    • set_cookie (optional): Boolean to indicate if the token should be stored in a cookie. If not provided, the token is stored in the session.
    • code (optional): String code for special access rights. Rarely used in manual token generation.

    If no expiration date is provided, the system uses a default lifespan, typically set to 86,400 seconds (1 day).

    The default token lifespan is declared at the top of the Trongate_tokens class, within the file named Trongate_tokens.php. You can modify the default token lifespan by changing the value assigned to $default_token_lifespan.

    Practical Examples of Token Generation

    Below are practical examples of how tokens can be generated in various scenarios.

    Example 1: Generating a Token for a Specific User

    To generate a token for a user with ID 88, expiring in one week:

    Example 2: Generating a Token Without Setting a Cookie

    If you prefer to store the token in the session instead of a cookie, you can omit the expiry_date parameter, allowing the session's natural lifecycle to manage token expiration:

    In this case, the token will automatically inherit the default lifespan of 86,400 seconds (1 day) unless otherwise configured.

    Security Note: In development mode ('dev'), Trongate will automatically generate and allocate a token for any user attempting to access the admin panel if no token is presented. This behavior is managed by the _make_sure_allowed() method in the 'Trongate Administrators' module.

    For production environments, ensure that the ENV constant in config.php is not set to 'dev' to avoid unintended token generation.

    In Summary

    • Token generation in Trongate is handled by the Trongate Tokens module.
    • Every token is assigned to a user_id.
    • The user_id property refers to the trongate_users table.

    In addition, tokens can be stored in multiple locations, including:

    • Session variables: Ideal for server-side applications.
    • Cookies: Useful for client-side persistence.
    • HTTP Headers: Commonly used for API-based interactions.

    When generating tokens, you have the option to:

    1. Manually set an expiration date and time.
    2. Allow the token lifespan to default to the $default_token_lifespan.

    Video Tutorial

    Here's a video tutorial, walking you through how to build a private area using Trongate's token system.

    YouTube tutorial

    Token Validation

    Overview of Token Validation

    The Trongate framework provides a robust mechanism for fetching and validating user tokens, which is crucial for implementing secure authentication and authorization in your applications.

    Token validation is primarily handled by the Trongate Tokens module, specifically through the _attempt_get_valid_token() method. This method validates tokens based on their existence in the database, their expiration status, and—most importantly—their association with specific user levels.

    Note: The _attempt_get_valid_token() method validates tokens against user levels. If your application requires more granular validation (e.g., verifying a specific user ID), additional methods such as _get_user_id() , _get_user_obj() , or _get_user_level() can be used to enforce stricter conditions.

    The Mechanics of Token Retrieval

    When an end user is allocated a 'Trongate token', the relevant details about the token are stored in the trongate_tokens database table. Upon subsequent visits to the application, the _attempt_get_valid_token() method can be used to retrieve and validate user tokens.

    This method is versatile and adapts to various authentication scenarios by searching for tokens in multiple locations and applying optional user-level filters.

    Method Signature

    Parameters

    Parameter Type Description Default Required
    $user_levels int|array|null User levels to filter tokens. null No

    Return Value

    The method returns either a string (the valid token) or a boolean false if no valid token is found.

    Token Retrieval Process

    The _attempt_get_valid_token() method searches for tokens in the following locations, in order of priority:

    1. HTTP headers ($_SERVER['HTTP_TRONGATETOKEN'])
    2. Cookies ($_COOKIE['trongatetoken'])
    3. Session ($_SESSION['trongatetoken'])

    If a token is found in any of these locations, it is validated against the database to ensure it has not expired and matches the specified user-level criteria (if provided).

    How Validation Works

    The validation process involves the following steps:

    1. Token Collection: The method collects tokens from HTTP headers, cookies, and session variables.
    2. Database Query: Each token is queried against the trongate_tokens table to verify its existence and expiration status.
    3. User-Level Filtering: If user-level filtering is applied, the method ensures the token corresponds to a user with the required permissions.
    4. Return Valid Token: If a valid token is found, it is returned; otherwise, the method returns false.

    Usage Examples

    Example 1: Fetching Any Valid Token

    To retrieve a valid token for any user level:

    Example 2: Fetching Token for Specific User Level

    To fetch a token for users with an 'admin' user level (assuming 'admin' has an ID of 1 in the trongate_user_levels table):

    Example 3: Fetching Token for Multiple User Levels

    To retrieve a token for users with either 'admin' or 'member' user levels (assuming IDs 1 and 2 respectively):

    Validating Tokens Against Custom Conditions

    While the _attempt_get_valid_token() method is effective for validating tokens against user levels, some applications may require more granular validation. For example, you might need to ensure that a token corresponds to a specific user ID or other custom criteria. In such cases, you can use the following methods:

    Fetching the Trongate User ID

    To validate a token against a specific user ID, use the _get_user_id() method. This method retrieves the Trongate User ID associated with a token:

    If you have a specific token to validate, you can pass it as an argument:

    Fetching the Trongate User Object

    For more detailed user information, use the _get_user_obj() method. This method returns an object containing the user's data, including their user level, token, and expiration date:

    Fetching the User Level

    To validate a token against a specific user level, use the _get_user_level() method. This method retrieves the user level associated with a token:

    Security Considerations

    When validating tokens, keep the following security considerations in mind:

    • Token Expiry: Ensure that tokens have a reasonable lifespan to minimize the risk of unauthorized access.
    • Secure Storage: Use HTTPS to protect tokens transmitted via HTTP headers or cookies.
    • Granular Validation: For sensitive operations, combine token validation with additional checks, such as verifying the user ID or role.

    The Trongate Tokens module employs a hierarchical mechanism to fetch valid tokens during authentication and authorization processes. This mechanism involves sequentially checking multiple storage locations for tokens, as outlined below:

    1. HTTP Headers: The framework first attempts to retrieve a token from the HTTP headers ($_SERVER['HTTP_TRONGATETOKEN']).
    2. Cookies: If no token is found in the headers, the framework proceeds to check for a token stored as a cookie ($_COOKIE['trongatetoken']).
    3. Session Data: Finally, if no token is located in the headers or cookies, the framework attempts to retrieve a token from session data ($_SESSION['trongatetoken']).

    This sequential retrieval process ensures that the framework can locate and validate tokens stored in various locations, thereby enabling seamless user authentication and authorization.

    Developers should be aware that the removal of token data from one location (e.g., cookies) does not automatically eliminate tokens stored elsewhere (e.g., session data). Consequently, incomplete token cleanup may lead to unintended persistence of user sessions.

    To ensure comprehensive token deletion—both from the user's device and the application's database—developers are encouraged to utilize the _destroy() method. This method systematically removes tokens from all storage locations and purges them from the database, thereby maintaining a secure and consistent state.

    In Summary

    The _attempt_get_valid_token() method is a powerful tool for retrieving and validating user tokens in Trongate applications. While it excels at validating tokens against user levels, additional methods like _get_user_id() , _get_user_obj() , and _get_user_level() allow for more granular validation when needed. By leveraging these tools effectively, developers can implement secure and flexible authentication and authorization workflows.


    Attaching Tokens to HTTP Requests

    Overview

    When interacting with Trongate API endpoints, it is essential to include the Trongate token in the HTTP request headers for authentication. This ensures that the server can validate the user's identity and authorize access to protected resources. Below are demonstrations of how to attach a Trongate token to HTTP requests using JavaScript, specifically with XMLHttpRequest and the modern Fetch API.

    Note: The Trongate token should be included in the trongateToken header for all authenticated requests. Ensure that the token is securely stored and transmitted over HTTPS to prevent unauthorized access.

    Using XMLHttpRequest

    The XMLHttpRequest object provides a traditional way to send HTTP requests in JavaScript. Below is an example of how to attach a Trongate token to the request headers using this approach:

    Explanation

    • targetUrl: Replace this with the actual URL of the Trongate API endpoint you wish to interact with.
    • token: Replace this placeholder with the actual Trongate token generated for the user.
    • setRequestHeader: The trongateToken header is explicitly set to include the token for authentication.
    • onload: This event handler processes the server's response once the request is complete.

    Using Fetch API

    The Fetch API offers a more modern and promise-based approach to making HTTP requests. Below is an example of how to attach a Trongate token to the request headers using the Fetch API:

    Explanation

    • targetUrl: Replace this with the actual URL of the Trongate API endpoint you wish to interact with.
    • token: Replace this placeholder with the actual Trongate token generated for the user.
    • headers: The trongateToken header is included in the request to authenticate the user.
    • Promises: The Fetch API uses promises to handle asynchronous operations, making it easier to manage responses and errors.

    Developers who are using Trongate MX are advised to use the 'mx-token' attribute to automatically add token data to HTTP requests. For more information, click here.

    Fetching Tokens from HTTP Headers Using Pure PHP

    In server-side PHP code, tokens sent via HTTP headers can be accessed directly using the $_SERVER superglobal. For example:

    In the code sample above, a $token variable is assigned the value of a 'Trongate token' passed via an HTTP request header. If no such header is found, the $token variable will be assigned a boolean value of false.

    Accessing token data from the header via the $_SERVER superglobal does not confirm whether the token passed via the header is valid.

    To validate token data, refer to the token validation documentation for guidance on using the Trongate Tokens class.

    Security Considerations

    When attaching tokens to HTTP headers, keep the following security considerations in mind:

    • HTTPS: Always transmit tokens over HTTPS to encrypt the data and prevent interception by malicious actors.
    • Token Storage: Store tokens securely on the client side. For web applications, consider using secure cookies or session storage to minimize exposure.
    • Token Expiry: Ensure that tokens have a reasonable lifespan and implement mechanisms to refresh or regenerate them as needed.
    • Error Handling: Implement robust error handling to detect and respond to failed authentication attempts or expired tokens.

    Destroying Tokens

    In certain scenarios, such as when a user logs out of a private members' area, it may be necessary to delete a token from the user's device and from your application's database. This can be accomplished by invoking the _destroy() method from the Trongate Tokens module. This method does not require any arguments.

    How It Works

    The _destroy() method systematically removes tokens from the following possible storage locations:

    • Session Data: If a token is stored in the session, it will be cleared.
    • Cookies: If a token is stored as a cookie, it will be deleted from the user's browser.
    • Database Records: Any corresponding records in the trongate_tokens table will be removed.

    This ensures that the token is completely invalidated and cannot be reused for authentication or authorization purposes.

    Example Usage

    Below is an example of how to invoke the _destroy() method:

    Explanation

    • Line 1: Loads the trongate_tokens module, making its methods available for use.
    • Line 2: Invokes the _destroy() method to clear tokens from the session, cookies, and database.

    This method clears any tokens that might be stored as either session data or cookie data on the user's device. If a token is found, the method will also delete corresponding records from the trongate_tokens table.

    If the _destroy() method is invoked when the end user does not have a valid token, nothing will happen, and no error messages will be produced.

    Security Implications

    Properly destroying tokens is a critical aspect of maintaining application security. By invoking the _destroy() method during logout or other relevant events, you ensure that:

    • Session Termination: The user's session is terminated, preventing unauthorized access to protected resources.
    • Token Cleanup: Tokens are removed from both the client side (session or cookies) and the server side (database), minimizing the risk of token reuse or hijacking.

    Additional Considerations

    While the _destroy() method handles token cleanup comprehensively, developers should also consider the following best practices:

    • Logout Confirmation: Provide users with feedback (e.g., a success message) after invoking the _destroy() method to confirm that they have been logged out.
    • Redirect After Logout: Redirect users to a public page (e.g., the login screen or homepage) after destroying their tokens to prevent accidental re-access to restricted areas.
    • Token Expiry: Ensure that tokens have a reasonable lifespan and implement mechanisms to automatically expire and clean up unused tokens from the database.

    The Trongate Security Module

    The Trongate Security module is an essential part of the Trongate framework, included with every installation to help manage authentication, authorization, and other security-related concerns. It provides a centralized hub for handling security tasks, ensuring that only authorized users can access restricted areas and resources within an application. By utilizing the Trongate Security module, developers can implement robust security measures with ease, enhancing overall application security.

    Exploring the Code

    The main PHP class for the Trongate Security module is somewhat unusual because it only has one method. Here's the code for the entire Trongate_security class (Trongate_security.php):

    The _make_sure_allowed() method accepts two possible arguments:

    1. A required $scenario (string) argument
    2. An optional $params (array) argument

    The _make_sure_allowed() method contains a PHP switch statement. Each item within the switch statement represents a different web application scenario, and the class is provided with the expectation that users will add their own scenarios to the switch statement as their application grows.

    Understanding Scenarios

    An important concept for those working with the Trongate Security module is scenarios.

    A scenario, in the context of Trongate Security, refers to a general situation or context where usage of the module may be desirable to enforce access control. Scenarios are not tied directly to specific user levels but rather represent broader access contexts that may involve multiple user levels. Below is an assortment of possible scenarios that could be relevant for a web application:

    • Admin Panel: A restricted area for administrators to manage application settings.
    • Discussion Forum: A space where users of various levels (e.g., moderators, members, guests) can interact.
    • Private Members Area: A section of the application accessible only to registered members.
    • Customer Account Page: A personalized dashboard for customers to view their orders, update their profiles, submit technical support requests, etc.

    Scenarios allow developers to define access rules that apply to specific parts of the application, irrespective of the user levels involved. For instance, a discussion forum might be accessible to multiple user levels, such as moderators, members, and even guests, depending on the application's requirements. The scenario itself exists independently of user levels, serving as a general context for access control.


    Basic Example: Enforcing Access Control

    To enforce access control using the Trongate Security module, you can utilize the _make_sure_allowed() method from any other module. This method ensures that the user has the necessary permissions for a given scenario before proceeding.

    Example: Restricting Access to an Admin Panel

    The code below demonstrates how to restrict access to an admin panel by ensuring that only users with an "admin" user level can view it.

    Explanation

    • Line 5: Loads the trongate_security module, making its methods available for use.
    • Line 6: Invokes the _make_sure_allowed() method with the scenario name 'admin panel'. This ensures that only users with the appropriate permissions can proceed.
    • Lines 9-11: If the user is allowed, the admin panel view is loaded.

    The scenario of 'admin panel' is the default argument for the _make_sure_allowed() method. This means that the same result could be achieved without actively declaring a value of 'admin panel' for the first argument. For example:

    How the Trongate Administrators Module Interacts with Other Modules

    To better understand how the Trongate Security module integrates with other modules, let's delve into the mechanics of the following two lines of code (taken from Trongate_security.php):

    Purpose of These Lines

    These two lines of code delegate the mechanics of access control to another module - in this case, the 'Trongate Administrators' module.

    Sure enough, within the 'Trongate Administrators' module, there is a method that is also named _make_sure_allowed(). That method makes sure the user is logged in as an administrator by invoking the 'Trongate Tokens' module. If a valid token is found, it is returned. Otherwise, the user is redirected to a login page.


    Advanced Example: Granular Access Control in a Discussion Forum

    Let's consider a scenario where we have a discussion forum module that allows users to create, edit, and delete comments. However, we want to restrict the editing and deletion of comments to either the user who created the comment or users with administrative privileges.

    To achieve this, we can utilize the $params argument in the _make_sure_allowed() method to pass additional data, such as the record_id of the comment being modified and the specific action being performed.

    Example: Restricting Comment Editing and Deletion

    In this example, we'll assume we have a Forums class with a write_record() method that handles the updating or deletion of comments.

    Explanation

    • Line 5: The write_record() method takes an optional $id parameter, representing the ID of the comment being edited or deleted.
    • Line 7: We create a $params array containing the record_id key-value pair, where the value is the $id of the comment, and an action key-value pair specifying the action being performed (in this case, 'write record').
    • Line 8: We load the trongate_security module to access its methods.
    • Line 9: We invoke the _make_sure_allowed() method, passing the scenario as 'discussion forum' and the $params array containing the record_id and action.
    • Lines 11-12: If the user is allowed to edit or delete the comment based on the scenario, record_id, and action, the method proceeds with the update or deletion logic.

    Implementing a solution like this would require adding an additional case to the switch statement within the 'Trongate_security' class.

    By leveraging the $params argument and including the action property, we can enforce even more granular access control rules within the discussion forum module. This allows us to handle different actions, such as editing or deleting comments, with specific permissions based on the user's role or ownership of the comment.


    Addressing Circular Dependency Concerns

    At first glance, the pattern employed by the Trongate Security module might raise concerns about circular dependencies. For example, it allows for a scenario where 'Module A' invokes 'Module B', and then 'Module B' invokes a method from within 'Module A'. This circular nature of the code flow could potentially lead to confusion and make the codebase harder to understand.

    However, it's important to note that using the Trongate Security module is not a strict requirement. Developers have the option to bypass it altogether, for example, by directly calling the _make_sure_allowed() method from the 'Trongate Administrators' module instead. However, while this approach may seem simpler and more straightforward, it comes with its own set of drawbacks.

    Beware of Spaghetti Code!

    Directly calling the _make_sure_allowed() method from the 'Trongate Administrators' module would result in a codebase that is more rigid and less adaptable to change. As the application evolves and grows, the rules for managing access to various areas, such as the admin panel, may need to be modified or expanded. Having security-related code scattered throughout different modules - with no common point of entry - can result in a codebase that is challenging to maintain and extremely difficult to upgrade.

    The Benefits Of The Trongate Security Module

    By channeling security-related functionality through the Trongate Security module, developers gain a centralized hub for handling all security matters. This centralization promotes code reusability, maintainability, and scalability. It allows for a more flexible and modular approach to managing access control across the entire application.

    While the Trongate Security module's approach may introduce some level of indirection and potential for circular dependencies, the benefits it provides in terms of code organization and maintainability outweigh the concerns. By consolidating security-related code into a dedicated module, developers can ensure that access control is handled consistently and can easily adapt to changing requirements.


    The API Explorer

    An Introduction To The Trongate API Explorer

    With Trongate's API Explorer, it's easy to create secure, custom API endpoints in record time.

    Screenshot
    API Explorer screenshot.

    The YouTube tutorial below provides guidance on how to create your own custom API endpoints using the API Explorer.

    YouTube tutorial

    API Terminology Explained

    Before moving forward, let's clarify some important terminology.

    Endpoint

    The word 'endpoint' means a URL (i.e., a website address) that has been designed to accept and process HTTP requests. Strictly speaking, an endpoint could be URL that loads up a webpage - perhaps with pictures, JavaScript and HTML. Or, an endpoint could simply return text-based data - perhaps in the form of XML, JSON or comma separated values (CSV format).

    HTTP

    HTTP stands for Hypertext Transfer Protocol and is the dominant method of communication by which information is sent across the internet.

    HTTP Request

    An 'HTTP request' is a packet of data that has been transmitted to an endpoint. Different types of HTTP request include (but are not limited to):

    • GET
    • POST
    • PUT
    • DELETE

    HTTP Response

    An 'HTTP response' is a server's response to an inbound HTTP request. Typically, a server's response will contain (but not be limited to) two key parameters.

    • an HTTP response status code - check this webpage for details.
    • an HTTP response body - which is a body of text that can be read by a browser and translated into entities like; HTML pages, JSON objects, XML documents and more.

    In-Built API Endpoint

    An in-built API endpoint is the phrase we'll be using, in the Trongate documentation, to refer to an endpoint that comes shipped with all installations of the Trongate framework. In other words, it's an assortment of endpoints that have already been coded into the framework and you can start using them immediately. Trongate's in-built endpoints assist with executing common database related tasks such as create, read, update and delete.

    Custom API Endpoint

    A custom API endpoint is a bespoke endpoint that has been custom built - by a developer - to serve a particular purpose. Custom endpoints are, by definition, not included with the Trongate framework.


    Optional Additional Parameters

    When you are creating your API settings file, there are a range of optional parameters that you can declare for each of your endpoints. The optional parameters are as follows:

    Required Fields

    • required_fields: This will be an array of key value pairs, with each pair representing the name and the label for a required field. The code below declares an endpoint that has 'id' as a required field:

    If you have a close look at the url_segments, above, you'll notice that the final segment is for 'id' and it's inside curly brackets. When you see this type of pattern in the URL segments, it means that we are expecting a value (in this case, 'id') to be passed in via the URL.

    Before Hook

    • beforeHook: The beforeHook parameter can be used to declare a method that should intercept the inbound HTTP request before allowing the request to reach the main endpoint method. Below is an example of an endpoint that has a beforeHook property of '_prep_password'. This endpoint will intercept the inbound HTTP request and run it through a method, on the loaded module, named _prep_password().

    The underscore at the start of _prep_password() means that the method is 'protected'. In other words, it cannot be invoked by going to a particular URL.

    After Hook

    • afterHook: The afterHook parameter can be used to declare a method that should receive the outbound server response before the response has been served to the end user. Below is an example of an endpoint that has an afterHook property of '_prep_date'. This endpoint will intercept the outbound HTTP response and run it through a method, on the loaded module, named _prep_date(). Our visualisation here would be a scenario where a date/time fetched from a database, such as a Unix timestamp, is to be formatted before being presented to the end user.

    Again, you can see that the after hook's method name begins with an underscore. This means that the method is protected.

    Before hooks and after hooks are important. Let's explore them in a little more detail!


    Using After Hooks

    The goal of an after hook is to intercept an outbound HTTP response and then do something with it before the server issues a response to the end user.

    An after hook can be added onto an API endpoint by adding the 'afterHook' property onto an endpoint's settings. Below is an example of an after hook called '_prep_date' being declared for a 'Get' endpoint. This setting (which would be stored on an api.json file) would invoke a protected method named _prep_date() whenever the server is about to issue a response, after having invoked the 'Get' endpoint.

    The Outbound Response Array

    All the information that gets passed into an after hook comes in the form of an array. We can call this array the 'outbound response array'.

    The general structure of an after hook will facilitate taking in an outbound response array, doing something with it, then potentially returning the array. If we represent our outbound response array with the variable $output, then our after hook methods can take the following form:

    Diving Deeper

    By using PHP's built-in var_dump() method, in combination with a die statement, it's possible to explore the contents of an outbound response array.

    This will reveal the following three parameters:

    • token - If a Trongate security token was passed into the header of the inbound HTTP request, then the value of the security token will be assigned to the 'token' property of the outbound response array. Therefore, to access the token, we could say:
    • body - The body is a string of text that is to be issued by the server. Often, though not always, the body can be JSON decoded into an array of key-value pairs. So, if 'id' with a value of '4' was being issued by the server, we could access the id with:
    • code - Finally, our outbound response array will contain a 'code' parameter. The code parameter will be a numeric value representing the HTTP response status code from the server. To display the HTTP response server code, using PHP, we could say:
    Learn about HTTP response status codes here.

    Modifying The Outbound Response Array

    Having access to the outbound HTTP response array means that we have the ability to manipulate the response before it gets served to the end user.

    There are lots of situations where this might be useful. One example would be to format dates.

    EXAMPLE

    Let's imagine that you have an API endpoint that queries a database table and returns information about a record that's stored in the database table.

    This could be something like a members table, and it's possible that the response body could take the form of a string of text that could be converted into a JSON object with the following properties:

    As you can see, 'date_joined' is an integer that's ten digits in length. When we see this kind of value in PHP, we can be fairly confident that we're being issued with a Unix timestamp. However, before sending the response to the end user, we may wish to use an after hook to intercept the response and format the date so that it's presented in a more user-friendly and readable manner.

    Below is an example of an after hook that could modify a response body so that 'date_joined' is nicely formatted.

    The code above would modify the HTTP response body, giving us:


    Best Practices

    Hiding The Admin Login URL

    The default admin login URL for Trongate websites is made up of a base URL followed by trongate_administrators/login. However, a base URL followed by tg-admin will also work. This shorter URL is made possible by the custom_routing.php file, which is inside the config directory.

    If somebody tried to hack into your admin panel then you can be sure that they would focus on entry points such as your default admin login and the URL for receiving post requests from your admin login. Of course, if a malicious user knows your login URL for your admin panel then it does not mean that they have successfully hacked your site. It merely means that they have a good starting point to carry out their diabolical deeds.

    With this in mind, it's a good practice to make your login URL secret and - hopefully - impossible to guess. Doing this is would make life much more difficult for a would-be hacker.

    How To Create A Secret Admin Login URL

    STEP 1: Think of a word that is difficult to guess but meaningful and easy to remember for the site owner.

    This could be an entirely made-up word or a word that's made of a combination of two words. Avoid spaces or any unusual characters. For the moment, let's assume that our secret word is going to be fantasticola. This means that to log into our site admin panel, the URL should be:

    The base URL, followed by 'fantasticola', e.g., example.com/fantasticola

    STEP 2: Modify custom_routing.php

    The next step is to modify your custom_routing.php file, which is inside your config directory. Simply replace all instances of 'tg-admin' with 'fantasticola' (or whatever your secret world may be).

    For example, here's some sample code from custom_routing.php:

    The code above would be changed to:

    Step 3: Modify and uncomment the secret login declaration on 'Trongate_administrators.php'

    Finally, open up Trongate_administrators.php. If you are using version 1.3.3031 or higher then around line 5 could should see the following code:

    Uncomment this line and change the secret login segment to your chosen word. For example:

    That's it!

    If you have followed these instructions and you are using Trongate version 1.3.3031 or higher then the trongate_administrators/login page will produce a 404 error. In order to access your admin login URL, users would have to go to your base URL followed by your secret word.


    Pre-Launch Checklist

    Here's a little checklist that you can run through before launching your next big Trongate web app.

    Check 1

    When you launch your web app, make sure your main config file (config.php) does not have 'ENV' set to 'dev'. The recommendation is to change the ENV setting to 'live' or 'production' or any word that is not 'DEV' or 'dev'.

    Never launch a Trongate web app with the environment set to 'dev'.

    Check 2

    Change the password to your admin panels to something that is difficult or impossible to guess.

    The admin panels that are produced by the Trongate Desktop App all have a default username of 'admin' and a default password of 'admin'. So, it's really important to make sure you don't have 'admin' as your password.

    Check 3

    Improve your site security by hiding your main admin login URL.

    Check 4

    Make sure your BASE_URL is set to the full base URL that corresponds with your live website homepage. For example, 'https://trongate.io/'.

    Check 5

    Make sure your database.php file contains database settings that relate to your live database and not your localhost.

    Check 6

    Make sure your site_owner.php file contains values that relate to the person or organisation who own the site.

    Check 7

    Don't forget to set up at least one live email account and run some two-way tests to make sure you're able to send and receive emails. The mechanics of setting up email accounts is beyond the scope of this documentation. However, it's always a good idea to talk to your web hosts and see if they have any recommendations that might prove to be helpful.

    Check 8

    And finally... when you're testing a live website for the first time, it's a very good idea to use a different computer from the one that you built on. If that's not possible then switch off the PHP engine on your localhost. One of the most common mistakes developers make when they launch is they leave 'localhost' paths in their code. Switching off localhost makes those kinds of mistakes very easy to spot.

    BONUS CHECK

    Most of the people who visit your website will probably be using mobile devices. So, be sure to test your site on a mobile device such as a smartphone.

    If you use GIT, be extra careful to avoid uploading a commit that contains your live website settings. Every day, websites get hacked because of developers accidentally uploading passwords and other credentials to GitHub.
    Git users - for maximum security, it is recommended to have your entire config directory declared in your .gitignore file. Furthermore, when uploading your config files, it's a good practice to use a basic FTP application like Filezilla. The uploading of site settings is safest when it is handled manually and beyond the reach of third-party software or websites. When it comes to uploading config files and other sensitive data, think old school. That means no GIT. No exotic third-party software. Just basic, simple FTP software.

    Complete API Reference Guide

    The Trongate PHP Framework Trongate CSS Trongate MX


    Class Reference

    The API Class

    explorer()

    function explorer(): void

    Description

    Renders the API explorer interface for development purposes. This method provides a user interface for exploring and testing API endpoints during development. If the application is not in 'dev' mode, the API explorer will be disabled with a 403 Forbidden response. The method attempts to identify the target database table by reading the third segment of the URL. If a table with a name matching the third URL segment is not found in the database, a 404 Not Found response will be returned.

    Parameters

    Parameter Type Description Default Required
    This method does not take any parameters.

    Return Value

    Type Description
    void This method does not return anything directly, but it outputs HTML content for the API explorer.

    Example Usage

    To load the API Explorer, navigate to the BASE_URL followed by 
    api/explorer/[target_table_name].

    get_status_codes()

    public function get_status_codes(?int $status_code = null): array|string|null

    Description

    Retrieves HTTP status codes and their descriptions. This method provides a mapping of HTTP status codes to their respective descriptions. If a specific status code is provided, the corresponding description is returned as a string. If no status code is provided, an array containing all HTTP status codes and descriptions is returned. If the provided status code is not found, "Unknown HTTP Response Code" is returned.

    Parameters

    Parameter Type Description Default Required
    $status_code int|null The HTTP status code to retrieve the description for. Defaults to null. null No

    Return Value

    Type Description
    array|string|null If a specific status code is provided, returns its description as a string. If no status code is provided, returns an array of all HTTP status codes and descriptions. If the provided status code is not found, returns "Unknown HTTP Response Code".

    Example Usage

    // Example Usage not available for this method

    The File Class

    copy()

    function copy(string $source_path, string $destination_path): bool

    Description

    Copies a file from a source location to a specified destination. This method ensures the source file exists and is accessible, validates the source path against predefined security rules, and performs the copy operation. If the operation succeeds, it returns true; otherwise, it throws an exception.

    How It Works:

    • The method first validates the $source_path to ensure it is not restricted by security rules (e.g., accessing sensitive directories like config or engine).
    • It checks if the source file exists at the specified path.
    • If both checks pass, it attempts to copy the file to the $destination_path.
    • If the copy operation fails, an exception is thrown with a descriptive error message.

    Note: Ensure the source file exists and the destination path is writable. If the source file is restricted or inaccessible, or if the destination path is invalid, the method will throw an exception.

    Parameters

    Parameter Type Description Default
    $source_path string The absolute or relative path to the source file that needs to be copied. The path must pass security validation. N/A
    $destination_path string The absolute or relative path to the destination where the file will be copied. The destination directory must be writable. N/A

    Exceptions

    Throws an Exception if:

    • The $source_path is restricted by security rules (e.g., accessing sensitive directories).
    • The source file does not exist at the specified path.
    • The copy operation fails (e.g., due to insufficient permissions or an invalid destination path).

    Return Value

    Type Description
    bool Returns true if the file is successfully copied. If the operation fails, an exception is thrown instead of returning false.

    Example Usage

    // Example 1: Copying a file to a new location
    try {
        $file = new File();
        $success = $file->copy('/path/to/source/file.txt', '/path/to/destination/file.txt');
        if ($success) {
            echo "File copied successfully.";
        }
    } catch (Exception $e) {
        echo "Error: " . $e->getMessage();
    }
    // Example 2: Copying multiple files in a loop
    $files_to_copy = [
        '/path/to/source/file1.txt' => '/path/to/destination/file1.txt',
        '/path/to/source/file2.jpg' => '/path/to/destination/file2.jpg',
    ];
    
    $file = new File();
    foreach ($files_to_copy as $source => $destination) {
        try {
            $file->copy($source, $destination);
            echo "Copied $source to $destination successfully.\n";
        } catch (Exception $e) {
            echo "Failed to copy $source: " . $e->getMessage() . "\n";
        }
    }
    // Example 3: Handling restricted paths
    try {
        $file = new File();
        $file->copy('/path/to/restricted/file.txt', '/path/to/destination/file.txt');
    } catch (Exception $e) {
        echo "Error: " . $e->getMessage(); // Output: "Access to this path is restricted: /path/to/restricted/file.txt"
    }

    Best Practices

    • Validate Paths: Always ensure the source and destination paths are valid and accessible before calling this method.
    • Handle Exceptions: Use try-catch blocks to handle exceptions gracefully, especially when copying multiple files or working with user-provided paths.
    • Check Permissions: Ensure the destination directory is writable to avoid copy failures.
    • Use Secure Paths: Avoid copying files to or from restricted directories (e.g., config, engine) to maintain application security.

    create_directory()

    function create_directory(string $directory_path, int $permissions = 0755, bool $recursive = true): bool

    Description

    Creates a new directory at the specified path. This method allows for the creation of nested directories if they do not exist. It also ensures the directory path is valid and accessible based on predefined security rules.

    How It Works:

    • The method first checks if the directory already exists at the specified path. If it does, it returns true immediately.
    • It validates the $directory_path to ensure it is not restricted by security rules (e.g., accessing sensitive directories like config or engine).
    • If the path is valid, it attempts to create the directory with the specified permissions and recursive flag.
    • If the directory creation fails, an exception is thrown with a descriptive error message.

    Note: Ensure the directory path is valid and does not conflict with restricted paths. If the directory already exists, the method will return true without attempting to create it again.

    Parameters

    Parameter Type Description Default
    $directory_path string The absolute or relative path where the directory should be created. The path must pass security validation. N/A
    $permissions int The permissions to set for the directory, in octal notation (e.g., 0755). This determines the access rights for the directory. 0755
    $recursive bool Whether to create nested directories if necessary. If set to true, all required parent directories will also be created. true

    Exceptions

    Throws an Exception if:

    • The $directory_path is restricted by security rules (e.g., accessing sensitive directories).
    • The directory cannot be created (e.g., due to insufficient permissions or an invalid path).

    Return Value

    Type Description
    bool Returns true if the directory is successfully created or already exists. If the operation fails, an exception is thrown instead of returning false.

    Example Usage

    // Example 1: Creating a directory with default permissions and recursive flag
    try {
        $file = new File();
        $success = $file->create_directory('/path/to/new_directory');
        if ($success) {
            echo "Directory created or already exists.";
        }
    } catch (Exception $e) {
        echo "Error: " . $e->getMessage();
    }
    // Example 2: Creating a directory with custom permissions and non-recursive flag
    try {
        $file = new File();
        $success = $file->create_directory('/path/to/new_directory', 0777, false);
        if ($success) {
            echo "Directory created or already exists.";
        }
    } catch (Exception $e) {
        echo "Error: " . $e->getMessage();
    }
    // Example 3: Handling restricted paths
    try {
        $file = new File();
        $file->create_directory('/path/to/restricted/directory');
    } catch (Exception $e) {
        echo "Error: " . $e->getMessage(); // Output: "Access to this path is restricted: /path/to/restricted/directory"
    }

    Best Practices

    • Validate Paths: Always ensure the directory path is valid and does not conflict with restricted paths before calling this method.
    • Use Recursive Flag: Set $recursive to true when creating nested directories to avoid errors due to missing parent directories.
    • Set Appropriate Permissions: Use secure permissions (e.g., 0755) to prevent unauthorized access to the directory.
    • Handle Exceptions: Use try-catch blocks to handle exceptions gracefully, especially when working with user-provided paths.

    delete()

    function delete(string $file_path): bool

    Description

    Deletes a file from the filesystem. This method ensures the file exists, validates the file path against predefined security rules, and attempts to delete the file. If the deletion is successful, it returns true; otherwise, it throws an exception.

    How It Works:

    • The method first validates the $file_path to ensure it is not restricted by security rules (e.g., accessing sensitive directories like config or engine).
    • It checks if the file exists at the specified path. If the file does not exist, an exception is thrown.
    • If the file exists and the path is valid, it attempts to delete the file using the unlink() function.
    • If the deletion fails (e.g., due to insufficient permissions or a locked file), an exception is thrown with a descriptive error message.

    Note: Ensure the file exists and the path is valid before calling this method. If the file is restricted or inaccessible, or if the deletion fails, an exception will be thrown.

    Parameters

    Parameter Type Description Default
    $file_path string The absolute or relative path to the file that needs to be deleted. The path must pass security validation. N/A

    Exceptions

    Throws an Exception if:

    • The $file_path is restricted by security rules (e.g., accessing sensitive directories).
    • The file does not exist at the specified path.
    • The file cannot be deleted (e.g., due to insufficient permissions or a locked file).

    Return Value

    Type Description
    bool Returns true if the file is successfully deleted. If the operation fails, an exception is thrown instead of returning false.

    Example Usage

    // Example 1: Deleting a single file
    try {
        $file = new File();
        $success = $file->delete('/path/to/file.txt');
        if ($success) {
            echo "File deleted successfully.";
        }
    } catch (Exception $e) {
        echo "Error: " . $e->getMessage();
    }
    // Example 2: Deleting multiple files in a loop
    $files_to_delete = [
        '/path/to/file1.txt',
        '/path/to/file2.jpg',
        '/path/to/file3.log',
    ];
    
    $file = new File();
    foreach ($files_to_delete as $file_path) {
        try {
            $file->delete($file_path);
            echo "Deleted $file_path successfully.\n";
        } catch (Exception $e) {
            echo "Failed to delete $file_path: " . $e->getMessage() . "\n";
        }
    }
    // Example 3: Handling restricted paths
    try {
        $file = new File();
        $file->delete('/path/to/restricted/file.txt');
    } catch (Exception $e) {
        echo "Error: " . $e->getMessage(); // Output: "Access to this file is restricted: /path/to/restricted/file.txt"
    }

    Best Practices

    • Validate Paths: Always ensure the file path is valid and does not conflict with restricted paths before calling this method.
    • Check File Existence: Verify the file exists before attempting to delete it, or handle the exception gracefully.
    • Handle Exceptions: Use try-catch blocks to handle exceptions, especially when deleting multiple files or working with user-provided paths.
    • Ensure Permissions: Make sure the script has sufficient permissions to delete the file.
    • Log Deletions: For auditing purposes, log successful and failed deletion attempts.

    download()

    function download(string $file_path, bool $as_attachment = true): void

    Description

    Initiates a file download or displays it inline in the browser. This method prepares and sends the appropriate HTTP headers to either force a file download or display the file directly in the browser, depending on the $as_attachment parameter.

    How It Works:

    • The method first validates the $file_path to ensure it is not restricted by security rules (e.g., accessing sensitive directories like config or engine).
    • It checks if the file exists and is readable. If the file is inaccessible or does not exist, an exception is thrown.
    • If the file is valid, it clears any output buffers to prevent interference with the file download.
    • It sets the appropriate HTTP headers based on the $as_attachment parameter:
      • If $as_attachment is true, the browser will prompt the user to download the file.
      • If $as_attachment is false, the file will be displayed inline in the browser (if supported by the file type).
    • The file is then read and sent to the output buffer using readfile().
    • The script terminates immediately after sending the file to prevent additional output.

    Note: Ensure the file exists and is accessible before calling this method. If the file is restricted, inaccessible, or does not exist, an exception will be thrown.

    Parameters

    Parameter Type Description Default
    $file_path string The absolute or relative path to the file that needs to be downloaded or displayed. The path must pass security validation. N/A
    $as_attachment bool Determines whether the file should be downloaded as an attachment (true) or displayed inline (false). true

    Exceptions

    Throws an Exception if:

    • The $file_path is restricted by security rules (e.g., accessing sensitive directories).
    • The file does not exist at the specified path.
    • The file is not readable or accessible.

    Return Value

    void

    This method does not return a value. It sends the file to the browser and terminates the script.

    Example Usage

    // Example 1: Force downloading a file
    try {
        $file = new File();
        $file->download('/path/to/file.pdf');
    } catch (Exception $e) {
        echo "Error: " . $e->getMessage();
    }
    // Example 2: Displaying a file inline in the browser
    try {
        $file = new File();
        $file->download('/path/to/image.jpg', false);
    } catch (Exception $e) {
        echo "Error: " . $e->getMessage();
    }
    // Example 3: Handling restricted paths
    try {
        $file = new File();
        $file->download('/path/to/restricted/file.txt');
    } catch (Exception $e) {
        echo "Error: " . $e->getMessage(); // Output: "Access to this file is restricted: /path/to/restricted/file.txt"
    }

    Best Practices

    • Validate Paths: Always ensure the file path is valid and does not conflict with restricted paths before calling this method.
    • Check File Accessibility: Verify the file exists and is readable before attempting to download or display it.
    • Use Appropriate Headers: Set the $as_attachment parameter based on the desired behavior (download or inline display).
    • Handle Exceptions: Use try-catch blocks to handle exceptions gracefully, especially when working with user-provided paths.
    • Terminate Script: Ensure no additional output is sent after calling this method, as it terminates the script to prevent interference with the file download.

    exists()

    function exists(string $path): bool

    Description

    Checks whether a file or directory exists at the specified path. This method is a simple wrapper around PHP's built-in file_exists() function, providing a convenient way to verify the existence of files or directories within the application.

    How It Works:

    • The method takes a $path parameter, which can be an absolute or relative path to a file or directory.
    • It uses PHP's file_exists() function to check if the file or directory exists at the specified path.
    • If the file or directory exists, it returns true; otherwise, it returns false.

    Note: This method does not validate the path against security rules or check if the file or directory is readable or writable. It only checks for existence.

    Parameters

    Parameter Type Description Default
    $path string The absolute or relative path to the file or directory to check. This can be a path to a file, a directory, or a symbolic link. N/A

    Return Value

    Type Description
    bool Returns true if the file or directory exists at the specified path; otherwise, returns false.

    Example Usage

    // Example 1: Checking if a file exists
    $file_path = '/path/to/your/file.txt';
    if ($this->file->exists($file_path)) {
        echo "The file exists!";
    } else {
        echo "The file does not exist!";
    }
    // Example 2: Checking if a directory exists
    $directory_path = '/path/to/your/directory';
    if ($this->file->exists($directory_path)) {
        echo "The directory exists!";
    } else {
        echo "The directory does not exist!";
    }
    // Example 3: Using exists() in conditional logic
    $path = '/path/to/resource';
    if ($this->file->exists($path)) {
        // Perform operations on the existing file or directory
        echo "Resource found!";
    } else {
        // Handle the case where the resource does not exist
        echo "Resource not found!";
    }

    Best Practices

    • Validate Paths: While this method checks for existence, ensure the path is valid and does not conflict with restricted paths before performing further operations.
    • Combine with Other Checks: Use this method in conjunction with other checks (e.g., is_readable() or is_writable()) to ensure the file or directory is accessible and usable.
    • Handle Edge Cases: Be mindful of symbolic links and edge cases where the path might exist but is inaccessible due to permissions.
    • Use for Pre-Validation: Use this method to pre-validate paths before performing operations like reading, writing, or deleting files or directories.

    info()

    function info(string $file_path): array

    Description

    Retrieves metadata about a file, including its name, size, last modification time, permissions, MIME type, and human-readable size. This method is useful for gathering detailed information about a file for logging, debugging, or display purposes.

    How It Works:

    • The method first checks if the file exists at the specified path. If the file does not exist, an exception is thrown.
    • If the file exists, it retrieves the following metadata:
      • File Name: The base name of the file (e.g., file.txt).
      • Size: The size of the file in bytes.
      • Human-Readable Size: The size of the file formatted in a human-readable format (e.g., 1.23 MB).
      • Modified Time: The last modification time of the file as a Unix timestamp.
      • Permissions: The file permissions in octal notation (e.g., 0644).
      • Readable Permissions: The file permissions formatted for readability (e.g., 0644).
      • MIME Type: The MIME type of the file (e.g., text/plain).
    • The metadata is returned as an associative array.

    Note: Ensure the file exists and is accessible before calling this method. If the file does not exist, an exception will be thrown.

    Parameters

    Parameter Type Description Default
    $file_path string The absolute or relative path to the file for which metadata should be retrieved. N/A

    Return Value

    Type Description
    array An associative array containing the following metadata:
    • file_name: (string) The base name of the file.
    • size: (int) The size of the file in bytes.
    • human_readable_size: (string) The size of the file in a human-readable format.
    • modified_time: (int) The last modification time as a Unix timestamp.
    • permissions: (int) The file permissions in octal notation.
    • readable_permissions: (string) The file permissions formatted for readability.
    • mime_type: (string) The MIME type of the file.

    Exceptions

    Throws an Exception if:

    • The file does not exist at the specified path.

    Example Usage

    // Example 1: Retrieving metadata for a file
    try {
        $file = new File();
        $file_info = $file->info('/path/to/file.txt');
        print_r($file_info);
        /*
        Output:
        Array
        (
            [file_name] => file.txt
            [size] => 1024
            [human_readable_size] => 1.00 KB
            [modified_time] => 1698765432
            [permissions] => 33188
            [readable_permissions] => 0644
            [mime_type] => text/plain
        )
        */
    } catch (Exception $e) {
        echo "Error: " . $e->getMessage();
    }
    // Example 2: Displaying human-readable file size
    try {
        $file = new File();
        $file_info = $file->info('/path/to/large_file.zip');
        echo "File size: " . $file_info['human_readable_size']; // Output: "File size: 123.45 MB"
    } catch (Exception $e) {
        echo "Error: " . $e->getMessage();
    }
    // Example 3: Checking file permissions
    try {
        $file = new File();
        $file_info = $file->info('/path/to/protected_file.txt');
        echo "File permissions: " . $file_info['readable_permissions']; // Output: "File permissions: 0644"
    } catch (Exception $e) {
        echo "Error: " . $e->getMessage();
    }

    Best Practices

    • Validate Paths: Ensure the file path is valid and does not conflict with restricted paths before calling this method.
    • Handle Exceptions: Use try-catch blocks to handle exceptions gracefully, especially when working with user-provided paths.
    • Use for Debugging: This method is useful for debugging or logging file-related issues, such as permission errors or missing files.
    • Combine with Other Methods: Use this method in conjunction with other file operations (e.g., read(), write()) to ensure the file is accessible and has the expected metadata.

    list_directory()

    function list_directory(string $directory_path, bool $recursive = false): array

    Description

    Lists files and directories within a specified directory. This method returns an array containing the names of files and directories within the specified directory. It also supports recursive listing, which includes all subdirectories and their contents.

    How It Works:

    • The method first validates the $directory_path to ensure it is not restricted by security rules (e.g., accessing sensitive directories like config or engine).
    • It checks if the specified path is a valid directory. If not, an exception is thrown.
    • It iterates through the contents of the directory using PHP's DirectoryIterator.
    • If the $recursive flag is set to true, it recursively lists the contents of subdirectories and stores them as nested arrays.
    • If the $recursive flag is false, it returns a flat array of file and directory names.

    Note: Ensure the directory exists and is accessible before calling this method. If the directory does not exist or is restricted, an exception will be thrown.

    Parameters

    Parameter Type Description Default
    $directory_path string The absolute or relative path to the directory whose contents are to be listed. The path must pass security validation. N/A
    $recursive bool Determines whether the listing should be recursive. If true, subdirectories and their contents are included in the result. false

    Return Value

    Type Description
    array An array containing the names of files and directories within the specified directory. If $recursive is true, subdirectories are represented as nested arrays.

    Exceptions

    Throws an Exception if:

    • The $directory_path is restricted by security rules.
    • The specified path does not exist or is not a directory.

    Example Usage

    // Example 1: Non-recursive listing
    try {
        $file = new File();
        $contents = $file->list_directory('/path/to/directory');
        print_r($contents);
        /*
        Output:
        Array
        (
            [0] => file1.txt
            [1] => file2.jpg
            [2] => subdirectory
        )
        */
    } catch (Exception $e) {
        echo "Error: " . $e->getMessage();
    }
    // Example 2: Recursive listing
    try {
        $file = new File();
        $contents = $file->list_directory('/path/to/directory', true);
        print_r($contents);
        /*
        Output:
        Array
        (
            [0] => file1.txt
            [1] => file2.jpg
            [2] => subdirectory => Array
                (
                    [0] => subfile1.txt
                    [1] => subfile2.jpg
                )
        )
        */
    } catch (Exception $e) {
        echo "Error: " . $e->getMessage();
    }
    // Example 3: Handling restricted paths
    try {
        $file = new File();
        $contents = $file->list_directory('/path/to/restricted/directory');
    } catch (Exception $e) {
        echo "Error: " . $e->getMessage(); // Output: "Access to this path is restricted: /path/to/restricted/directory"
    }

    Best Practices

    • Validate Paths: Ensure the directory path is valid and does not conflict with restricted paths before calling this method.
    • Use Recursive Flag Wisely: Use the $recursive flag only when necessary, as it can significantly increase the size of the returned array for directories with many subdirectories.
    • Handle Exceptions: Use try-catch blocks to handle exceptions gracefully, especially when working with user-provided paths.
    • Optimize for Large Directories: For directories with a large number of files or subdirectories, consider using alternative methods (e.g., pagination) to avoid performance issues.
    • Combine with Other Methods: Use this method in conjunction with other file operations (e.g., info(), delete()) to perform bulk operations on listed files or directories.

    move()

    function move(string $source_path, string $destination_path): bool

    Description

    Moves a file from one location to another. This method ensures the source file exists, validates the source path against predefined security rules, and attempts to move the file to the specified destination. If the move operation is successful, it returns true; otherwise, it throws an exception.

    How It Works:

    • The method first validates the $source_path to ensure it is not restricted by security rules (e.g., accessing sensitive directories like config or engine).
    • It checks if the source file exists at the specified path. If the file does not exist, an exception is thrown.
    • If the source file exists and the path is valid, it attempts to move the file to the $destination_path using PHP's rename() function.
    • If the move operation fails (e.g., due to insufficient permissions or an invalid destination path), an exception is thrown with a descriptive error message.

    Note: Ensure the source file exists and the destination path is writable before calling this method. If the source file is restricted or inaccessible, or if the move operation fails, an exception will be thrown.

    Parameters

    Parameter Type Description Default
    $source_path string The absolute or relative path to the source file that needs to be moved. The path must pass security validation. N/A
    $destination_path string The absolute or relative path to the destination where the file will be moved. The destination directory must be writable. N/A

    Exceptions

    Throws an Exception if:

    • The $source_path is restricted by security rules.
    • The source file does not exist at the specified path.
    • The move operation fails (e.g., due to insufficient permissions or an invalid destination path).

    Return Value

    Type Description
    bool Returns true if the file is successfully moved. If the operation fails, an exception is thrown instead of returning false.

    Example Usage

    // Example 1: Moving a file to a new location
    try {
        $file = new File();
        $success = $file->move('/path/to/source/file.txt', '/path/to/destination/file.txt');
        if ($success) {
            echo "File moved successfully.";
        }
    } catch (Exception $e) {
        echo "Error: " . $e->getMessage();
    }
    // Example 2: Moving multiple files in a loop
    $files_to_move = [
        '/path/to/source/file1.txt' => '/path/to/destination/file1.txt',
        '/path/to/source/file2.jpg' => '/path/to/destination/file2.jpg',
    ];
    
    $file = new File();
    foreach ($files_to_move as $source => $destination) {
        try {
            $file->move($source, $destination);
            echo "Moved $source to $destination successfully.\n";
        } catch (Exception $e) {
            echo "Failed to move $source: " . $e->getMessage() . "\n";
        }
    }
    // Example 3: Handling restricted paths
    try {
        $file = new File();
        $file->move('/path/to/restricted/file.txt', '/path/to/destination/file.txt');
    } catch (Exception $e) {
        echo "Error: " . $e->getMessage(); // Output: "Access to this path is restricted: /path/to/restricted/file.txt"
    }

    Best Practices

    • Validate Paths: Always ensure the source and destination paths are valid and do not conflict with restricted paths before calling this method.
    • Check File Existence: Verify the source file exists before attempting to move it, or handle the exception gracefully.
    • Ensure Permissions: Make sure the script has sufficient permissions to read the source file and write to the destination directory.
    • Handle Exceptions: Use try-catch blocks to handle exceptions, especially when moving multiple files or working with user-provided paths.
    • Backup Important Files: Before moving critical files, consider creating backups to prevent data loss in case of errors.

    read()

    function read(string $file_path): string

    Description

    Reads the contents of a file and returns it as a string. This method ensures the file exists, validates the file path against predefined security rules, and reads the file's contents using PHP's file_get_contents() function.

    How It Works:

    • The method first validates the $file_path to ensure it is not restricted by security rules (e.g., accessing sensitive directories like config or engine).
    • It checks if the file exists at the specified path. If the file does not exist, an exception is thrown.
    • If the file exists and the path is valid, it attempts to read the file's contents using file_get_contents().
    • If the read operation fails (e.g., due to insufficient permissions or an invalid file), an exception is thrown with a descriptive error message.
    • If successful, the file's contents are returned as a string.

    Note: Ensure the file exists and is accessible before calling this method. If the file is restricted, inaccessible, or does not exist, an exception will be thrown.

    Parameters

    Parameter Type Description Default
    $file_path string The absolute or relative path to the file to be read. The path must pass security validation. N/A

    Exceptions

    Throws an Exception if:

    • The $file_path is restricted by security rules.
    • The file does not exist at the specified path.
    • The file cannot be read (e.g., due to insufficient permissions or an invalid file).

    Return Value

    Type Description
    string Returns the contents of the file as a string. If the operation fails, an exception is thrown instead of returning a value.

    Example Usage

    // Example 1: Reading a text file
    try {
        $file = new File();
        $content = $file->read('/path/to/file.txt');
        echo $content;
    } catch (Exception $e) {
        echo "Error: " . $e->getMessage();
    }
    // Example 2: Reading a JSON file and decoding it
    try {
        $file = new File();
        $json_content = $file->read('/path/to/data.json');
        $data = json_decode($json_content, true);
        print_r($data);
    } catch (Exception $e) {
        echo "Error: " . $e->getMessage();
    }
    // Example 3: Handling restricted paths
    try {
        $file = new File();
        $content = $file->read('/path/to/restricted/file.txt');
    } catch (Exception $e) {
        echo "Error: " . $e->getMessage(); // Output: "Access to this file is restricted: /path/to/restricted/file.txt"
    }

    Best Practices

    • Validate Paths: Always ensure the file path is valid and does not conflict with restricted paths before calling this method.
    • Check File Existence: Verify the file exists before attempting to read it, or handle the exception gracefully.
    • Handle Large Files: For large files, consider using alternative methods (e.g., streaming) to avoid memory issues.
    • Use Appropriate Encoding: If the file contains non-UTF-8 data, ensure proper encoding handling when processing the content.
    • Handle Exceptions: Use try-catch blocks to handle exceptions gracefully, especially when working with user-provided paths.

    upload()

    public function upload(array $config): array

    Description

    Handles the file upload process with specified configuration. This method validates the upload configuration, processes the uploaded file, performs security checks, generates a secure filename, and moves the file to the target destination. It returns an array containing details about the uploaded file.

    How It Works:

    • The method first validates the upload configuration, ensuring all required options are provided and valid.
    • It checks if a file was uploaded and validates the file's integrity and security (e.g., MIME type, memory requirements).
    • A secure filename is generated, either randomly or based on the original filename, depending on the configuration.
    • The file is moved to the target destination, and its details (name, path, type, size) are returned as an array.

    Note: Ensure the upload configuration is valid and the destination path is accessible. If the upload fails due to invalid configuration, security validation, or file movement issues, an exception will be thrown.

    Parameters

    Parameter Type Description Default
    $config array An associative array containing upload configuration options:
    • 'destination': (string) The target directory for the uploaded file.
    • 'target_module': (string) The target module name (defaults to the current segment).
    • 'upload_to_module': (bool) Whether to upload to the module's assets directory (default: false).
    • 'make_rand_name': (bool) Whether to generate a random filename (default: false).
    N/A

    Exceptions

    Throws an Exception if:

    • The upload configuration is invalid (e.g., missing destination).
    • No file was uploaded or the upload failed.
    • The file fails security validation (e.g., invalid MIME type or insufficient memory).
    • The file cannot be moved to the target destination.

    Return Value

    Type Description
    array An associative array containing details about the uploaded file:
    • 'file_name': (string) The name of the uploaded file.
    • 'file_path': (string) The full path to the uploaded file.
    • 'file_type': (string) The MIME type of the uploaded file.
    • 'file_size': (int) The size of the uploaded file in bytes.

    Example Usage

    // Example 1: Uploading a file to a specific directory
    try {
        $file = new File();
        $config = [
            'destination' => 'uploads/images',
            'make_rand_name' => true
        ];
        $uploaded_file = $file->upload($config);
        echo "File uploaded successfully: " . $uploaded_file['file_name'];
    } catch (Exception $e) {
        echo "Upload failed: " . $e->getMessage();
    }
    // Example 2: Uploading a file to a module's assets directory
    try {
        $file = new File();
        $config = [
            'destination' => 'profile_pictures',
            'upload_to_module' => true,
            'target_module' => 'users'
        ];
        $uploaded_file = $file->upload($config);
        echo "File uploaded to module successfully: " . $uploaded_file['file_path'];
    } catch (Exception $e) {
        echo "Upload failed: " . $e->getMessage();
    }
    // Example 3: Handling multiple file uploads
    $files_to_upload = ['file1.jpg', 'file2.png'];
    foreach ($files_to_upload as $file_name) {
        try {
            $file = new File();
            $config = [
                'destination' => 'uploads/documents',
                'make_rand_name' => false
            ];
            $uploaded_file = $file->upload($config);
            echo "Uploaded: " . $uploaded_file['file_name'] . "\n";
        } catch (Exception $e) {
            echo "Error uploading $file_name: " . $e->getMessage() . "\n";
        }
    }

    Best Practices

    • Validate Configuration: Always ensure the upload configuration is valid and the destination path is accessible.
    • Use Random Filenames: When handling sensitive files, use 'make_rand_name' => true to generate random filenames and avoid conflicts.
    • Check Memory Requirements: Ensure the server has sufficient memory to handle large file uploads.
    • Secure Uploads: Always validate file MIME types and restrict access to sensitive directories.
    • Handle Exceptions: Use try-catch blocks to handle exceptions gracefully, especially when uploading multiple files or working with user-provided paths.

    write()

    function write(string $file_path, mixed $data, bool $append = false): bool

    Description

    Writes or appends data to a file. This method ensures the file path is valid and accessible, writes the provided data to the file, and optionally appends the data instead of overwriting the file.

    How It Works:

    • The method first validates the $file_path to ensure it is not restricted by security rules (e.g., accessing sensitive directories like config or engine).
    • If the path is valid, it writes the provided $data to the file using PHP's file_put_contents() function.
    • If the $append flag is set to true, the data is appended to the file instead of overwriting it.
    • If the write operation fails (e.g., due to insufficient permissions or an invalid path), an exception is thrown with a descriptive error message.

    Note: Ensure the file path is valid and writable before calling this method. If the file is restricted or inaccessible, or if the write operation fails, an exception will be thrown.

    Parameters

    Parameter Type Description Default
    $file_path string The absolute or relative path to the file where data should be written. The path must pass security validation. N/A
    $data mixed The data to write to the file. This can be a string, array, or any other data type that can be converted to a string. N/A
    $append bool Determines whether the data should be appended to the file (true) or overwrite the file (false). false

    Exceptions

    Throws an Exception if:

    • The $file_path is restricted by security rules.
    • The write operation fails (e.g., due to insufficient permissions or an invalid path).

    Return Value

    Type Description
    bool Returns true if the data is successfully written to the file. If the operation fails, an exception is thrown instead of returning false.

    Example Usage

    // Example 1: Writing data to a file (overwrite)
    try {
        $file = new File();
        $success = $file->write('/path/to/file.txt', 'Hello, world!');
        if ($success) {
            echo "Data written successfully.";
        }
    } catch (Exception $e) {
        echo "Error: " . $e->getMessage();
    }
    // Example 2: Appending data to a file
    try {
        $file = new File();
        $success = $file->write('/path/to/file.txt', 'Appended text.', true);
        if ($success) {
            echo "Data appended successfully.";
        }
    } catch (Exception $e) {
        echo "Error: " . $e->getMessage();
    }
    // Example 3: Writing an array to a file
    try {
        $file = new File();
        $data = ['line1', 'line2', 'line3'];
        $success = $file->write('/path/to/file.txt', implode("\n", $data));
        if ($success) {
            echo "Array data written successfully.";
        }
    } catch (Exception $e) {
        echo "Error: " . $e->getMessage();
    }

    Best Practices

    • Validate Paths: Always ensure the file path is valid and does not conflict with restricted paths before calling this method.
    • Use Append Flag Wisely: Use the $append flag to avoid overwriting important data in existing files.
    • Handle Large Data: For large data sets, consider writing data in chunks to avoid memory issues.
    • Check Permissions: Ensure the script has sufficient permissions to write to the file and its directory.
    • Handle Exceptions: Use try-catch blocks to handle exceptions gracefully, especially when working with user-provided paths or data.

    The Image Class

    crop()

    function crop(int $width, int $height, string $trim = 'center'): void

    Description

    Adjusts the image to the specified width and height by cropping it according to the provided $trim parameter. This method allows precise control over the section of the image to retain, either centering or aligning the crop to one side, based on the focus area specified. If the desired dimensions exceed the original image dimensions, no cropping occurs.

    The $trim parameter determines the focus area of the crop:

    • 'center': Crops the image from the center (default behavior).
    • 'right': Crops the image from the right side.
    • 'left': No offset is applied, and the crop starts from the left side.
    • Other values: Default to 'center' behavior.

    This method is ideal for creating uniform image dimensions without distorting the content.

    Parameters

    Parameter Type Description Default
    $width int The desired width of the cropped image. Must be a positive integer. N/A
    $height int The desired height of the cropped image. Must be a positive integer. N/A
    $trim string Optional. Specifies the focus area of the crop: 'center', 'right', or 'left'. Defaults to 'center'. center

    Exceptions

    Throws an InvalidArgumentException if:

    • The provided dimensions are non-positive.
    • The dimensions exceed the original image's dimensions.
    • No image is loaded.

    Return Value

    Type Description
    void This method modifies the image in-place and does not return a value.

    Example Usage

    // Example 1: Crop an image to 200x200 pixels, focusing on the center
    try {
        // Load an image
        $this->image->load('path/to/image.jpg');
        
        // Crop it to 200x200 pixels
        $this->image->crop(200, 200, 'center');
        
        // Free up memory after cropping
        $this->image->destroy();
        
        echo "Image cropped successfully.";
    } catch (Exception $e) {
        echo "Error: " . $e->getMessage();
    }
    // Example 2: Crop an image to 300x300 pixels, focusing on the right side
    try {
        $this->image->load('path/to/image.jpg');
        $this->image->crop(300, 300, 'right');
        $this->image->destroy();
        echo "Image cropped successfully.";
    } catch (Exception $e) {
        echo "Error: " . $e->getMessage();
    }
    // Example 3: Attempt to crop with invalid dimensions
    try {
        $this->image->load('path/to/image.jpg');
        $this->image->crop(0, 0); // Invalid dimensions
    } catch (InvalidArgumentException $e) {
        echo "Error: " . $e->getMessage();
    }

    Best Practices

    • Call destroy() After Cropping: To free up memory, especially in scripts that process multiple images or large images.
    • Validate Dimensions: Ensure the desired dimensions are valid and do not exceed the original image dimensions to avoid exceptions.
    • Use Appropriate $trim Values: Choose 'center', 'right', or 'left' based on the desired focus area.

    destroy()

    function destroy(): void

    Description

    Frees up memory allocated to the image resource stored in this class's instance. This method should be invoked when the image is no longer needed, especially in scripts that process multiple or large images. Properly releasing memory helps prevent memory leaks and ensures efficient management of system resources.

    Failure to call this method in scenarios involving multiple or large images can lead to increased memory usage and potential performance degradation.

    When to Use destroy():

    • After modifying the image (e.g., resizing, cropping, saving).
    • When the image is no longer needed in the script.
    • In batch processing or long-running scripts to prevent memory leaks.

    When destroy() Is Not Needed:

    • After read-only operations like get_header(), get_height(), or get_width(). These methods do not modify the image or allocate additional memory, so calling destroy() is unnecessary.
    • In short-lived scripts (e.g., scripts that terminate immediately after processing an image), calling destroy() is optional, as PHP automatically frees memory at the end of script execution. However, it is still considered a best practice to explicitly call destroy() for clean and predictable memory management.

    Parameters

    Parameter Type Description Default
    N/A N/A This method does not accept any parameters. N/A

    Exceptions

    This method does not throw any exceptions. It safely checks if an image resource exists before attempting to destroy it. If no image is loaded, the method does nothing.

    Return Value

    Type Description
    void This method does not return a value but ensures that the memory associated with the image resource is freed.

    Example Usage

    // Example 1: Freeing memory after processing a single image
    try {
        // Load an image
        $this->image->load('path/to/image.jpg');
        
        // Perform image operations (e.g., resize, crop, etc.)
        $this->image->resize_to_width(800);
        
        // Save the modified image
        $this->image->save('path/to/output.jpg');
        
        // Free up memory after processing
        $this->image->destroy();
        
        echo "Image processing completed, and memory has been freed.";
    } catch (Exception $e) {
        echo "Error: " . $e->getMessage();
    }
    // Example 2: Batch processing multiple images
    $image_files = ['image1.jpg', 'image2.jpg', 'image3.jpg'];
    
    foreach ($image_files as $file) {
        try {
            // Load an image
            $this->image->load("path/to/$file");
            
            // Perform image operations
            $this->image->resize_to_width(800);
            
            // Save the modified image
            $this->image->save("path/to/output/$file");
            
            // Free up memory after processing each image
            $this->image->destroy();
            
            echo "Processed and saved $file successfully.\n";
        } catch (Exception $e) {
            echo "Error processing $file: " . $e->getMessage() . "\n";
        }
    }
    // Example 3: Optional use in short-lived scripts
    try {
        $this->image->load('path/to/image.jpg');
        $this->image->resize_to_width(800);
        $this->image->save('path/to/output.jpg');
        
        // No explicit destroy() call (memory will be freed automatically at script end)
        echo "Image processing completed.";
    } catch (Exception $e) {
        echo "Error: " . $e->getMessage();
    }

    Best Practices

    • Always Call destroy() in Long-Running Scripts: In scripts that run for extended periods or process multiple images, explicitly calling destroy() ensures efficient memory management and prevents memory leaks.
    • Use in Batch Processing: When processing multiple images in a loop, call destroy() after each image to free memory before loading the next one.
    • Optional in Short-Lived Scripts: In scripts that terminate immediately after processing an image, calling destroy() is optional but still recommended for clean and predictable memory management.
    • No Need for destroy() After Read-Only Operations: Methods like get_header(), get_height(), and get_width() do not modify the image or allocate additional memory, so calling destroy() is unnecessary after using them.

    get_header()

    function get_header(): string

    Description

    This method returns the MIME type corresponding to the image format of the currently loaded image. The MIME type is essential for setting correct HTTP Content-Type headers when serving images directly from PHP scripts or APIs.

    If no image is loaded or the image type has not been set, this method throws an InvalidArgumentException to prevent misuse and aid in debugging.

    Common Use Cases:

    • Serving images dynamically in web applications.
    • Setting the Content-Type header for image downloads or API responses.

    Parameters

    Parameter Type Description Default
    N/A N/A This method does not accept any parameters. N/A

    Exceptions

    Throws an InvalidArgumentException if:

    • No image has been loaded.
    • The image type is not set.

    Return Value

    Type Description
    string Returns the MIME type of the image, suitable for HTTP Content-Type headers (e.g., 'image/jpeg', 'image/png').

    Example Usage

    // Example 1: Serving an image directly to the browser
    try {
        // Load an image
        $this->image->load('path/to/image.jpg');
        
        // Get the MIME type
        $mime_type = $this->image->get_header();
        
        // Set the Content-Type header
        header("Content-Type: " . $mime_type);
        
        // Output the image
        echo $this->image->output();
    } catch (InvalidArgumentException $e) {
        echo "Error: " . $e->getMessage();
    }
    // Example 2: Using get_header() in an API response
    try {
        $this->image->load('path/to/image.png');
        $mime_type = $this->image->get_header();
        
        // Return the image as part of an API response
        header("Content-Type: " . $mime_type);
        echo json_encode([
            'status' => 'success',
            'image' => base64_encode($this->image->output(true)) // Output image as base64
        ]);
    } catch (InvalidArgumentException $e) {
        header("Content-Type: application/json");
        echo json_encode([
            'status' => 'error',
            'message' => $e->getMessage()
        ]);
    }

    Best Practices

    • Always Check for Loaded Images: Ensure an image is loaded before calling get_header() to avoid exceptions.
    • Use in Dynamic Image Serving: This method is particularly useful when serving images dynamically in web applications or APIs.
    • Combine with output(): Use get_header() in conjunction with the output() method to serve images directly to the browser.

    get_height()

    function get_height(): int

    Description

    Returns the height of the currently loaded image in pixels. This method utilizes PHP's GD library function imagesy() to retrieve the height of the image resource.

    Note: An image must be loaded before calling this method. If no image is loaded, the method throws an Exception to prevent misuse and ensure valid output.

    Common Use Cases:

    • Calculating the aspect ratio of an image (in combination with get_width()).
    • Performing resizing or cropping operations based on the image's dimensions.
    • Validating image dimensions before processing.

    Parameters

    Parameter Type Description Default
    N/A N/A This method does not accept any parameters. N/A

    Exceptions

    Throws an Exception if no image is loaded. This ensures that the method does not fail silently and provides clear feedback for debugging.

    Return Value

    Type Description
    int The height of the image in pixels, if an image is loaded.

    Example Usage

    // Example 1: Retrieving the height of an image
    try {
        // Load an image
        $this->image->load('path/to/image.jpg');
        
        // Get the height of the image
        $height = $this->image->get_height();
        echo "Height of the image: " . $height . " pixels";
    } catch (Exception $e) {
        echo "Error: " . $e->getMessage();
    }
    // Example 2: Calculating the aspect ratio of an image
    try {
        $this->image->load('path/to/image.jpg');
        $width = $this->image->get_width();
        $height = $this->image->get_height();
        
        $aspect_ratio = $width / $height;
        echo "Aspect ratio of the image: " . $aspect_ratio;
    } catch (Exception $e) {
        echo "Error: " . $e->getMessage();
    }
    // Example 3: Validating image dimensions before resizing
    try {
        $this->image->load('path/to/image.jpg');
        $height = $this->image->get_height();
        
        if ($height > 1000) {
            echo "Image is too tall. Resizing...";
            $this->image->resize_to_height(1000);
        } else {
            echo "Image height is within acceptable limits.";
        }
    } catch (Exception $e) {
        echo "Error: " . $e->getMessage();
    }

    Best Practices

    • Always Check for Loaded Images: Ensure an image is loaded before calling get_height() to avoid exceptions.
    • Combine with get_width(): Use get_height() in conjunction with get_width() for tasks like calculating aspect ratios or performing resizing operations.
    • Validate Dimensions: Use this method to validate image dimensions before performing operations like resizing or cropping.

    get_width()

    function get_width(): int

    Description

    Returns the width of the currently loaded image in pixels. This method utilizes PHP's GD library function imagesx() to retrieve the width of the image resource.

    Note: An image must be loaded before calling this method. If no image is loaded, the method throws an Exception to prevent misuse and ensure valid output.

    Common Use Cases:

    • Calculating the aspect ratio of an image (in combination with get_height()).
    • Performing resizing or cropping operations based on the image's dimensions.
    • Validating image dimensions before processing.

    Parameters

    Parameter Type Description Default
    N/A N/A This method does not accept any parameters. N/A

    Exceptions

    Throws an Exception if no image is loaded. This ensures that the method does not fail silently and provides clear feedback for debugging.

    Return Value

    Type Description
    int The width of the image in pixels, if an image is loaded.

    Example Usage

    // Example 1: Retrieving the width of an image
    try {
        // Load an image
        $this->image->load('path/to/image.jpg');
        
        // Get the width of the image
        $width = $this->image->get_width();
        echo "Width of the image: " . $width . " pixels";
    } catch (Exception $e) {
        echo "Error: " . $e->getMessage();
    }
    // Example 2: Calculating the aspect ratio of an image
    try {
        $this->image->load('path/to/image.jpg');
        $width = $this->image->get_width();
        $height = $this->image->get_height();
        
        $aspect_ratio = $width / $height;
        echo "Aspect ratio of the image: " . $aspect_ratio;
    } catch (Exception $e) {
        echo "Error: " . $e->getMessage();
    }
    // Example 3: Validating image dimensions before resizing
    try {
        $this->image->load('path/to/image.jpg');
        $width = $this->image->get_width();
        
        if ($width > 1200) {
            echo "Image is too wide. Resizing...";
            $this->image->resize_to_width(1200);
        } else {
            echo "Image width is within acceptable limits.";
        }
    } catch (Exception $e) {
        echo "Error: " . $e->getMessage();
    }

    Best Practices

    • Always Check for Loaded Images: Ensure an image is loaded before calling get_width() to avoid exceptions.
    • Combine with get_height(): Use get_width() in conjunction with get_height() for tasks like calculating aspect ratios or performing resizing operations.
    • Validate Dimensions: Use this method to validate image dimensions before performing operations like resizing or cropping.

    output()

    function output(bool $return = false): ?string

    Description

    Outputs or returns the image content directly depending on the $return parameter. This method is versatile and can be used to either:

    • Output the image directly to the browser: When $return is false (default), the image is sent to the browser as binary data. This is useful for dynamically serving images in web applications.
    • Return the image as a string: When $return is true, the image data is captured as a string using output buffering. This is useful for embedding images in APIs, storing them in databases, or further processing.

    The method supports various image formats (JPEG, GIF, PNG, WebP) based on the internal image type set within the class.

    Note: Ensure an image is loaded before calling this method. If no image is loaded, the behavior is undefined.

    Parameters

    Parameter Type Description Default
    $return bool Determines whether to return the image content as a string (true) or output it directly to the browser (false). false

    Exceptions

    This method does not throw any exceptions directly. However, it relies on the internal state of the class and the GD library functions (e.g., imagejpeg(), imagepng()) to handle image output. If no image is loaded or if the image type is unsupported, the behavior is undefined.

    Return Value

    Type Description
    ?string Returns the image data as a string if $return is true. Otherwise, outputs the image directly to the browser and returns null.

    Example Usage

    // Example 1: Output the image directly to the browser
    try {
        // Load an image
        $this->image->load('path/to/image.jpg');
        
        // Set the appropriate Content-Type header
        header("Content-Type: " . $this->image->get_header());
        
        // Output the image directly to the browser
        $this->image->output();
    } catch (Exception $e) {
        echo "Error: " . $e->getMessage();
    }
    // Example 2: Capture the image data as a string
    try {
        $this->image->load('path/to/image.png');
        
        // Capture the image data as a string
        $image_data = $this->image->output(true);
        
        if ($image_data !== null) {
            // Use the image data (e.g., embed in an API response)
            echo json_encode([
                'status' => 'success',
                'image' => base64_encode($image_data) // Base64-encoded image
            ]);
        }
    } catch (Exception $e) {
        echo json_encode([
            'status' => 'error',
            'message' => $e->getMessage()
        ]);
    }
    // Example 3: Output a WebP image directly to the browser
    try {
        $this->image->load('path/to/image.webp');
        
        // Set the appropriate Content-Type header
        header("Content-Type: image/webp");
        
        // Output the image directly to the browser
        $this->image->output();
    } catch (Exception $e) {
        echo "Error: " . $e->getMessage();
    }

    Best Practices

    • Set Appropriate Headers: When outputting images directly to the browser, always set the appropriate Content-Type header using get_header() to ensure the browser interprets the image correctly.
    • Use Base64 Encoding for APIs: When embedding images in API responses, consider encoding the image data as a base64 string for compatibility with JSON or other text-based formats.
    • Ensure an Image Is Loaded: Always load an image before calling output() to avoid undefined behavior.
    • Free Memory After Use: If you no longer need the image after calling output(), call destroy() to free up memory, especially in batch processing or long-running scripts.

    resize_and_crop()

    function resize_and_crop(int $width, int $height): void

    Description

    Adjusts the image to precisely match specified dimensions by resizing to maintain the aspect ratio and then cropping the excess. This method ensures that the final image fits the exact dimensions provided, even if that involves cropping parts of the image.

    How It Works:

    • If the target aspect ratio matches the original image's aspect ratio, the image is simply resized to the specified dimensions.
    • If the target aspect ratio differs, the image is first resized to the dimension that requires less adjustment (width or height) and then cropped to achieve the desired dimensions.

    Common Use Cases:

    • Creating thumbnails with consistent dimensions.
    • Ensuring images fit specific UI components (e.g., profile pictures, banners).
    • Preparing images for responsive designs where exact dimensions are required.

    Note: Ensure an image is loaded before calling this method. If no image is loaded or if the dimensions are invalid, an exception is thrown.

    Parameters

    Parameter Type Description Default
    $width int The desired width of the final image. Must be a positive integer. N/A
    $height int The desired height of the final image. Must be a positive integer. N/A

    Exceptions

    Throws an Exception if:

    • No image is loaded.
    • The provided width or height are non-positive values.

    Return Value

    Type Description
    void This method does not return a value but modifies the image in-place to the specified dimensions.

    Example Usage

    // Example 1: Resizing and cropping an image to 200x200 pixels
    try {
        // Load an image
        $this->image->load('path/to/image.jpg');
        
        // Resize and crop it to 200x200 pixels
        $this->image->resize_and_crop(200, 200);
        
        // Save the modified image
        $this->image->save('path/to/output.jpg');
        
        echo "Image resized and cropped successfully.";
    } catch (Exception $e) {
        echo "Error: " . $e->getMessage();
    }
    // Example 2: Resizing and cropping a landscape image to fit a square aspect ratio
    try {
        $this->image->load('path/to/landscape.jpg');
        
        // Resize and crop to 300x300 pixels
        $this->image->resize_and_crop(300, 300);
        
        // Save the modified image
        $this->image->save('path/to/output_square.jpg');
        
        echo "Landscape image resized and cropped to square successfully.";
    } catch (Exception $e) {
        echo "Error: " . $e->getMessage();
    }
    // Example 3: Resizing and cropping a portrait image to fit a banner aspect ratio
    try {
        $this->image->load('path/to/portrait.jpg');
        
        // Resize and crop to 800x200 pixels (banner dimensions)
        $this->image->resize_and_crop(800, 200);
        
        // Save the modified image
        $this->image->save('path/to/output_banner.jpg');
        
        echo "Portrait image resized and cropped to banner dimensions successfully.";
    } catch (Exception $e) {
        echo "Error: " . $e->getMessage();
    }

    Best Practices

    • Validate Dimensions: Ensure the provided width and height are positive integers to avoid exceptions.
    • Check Aspect Ratios: Be mindful of the original image's aspect ratio to avoid excessive cropping.
    • Use for Thumbnails: This method is ideal for creating thumbnails or images with consistent dimensions.
    • Free Memory After Use: If you no longer need the image after resizing and cropping, call destroy() to free up memory, especially in batch processing or long-running scripts.

    resize_to_height()

    function resize_to_height(int $height): void

    Description

    Resizes the currently loaded image to a specified height while maintaining the image's aspect ratio. This method calculates the proportional width required to preserve the aspect ratio based on the new height and then calls the internal resize method to adjust the image dimensions.

    How It Works:

    • The method calculates the ratio between the target height and the current height of the image.
    • It then calculates the new width by multiplying the current width by this ratio.
    • Finally, it resizes the image to the new dimensions using the internal resize method.

    Note: Ensure an image is loaded before calling this method. If no image is loaded, or if the provided height is invalid, an exception is thrown.

    Memory Management: After resizing and saving the image, consider calling destroy() to free up memory, especially in scripts that process multiple or large images.

    Parameters

    Parameter Type Description Default
    $height int The target height to which the image should be resized. Must be a positive integer. N/A

    Exceptions

    Throws an Exception if:

    • No image is loaded.
    • The provided height is non-positive.
    • The current image height is zero (to prevent division by zero).

    Return Value

    Type Description
    void This method does not return a value but resizes the image in-place.

    Example Usage

    // Example 1: Resizing an image to a specific height while maintaining aspect ratio
    try {
        // Load an image
        $this->image->load('path/to/image.jpg');
        
        // Resize the image to a height of 300 pixels
        $this->image->resize_to_height(300);
        
        // Save the resized image
        $this->image->save('path/to/resized_image.jpg');
        
        // Free up memory after saving
        $this->image->destroy();
        
        echo "Image resized successfully to a height of 300 pixels.";
    } catch (Exception $e) {
        echo "Error: " . $e->getMessage();
    }
    // Example 2: Batch resizing multiple images to a specific height
    $image_files = ['image1.jpg', 'image2.jpg', 'image3.jpg'];
    
    foreach ($image_files as $file) {
        try {
            // Load an image
            $this->image->load("path/to/$file");
            
            // Resize the image to a height of 400 pixels
            $this->image->resize_to_height(400);
            
            // Save the resized image
            $this->image->save("path/to/resized_$file");
            
            // Free up memory after saving
            $this->image->destroy();
            
            echo "Resized and saved $file successfully.\n";
        } catch (Exception $e) {
            echo "Error processing $file: " . $e->getMessage() . "\n";
        }
    }
    // Example 3: Resizing an image without calling destroy() (for short-lived scripts)
    try {
        $this->image->load('path/to/image.jpg');
        $this->image->resize_to_height(250);
        $this->image->save('path/to/resized_image.jpg');
        
        echo "Image resized successfully. Memory will be freed automatically at script end.";
    } catch (Exception $e) {
        echo "Error: " . $e->getMessage();
    }

    Best Practices

    • Validate Dimensions: Ensure the provided height is a positive integer to avoid exceptions.
    • Use destroy() After Resizing: In scripts that process multiple or large images, call destroy() to free up memory after saving the resized image.
    • Batch Processing: When resizing multiple images, always call destroy() after each image to prevent memory leaks.
    • Check Aspect Ratio: Be mindful of the original image's aspect ratio to avoid unexpected results when resizing.

    resize_to_width()

    function resize_to_width(int $width): void

    Description

    Resizes the currently loaded image to a specified width while maintaining the image's aspect ratio. This method calculates the proportional height required to preserve the aspect ratio based on the new width and then calls the internal resize method to adjust the image dimensions.

    How It Works:

    • The method calculates the ratio between the target width and the current width of the image.
    • It then calculates the new height by multiplying the current height by this ratio.
    • Finally, it resizes the image to the new dimensions using the internal resize method.

    Note: Ensure an image is loaded before calling this method. If no image is loaded, or if the provided width is invalid, an exception is thrown.

    Memory Management: After resizing and saving the image, consider calling destroy() to free up memory, especially in scripts that process multiple or large images.

    Parameters

    Parameter Type Description Default
    $width int The target width to which the image should be resized. Must be a positive integer. N/A

    Exceptions

    Throws an Exception if:

    • No image is loaded.
    • The provided width is non-positive.
    • The current image width is zero (to prevent division by zero).

    Return Value

    Type Description
    void This method does not return a value but resizes the image in-place.

    Example Usage

    // Example 1: Resizing an image to a specific width while maintaining aspect ratio
    try {
        // Load an image
        $this->image->load('path/to/image.jpg');
        
        // Resize the image to a width of 500 pixels
        $this->image->resize_to_width(500);
        
        // Save the resized image
        $this->image->save('path/to/resized_image.jpg');
        
        // Free up memory after saving
        $this->image->destroy();
        
        echo "Image resized successfully to a width of 500 pixels.";
    } catch (Exception $e) {
        echo "Error: " . $e->getMessage();
    }
    // Example 2: Batch resizing multiple images to a specific width
    $image_files = ['image1.jpg', 'image2.jpg', 'image3.jpg'];
    
    foreach ($image_files as $file) {
        try {
            // Load an image
            $this->image->load("path/to/$file");
            
            // Resize the image to a width of 800 pixels
            $this->image->resize_to_width(800);
            
            // Save the resized image
            $this->image->save("path/to/resized_$file");
            
            // Free up memory after saving
            $this->image->destroy();
            
            echo "Resized and saved $file successfully.\n";
        } catch (Exception $e) {
            echo "Error processing $file: " . $e->getMessage() . "\n";
        }
    }
    // Example 3: Resizing an image without calling destroy() (for short-lived scripts)
    try {
        $this->image->load('path/to/image.jpg');
        $this->image->resize_to_width(300);
        $this->image->save('path/to/resized_image.jpg');
        
        echo "Image resized successfully. Memory will be freed automatically at script end.";
    } catch (Exception $e) {
        echo "Error: " . $e->getMessage();
    }

    Best Practices

    • Validate Dimensions: Ensure the provided width is a positive integer to avoid exceptions.
    • Use destroy() After Resizing: In scripts that process multiple or large images, call destroy() to free up memory after saving the resized image.
    • Batch Processing: When resizing multiple images, always call destroy() after each image to prevent memory leaks.
    • Check Aspect Ratio: Be mindful of the original image's aspect ratio to avoid unexpected results when resizing.

    save()

    function save(?string $filename = null, int $compression = 100, ?int $permissions = null): void

    Description

    Saves the currently loaded image to a file, with optional compression and file permissions settings. This method handles different image formats (JPEG, GIF, PNG, WEBP) and applies the specified compression level for formats that support it (JPEG, WEBP). File permissions can also be set if provided.

    How It Works:

    • If no filename is provided, the method uses the internal filename stored in the class instance ($file_name).
    • The image is saved in the format corresponding to the loaded image type (e.g., JPEG, PNG, etc.).
    • For JPEG and WEBP formats, the compression level can be adjusted to control the trade-off between file size and image quality.
    • Optional file permissions can be set to control access to the saved file.
    • Transparency is preserved for formats that support it (e.g., PNG and GIF).

    Note: While the save() method writes the image to disk, it does not release the memory allocated for the image resource. To free up memory after saving, it is recommended to call the destroy() method, especially in scripts that process multiple images or large images.

    When to Use destroy() After save()

    After calling save(), it is often advisable to call destroy() to explicitly free the memory allocated for the image resource. Here are some scenarios where using destroy() is particularly important:

    • Batch Processing: When processing multiple images in a loop, failing to free memory after each image can lead to excessive memory usage. Explicitly calling destroy() ensures efficient memory management.
    • Large Images: Working with large images can consume significant memory. Releasing memory immediately after saving helps prevent memory exhaustion.
    • Long-Running Scripts: In scripts that run for extended periods, memory leaks can accumulate if resources are not freed. Using destroy() ensures that memory is released as soon as it is no longer needed.
    • Future-Proofing: Even in simple scripts that process only one image, calling destroy() is a good habit. It makes your code more robust and adaptable for future changes.

    Parameters

    Parameter Type Description Default
    $filename string|null Optional. The path where the image file will be saved. If not provided, the method uses the internal default filename ($file_name) set in the class. null
    $compression int Optional. Compression level for JPEG and WEBP images, ranging from 0 (worst quality, smallest file) to 100 (best quality, largest file). 100
    $permissions int|null Optional. File permissions to set on the saved file, using the format (e.g., 0644). If not specified, the system's default permissions are used. null

    Exceptions

    Throws an InvalidArgumentException if:

    • An unsupported image type is encountered.
    • Required properties (e.g., internal filename) are not set.

    Throws a RuntimeException if:

    • Writing the file fails.
    • Setting the specified file permissions is unsuccessful.

    Return Value

    Type Description
    void This method does not return a value but ensures that the image is saved to the specified file with the requested settings.

    Example Usage

    // Example 1: Saving a Single Image
    try {
        // Load an image
        $this->image->load('path/to/image.jpg');
        
        // Perform image operations (e.g., resize)
        $this->image->resize_to_width(800);
        
        // Save the modified image
        $this->image->save('path/to/output.jpg', 85, 0644);
        
        // Free up memory after saving
        $this->image->destroy();
        
        echo "Image saved successfully, and memory has been freed.";
    } catch (Exception $e) {
        echo "Error: " . $e->getMessage();
    }
    // Example 2: Batch Image Processing
    $image_files = ['image1.jpg', 'image2.jpg', 'image3.jpg'];
    
    foreach ($image_files as $file) {
        try {
            // Load an image
            $this->image->load("path/to/$file");
            
            // Perform image operations (e.g., resize)
            $this->image->resize_to_width(800);
            
            // Save the modified image
            $this->image->save("path/to/output/$file", 85, 0644);
            
            // Free up memory after saving
            $this->image->destroy();
            
            echo "Processed and saved $file successfully.\n";
        } catch (Exception $e) {
            echo "Error processing $file: " . $e->getMessage() . "\n";
        }
    }
    // Memory is efficiently managed for each image
    
    // Example 3: Optional Use Case Without destroy()
    // In short-lived scripts, destroy() may not be strictly necessary
    try {
        $this->image->load('path/to/image.jpg');
        $this->image->resize_to_width(800);
        $this->image->save('path/to/output.jpg', 85, 0644);
        
        // No explicit destroy() call
        echo "Image saved successfully. Memory will be cleaned up automatically at script end.";
    } catch (Exception $e) {
        echo "Error: " . $e->getMessage();
    }
    

    Best Practices

    • Always Call destroy() After save(): This ensures immediate cleanup of memory, even if the script terminates shortly afterward.
    • Batch Processing Requires destroy(): When processing multiple images, failing to free memory after each image can lead to memory exhaustion.
    • Future-Proof Your Code: Even if your script currently handles only one image, explicitly calling destroy() makes your code more robust and adaptable for future changes.
    • Validate File Paths: Ensure the provided file path is writable and valid to avoid runtime errors.
    • Adjust Compression: Use appropriate compression levels to balance image quality and file size, especially for web-optimized images.
    • Set Permissions Carefully: Use file permissions to control access to sensitive images, but avoid overly restrictive settings that might break functionality.

    scale()

    function scale(float $scale): void

    Description

    Scales the currently loaded image by a specified percentage, adjusting both the width and height while maintaining the image's aspect ratio. This method calculates the new dimensions based on the percentage provided and resizes the image accordingly using the internal resize method.

    How It Works:

    • The method calculates the new width and height by multiplying the current dimensions by the scaling percentage divided by 100.
    • It then resizes the image to the new dimensions using the internal resize method.

    Note: Ensure an image is loaded before calling this method. If no image is loaded, or if the scale value is invalid, an exception is thrown.

    Memory Management: After scaling and saving the image, consider calling destroy() to free up memory, especially in scripts that process multiple or large images.

    Parameters

    Parameter Type Description Default
    $scale float The scaling percentage. A value of 100 maintains the original size, values less than 100 decrease the size, and values greater than 100 increase the size. Must be a positive number. N/A

    Exceptions

    Throws an Exception if:

    • No image is loaded.
    • The provided scale value is non-positive.

    Return Value

    Type Description
    void This method does not return a value but resizes the image in-place.

    Example Usage

    // Example 1: Scaling an image to 50% of its original size
    try {
        // Load an image
        $this->image->load('path/to/image.jpg');
        
        // Scale the image to 50% of its original size
        $this->image->scale(50);
        
        // Save the scaled image
        $this->image->save('path/to/scaled_image.jpg');
        
        // Free up memory after saving
        $this->image->destroy();
        
        echo "Image scaled successfully to 50% of its original size.";
    } catch (Exception $e) {
        echo "Error: " . $e->getMessage();
    }
    // Example 2: Scaling an image to 150% of its original size
    try {
        $this->image->load('path/to/image.jpg');
        
        // Scale the image to 150% of its original size
        $this->image->scale(150);
        
        // Save the scaled image
        $this->image->save('path/to/enlarged_image.jpg');
        
        // Free up memory after saving
        $this->image->destroy();
        
        echo "Image scaled successfully to 150% of its original size.";
    } catch (Exception $e) {
        echo "Error: " . $e->getMessage();
    }
    // Example 3: Batch scaling multiple images
    $image_files = ['image1.jpg', 'image2.jpg', 'image3.jpg'];
    
    foreach ($image_files as $file) {
        try {
            // Load an image
            $this->image->load("path/to/$file");
            
            // Scale the image to 75% of its original size
            $this->image->scale(75);
            
            // Save the scaled image
            $this->image->save("path/to/scaled_$file");
            
            // Free up memory after saving
            $this->image->destroy();
            
            echo "Scaled and saved $file successfully.\n";
        } catch (Exception $e) {
            echo "Error processing $file: " . $e->getMessage() . "\n";
        }
    }

    Best Practices

    • Validate Scale Value: Ensure the provided scale value is a positive number to avoid exceptions.
    • Use destroy() After Scaling: In scripts that process multiple or large images, call destroy() to free up memory after saving the scaled image.
    • Batch Processing: When scaling multiple images, always call destroy() after each image to prevent memory leaks.
    • Check Aspect Ratio: Since this method maintains the aspect ratio, be mindful of the original image's dimensions to avoid unexpected results when scaling.

    upload()

    function upload(array $data): array

    Description

    Handles the entire process of uploading and processing an image file. This method performs the following steps:

    • Delegates the initial file upload to the File class.
    • Loads the uploaded image for further processing.
    • Resizes the image if its dimensions exceed the specified maximum width or height.
    • Generates a thumbnail if requested.

    Note: After processing the image (e.g., resizing or saving), it is recommended to call the destroy() method to free up memory, especially when handling multiple images or large files.

    Parameters

    Parameter Type Description Default
    $data array Configuration array with settings for file destination, size limits, resizing dimensions, thumbnail creation, and more. See Configuration Properties table below for full details. N/A

    Configuration Properties

    Parameter Type Description Example Values Default Required
    destination string The directory path where the uploaded file will be saved. uploads/images/ N/A Yes
    max_width int The maximum allowed width for the image. If the image exceeds this width, it will be resized. 1200 450 No
    max_height int The maximum allowed height for the image. If the image exceeds this height, it will be resized. 1200 450 No
    thumbnail_dir string The directory path where thumbnails should be saved, if thumbnail generation is enabled. uploads/thumbnails/ '' No
    thumbnail_max_width int The maximum width for thumbnails. 120 0 No
    thumbnail_max_height int The maximum height for thumbnails. 120 0 No
    upload_to_module bool Whether to upload the file to a module-specific directory. If true, uses the module's asset directory. true/false false No
    make_rand_name bool Whether to generate a random filename for the uploaded file to avoid name conflicts. true/false false No
    targetModule string The target module for module-specific uploads. Defaults to the value of segment(1). my_module segment(1) No

    Return Value

    Type Description
    array An associative array containing details about the uploaded file, including:
    • file_name (string): The name of the uploaded file.
    • file_path (string): The full path to the uploaded file.
    • file_type (string): The MIME type of the uploaded file.
    • file_size (int): The size of the uploaded file in bytes.
    • thumbnail_path (string, optional): The full path to the generated thumbnail, if applicable.

    Exceptions

    Throws an Exception if:

    • The file upload fails.
    • There are issues during image processing (e.g., invalid directories or unsupported image types).

    Example Usage

    // Example 1: Uploading an image with resizing and thumbnail generation
    $config = [
        'destination' => 'uploads/images/',
        'max_width' => 1200,
        'max_height' => 1200,
        'thumbnail_dir' => 'uploads/thumbnails/',
        'thumbnail_max_width' => 120,
        'thumbnail_max_height' => 120,
        'upload_to_module' => true,
        'make_rand_name' => true
    ];
    
    try {
        $file_info = $this->image->upload($config);
        $this->image->destroy(); // Free up memory after processing
        echo 'File uploaded successfully. Details: ';
        print_r($file_info);
    } catch (Exception $e) {
        echo 'Upload failed: ' . $e->getMessage();
    }
    // Example 2: Uploading an image without thumbnail generation
    $config = [
        'destination' => 'uploads/images/',
        'max_width' => 800,
        'max_height' => 800,
        'upload_to_module' => false,
        'make_rand_name' => false
    ];
    
    try {
        $file_info = $this->image->upload($config);
        $this->image->destroy(); // Free up memory after processing
        echo 'File uploaded successfully. Details: ';
        print_r($file_info);
    } catch (Exception $e) {
        echo 'Upload failed: ' . $e->getMessage();
    }

    Best Practices

    • Validate Configuration: Ensure all required configuration keys (e.g., destination) are provided and valid.
    • Use destroy() After Upload: In scripts that process multiple or large images, call destroy() to free up memory after processing.
    • Batch Processing: When uploading multiple images, always call destroy() after each image to prevent memory leaks.
    • Check File Permissions: Ensure the destination directories are writable to avoid upload failures.

    The Model Class

    count()

    public function count(?string $target_tbl = null): int

    Description

    Counts the number of rows in a database table. This method constructs and executes an SQL query to count the rows in the specified table. It returns the number of rows found in the table.

    Parameters

    Parameter Type Description Default Required
    target_tbl string|null The name of the database table to count rows from. If not explicitly passed, the table name is assumed to be the value of the first URL segment. 'First URL segment' No

    Return Value

    Type Description
    int The number of rows in the specified table.

    Exceptions

    Exception Type Description
    RuntimeException Thrown if the query execution fails or if the result cannot be fetched.

    Example Usage

    $num_users = $this->model->count('users');

    count_rows()

    public function count_rows(string $column, $value, ?string $target_table = null): int

    Description

    Counts the number of rows in a database table based on a single condition. This method constructs and executes an SQL query to count the rows in the specified table that match the provided condition.

    Parameters

    Parameter Type Description Default Required
    column string The name of the table column referred to when fetching results. N/A Yes
    value mixed The value that should be matched against the target table column. N/A Yes
    target_table string|null (optional) The name of the database table to be queried. If not explicitly passed, the table name is assumed to be the value of the first URL segment. 'First URL segment' No

    Return Value

    Type Description
    int The number of rows matching the condition.

    Exceptions

    Exception Type Description
    RuntimeException Thrown if the query execution fails.

    Example Usage

    $column = 'status';
    $value = 'active';
    $target_table = 'users';
    $num_active_users = $this->model->count_rows($column, $value, $target_table);

    count_where()

    public function count_where(string $column, $value, string $operator = '=', ?string $target_tbl = null): int

    Description

    Counts the number of rows in a database table based on custom conditions. This method constructs and executes an SQL query to count the rows in the specified table that match the provided conditions.

    Parameters

    Parameter Type Description Default Required
    column string The name of the table column referred to when fetching results. N/A Yes
    value mixed The value that should be matched against the target table column. N/A Yes
    operator string (optional) The comparison operator. Default is '='. = No
    target_tbl string|null (optional) The name of the database table to be queried. If not explicitly passed, the table name is assumed to be the value of the first URL segment. 'First URL segment' No

    Return Value

    Type Description
    int The number of rows matching the conditions.

    Exceptions

    Exception Type Description
    InvalidArgumentException Thrown if an invalid operator is provided.
    RuntimeException Thrown if the query execution fails.

    Example Usage

    $column = 'status';
    $value = 'active';
    $operator = '=';
    $target_tbl = 'users';
    
    $num_active_users = $this->model->count_where($column, $value, $operator, $target_tbl);
    

    delete()

    public function delete(int $id, ?string $target_tbl = null): bool

    Description

    Deletes a record from a database table based on its ID. This method takes the ID of the record to delete and an optional parameter specifying the name of the database table. It constructs and executes an SQL query to delete the record, returning true if the delete operation was successful and false otherwise.

    Parameters

    Parameter Type Description Default Required
    id int The ID of the record to delete. N/A Yes
    target_tbl string|null (optional) The name of the database table to delete from. If not explicitly passed, the table name is assumed to be the value of the first URL segment. 'First URL segment' No

    Return Value

    Type Description
    bool Indicates whether the delete operation was successful.

    Example Usage

    $id = 123; // Example ID of the record to delete
    $target_tbl = 'products'; // Example target table
    
    $is_deleted = $this->model->delete($id, $target_tbl);
    
    if ($is_deleted) {
        echo "Record with ID {$id} was successfully deleted from the {$target_tbl} table.";
    } else {
        echo "Failed to delete record with ID {$id} from the {$target_tbl} table.";
    }
    

    describe_table()

    public function describe_table(string $table, bool $column_names_only = false): array|false

    Description

    Retrieves information about the structure of a database table. By default, it returns details of all columns in the specified table. Optionally, it can return only the column names if instructed.

    Parameters

    Parameter Type Description Default Required
    $table string The name of the table whose structure is to be described. N/A Required
    $column_names_only bool (optional) Whether to return only column names. Default is false. false Optional

    Return Value

    Type Description
    array|false Returns an array of column details or an array of column names if $column_names_only is true. Returns false on failure.

    Exceptions

    Exception Type Description
    PDOException Thrown if there is an error executing the SQL query.

    Example Usage

    $table_name = 'users'; // Example table name
    
    // Get detailed information about table structure
    $table_info = $this->model->describe_table($table_name);
    
    // Display the information
    json($table_info);

    Alternative Example

    $table_name = 'users'; // Example table name
    
    // Get only column names
    $column_names = $this->model->describe_table($table_name, true);
    
    // Display the column names
    json($column_names);
    

    exec()

    public function exec(string $sql): void

    Description

    Executes a SQL statement. This method is primarily intended for usage by Trongate's Module Import Wizard and should not be used in production environments. It allows executing raw SQL queries directly on the database.

    It's important to ensure that the provided SQL query is properly sanitized to prevent SQL injection attacks.

    Parameters

    Parameter Type Description Default Required
    sql string The SQL statement to execute. N/A Yes

    Return Value

    Type Description
    void This method does not return any value.

    Throws

    Exception Description
    Exception Thrown if the application environment is not set to 'dev'.
    PDOException Thrown if an error occurs during the database operation.

    Note

    This method should only be used for development purposes and may produce undesired consequences if used improperly. It is disabled in production environments.

    Example Usage

    Below is an example of executing a SQL statement using the `exec()` method:

    $sql = "CREATE TABLE example_table (
            id INT AUTO_INCREMENT PRIMARY KEY,
            name VARCHAR(255) NOT NULL,
            created_at TIMESTAMP DEFAULT CURRENT_TIMESTAMP
        )";
        
    $this->model->exec($sql);

    get()

    public function get(?string $order_by = null, ?string $target_tbl = null, ?int $limit = null, int $offset = 0): array

    Description

    Retrieves rows from a database table based on optional parameters. This method constructs and executes an SQL query to fetch rows from the specified table, ordering them as specified, with optional limits and offsets.

    Parameters

    Parameter Type Description Default Required
    order_by string|null The column to order results by. Default is 'id'. 'id' No
    target_tbl string|null The name of the database table to query. Default is derived from the first URL segment. 'First URL segment' No
    limit int|null The maximum number of results to return. Default is null. null No
    offset int The number of rows to skip before fetching results. Default is 0. 0 No

    Return Value

    Type Description
    array An array of objects representing the fetched rows.

    Example Usage #1

    The code sample below demonstrates how to retrieve all rows from a table. In this example, the table name is not explicitly passed into the method. This means that the table name would be assumed to be the value of the first URL segment.

    $rows = $this->model->get();

    Example Usage #2

    The code sample below demonstrates how to retrieve rows from a specific table, ordered by 'id' descending. In this example, the second argument ('orders') indicates the name of the table to be queried.

    $rows = $this->model->get('id desc', 'orders');

    Example Usage #3

    The code sample below demonstrates how to retrieve rows from a specific table, named 'products'. The results, in this instance, would be ordered by 'name' and limited to 10 results, with an offset of 5.

    $rows = $this->model->get('name', 'products', 10, 5);

    get_all_tables()

    public function get_all_tables(): array

    Description

    Retrieves all table names from the database.

    Parameters

    Parameter Type Description Default Required
    This method does not take any parameters.

    Return Value

    Type Description
    array Returns an array of table names.

    Example Usage

    // Retrieve all table names from the database
    $tables = $this->model->get_all_tables();
    
    // Display the table names
    json($tables);

    get_many_where()

    public function get_many_where(string $column, $value, ?string $target_table = null): array

    Description

    Retrieves multiple records from a database table based on custom conditions. This method constructs and executes an SQL query to retrieve rows where the specified column matches the provided value from the specified table. It returns an array of objects representing the fetched rows. If no records are found, an empty array is returned.

    Parameters

    Parameter Type Description Default Required
    column string The name of the table column referred to when fetching results. N/A Yes
    value mixed The value that should be matched against the target table column. N/A Yes
    target_table string|null The name of the database table to be queried. Default is derived from the first URL segment. 'First URL segment' No

    Return Value

    Type Description
    array An array of objects representing the fetched rows. If no records are found, an empty array is returned.

    Exceptions

    Exception Type Description
    RuntimeException Thrown if the query execution fails.

    Example Usage

    // Retrieve multiple records where the 'status' column equals 'active'
    $active_users = $this->model->get_many_where('status', 'active', 'users');
    
    // Display the fetched records
    json($active_users);
    

    get_max()

    public function get_max(?string $target_table = null): ?int

    Description

    Retrieves the maximum 'id' value from the specified database table. This method constructs and executes an SQL query to fetch the maximum 'id' value from the table. It returns the maximum 'id' value as an integer, or 0 if the table is empty, or null if no table is specified.

    Parameters

    Parameter Type Description Default Required
    target_table string|null (optional) The name of the database table to query. When a table name is not explicitly passed into the method, the table name will be assumed to be the value of the first URL segment. 'First URL segment' No

    Return Value

    Type Description
    int|null Returns the maximum 'id' value from the table. Returns 0 if the table is empty or null if no table is specified.

    Example Usage #1

    In the example below, the table name ('products') is being passed into the method as an argument.

    $max_id = $this->model->get_max('products');

    Example Usage #2

    In this alternative example, no table name has been passed into the method. This means that the table name will be assumed to be the value of the first URL segment.

    $max_id = $this->model->get_max();

    get_one_where()

    public function get_one_where(string $column, $value, ?string $target_table = null): object|false

    Description

    Fetches a single record based on a column value from a database table. This method constructs and executes an SQL query to retrieve the record where the specified column matches the provided value from the specified table. If no record is found, it returns false.

    Parameters

    Parameter Type Description Default Required
    column string The name of the column to filter by. N/A Yes
    value mixed The value to match against the specified column. N/A Yes
    target_table string|null (optional) The name of the database table to be queried. When a table name is not explicitly passed into the method, the table name will be assumed to be the value of the first URL segment. 'First URL segment' No

    Return Value

    Type Description
    object|false An object representing the fetched record, or false if no record is found.

    Exceptions

    Exception Type Description
    RuntimeException Thrown if the query execution fails.

    Example Usage #1

    The code sample below demonstrates how to fetch a single record from the 'users' table where the 'username' column matches the value 'john_doe'.

    $user_obj = $this->model->get_one_where('username', 'john_doe', 'users');

    Example Usage #2

    In this alternative example, no table name has been passed into the method. This means that the table name will be assumed to be the value of the first URL segment.

    $record_obj = $this->model->get_one_where('id', 123);

    get_where()

    public function get_where(int $id, ?string $target_table = null): object|false

    Description

    Fetches a single record by its ID from a database table. This method constructs and executes an SQL query to retrieve the record with the specified ID from the specified table. If no record is found, it returns false.

    Parameters

    Parameter Type Description Default Required
    id int The ID of the record to fetch. N/A Yes
    target_table string|null The name of the database table to be queried. If not explicitly passed, the table name is assumed to be the value of the first URL segment. 'First URL segment' No

    Return Value

    Type Description
    object|false An object representing the fetched record, or false if no record is found.

    Exceptions

    Exception Type Description
    RuntimeException Thrown if the query execution fails.

    Example Usage #1

    The code sample below demonstrates how to fetch a single record from the 'products' table with the ID '123'.

    $product_obj = $this->model->get_where(123, 'products');

    Example Usage #2

    In this alternative example, no table name has been passed into the method. This means that the table name will be assumed to be the value of the first URL segment.

    $user_obj = $this->model->get_where(456);

    get_where_custom()

    public function get_where_custom(string $column, $value, string $operator = '=', string $order_by = 'id', ?string $target_table = null, ?int $limit = null, ?int $offset = null): array

    Description

    Retrieves rows from a database table based on custom conditions. This method constructs and executes an SQL query to fetch rows from the specified table, filtering them based on the provided column, value, and comparison operator. Results can be further customized with optional parameters for ordering, limiting, and offsetting.

    Parameters

    Parameter Type Description Default Required
    column string The name of the table column referred to when fetching results. N/A Yes
    value mixed The value that should be matched against the target table column. N/A Yes
    operator string The comparison operator. Default is '='. = No
    order_by string The column to order results by. Default is 'id'. 'id' No
    target_table string|null The name of the database table to be queried. Default is derived from the first URL segment. 'First URL segment' No
    limit int|null The maximum number of results to return. Default is null. null No
    offset int|null The number of rows to skip before fetching results. Default is null. null No

    Return Value

    Type Description
    array An array of objects representing the fetched rows. If no records are found, an empty array is returned.

    Exceptions

    Exception Type Description
    InvalidArgumentException Thrown if an invalid operator is provided.
    RuntimeException Thrown if the query execution fails.

    Example Usage #1

    The code sample below demonstrates how to retrieve rows from a database table where the column 'paid' equals 1, ordered by the default column 'id'. In this example, the table name would be inferred from the first URL segment.

    $invoices = $this->model->get_where_custom('paid', 1);

    Example Usage #2

    The code sample below demonstrates how to fetch rows from the 'orders' table where the 'status' column equals 'pending', ordered by 'order_date' in descending order, limited to 10 results, with an offset of 5.

    $orders = $this->model->get_where_custom('status', 'pending', '=', 'order_date DESC', 'orders', 10, 5);

    Example Usage #3

    In this alternative example, rows are fetched from the 'customers' table where the 'country' column equals 'USA', ordered by 'last_name' in ascending order. No limit or offset is applied.

    $customers = $this->model->get_where_custom('country', 'USA', '=', 'last_name', 'customers');

    Example Usage #4

    The following example retrieves rows from the 'tasks' table where the 'status' column does not equal 'completed', ordered by the default column 'id'.

    $incomplete_tasks = $this->model->get_where_custom('status', 'completed', '!=', 'id', 'tasks');

    Example Usage #5

    This example fetches rows from the 'products' table where the 'price' column is greater than 100, ordered by the 'name' column.

    $expensive_products = $this->model->get_where_custom('price', 100, '>', 'name', 'products');

    Example Usage #6

    The example below retrieves rows from the 'articles' table where the 'title' column contains the word 'apple' (case-insensitive), ordered by the 'created_at' column.

    $apple_articles = $this->model->get_where_custom('title', 'apple', 'LIKE', 'created_at', 'articles');

    get_where_in()

    public function get_where_in(string $column, array $values, ?string $target_table = null, string $return_type = 'object'): array

    Description

    Retrieves records from a database table where the column's value is within a specified array of values. This method allows for filtering records based on multiple values for a given column.

    Parameters

    Parameter Type Description Default Required
    $column string The name of the column to filter by. N/A Yes
    $values array The array of values to match against the specified column. N/A Yes
    $target_table string|null The name of the database table to be queried. Default is 'First URL segment'. 'First URL segment' No
    $return_type string The type of result to return ('object' or 'array'). object No

    Return Value

    Type Description
    array Returns an array of objects or arrays representing the fetched rows.

    Example #1

    The following code sample demonstrates how to fetch an array of records from a 'members' table where the 'id' values match those within a specified array of integers. In this example, the table name is not explicitly passed as an argument, so the method will derive the table name from the first URL segment.

    // Assuming the URL is: http://your-domain.com/members/{method_name}
    $member_ids = [1, 2, 3, 4];
    $members = $this->model->get_where_in('id', $member_ids);
    foreach ($members as $member) {
        echo $member->username.'
    '; }

    Example #2

    This example demonstrates explicitly passing the table name and specifying the return type for the records. This approach provides more control over the query execution and result format.

    $column = 'id';
    $values = [1, 2, 3, 4];
    $target_table = 'items';
    $return_type = 'object';
    
    $items = $this->model->get_where_in($column, $values, $target_table, $return_type);
    foreach ($items as $item) {
        echo $item->title;
    }
    

    insert()

    public function insert(array $data, ?string $target_table = null): ?int

    Description

    Insert a new record into the database table and return the ID of the newly inserted record. This method takes an associative array containing column names as keys and their corresponding values, along with an optional parameter specifying the name of the database table to insert into. It constructs and executes an SQL query to perform the insertion, returning the ID of the newly inserted record or null if insertion fails.

    Parameters

    Parameter Type Description Default Required
    data array An associative array containing column names as keys and their corresponding values. N/A Yes
    target_table string|null (optional) The name of the database table to insert into. When a table name is not explicitly passed into the method, the table name will be assumed to be the value of the first URL segment. 'First URL segment' No

    Return Value

    Type Description
    int|null The ID (int) of the newly inserted record, or null if insertion fails.

    Example Usage #1

    The following code demonstrates how to insert a new record into the 'users' table.

    $user_data = [
        'username' => 'john_doe',
        'email' => '[email protected]',
        'password' => 'hashed_password'
    ];
    $new_user_id = $this->model->insert($user_data, 'users');

    Example Usage #2

    In this example, we insert a new product record into an unspecified database table. Since no second argument has been passed into the method, the table name will be inferred from the first URL segment.

    $product_data = [
        'name' => 'Product X',
        'description' => 'A fantastic product',
        'price' => 99.99
    ];
    $new_product_id = $this->model->insert($product_data);

    insert_batch()

    public function insert_batch(string $table, array $records): int

    Description

    Insert multiple records into the specified table in a batch using a single SQL statement. This method is designed for efficiency when inserting a large number of records at once.

    Parameters

    Parameter Type Description Default Required
    table string The name of the table to insert records into. N/A Yes
    records array An array containing associative arrays representing records to be inserted. N/A Yes

    Return Value

    Type Description
    int The number of records successfully inserted.

    Throws

    Exception Description
    PDOException If an error occurs during the database operation.
    Warning!

    This method should only be used in controlled environments to prevent potential security vulnerabilities arising from direct user input.

    Example Usage

    Below is an example of how to insert three records into an 'employees' table in a single batch:

    $employee_records = [
        [
            'name' => 'John Doe',
            'position' => 'Software Engineer',
            'salary' => 80000
        ],
        [
            'name' => 'Jane Smith',
            'position' => 'UX Designer',
            'salary' => 75000
        ],
        [
            'name' => 'Mike Johnson',
            'position' => 'Data Analyst',
            'salary' => 70000
        ]
    ];
    
    $num_inserted = $this->model->insert_batch('employees', $employee_records);
    echo "Successfully inserted $num_inserted records into the 'employees' table.";
        

    query()

    public function query(string $sql, ?string $return_type = null): mixed

    Description

    Execute a custom SQL query. This method allows executing custom SQL queries. It takes the SQL query to execute as the first parameter and an optional parameter specifying the type of result to return ('object' or 'array'). It returns the result of the query based on the specified return type.

    It's important to ensure that the provided SQL query is properly sanitized to prevent SQL injection attacks.

    Parameters

    Parameter Type Description Default Required
    sql string The SQL query to execute. N/A Yes
    return_type string|null (optional) The type of result to return ('object' or 'array'). Default is null. null No

    Return Value

    Type Description
    mixed Returns the result of the query based on the specified return type.

    Throws

    Exception Description
    RuntimeException If the query execution fails.
    InvalidArgumentException If the SQL query is potentially vulnerable to SQL injection.

    Note

    It's important to ensure that the provided SQL query is properly sanitized to prevent SQL injection attacks.

    Example Usage

    Below is an example of executing a custom SQL query involving a table join to retrieve information about employees and their corresponding departments:

    $sql = "SELECT e.name AS employee_name, e.position, d.name AS department_name
            FROM employees e
            JOIN departments d ON e.department_id = d.id";
            
    $rows = $this->model->query($sql, 'object');

    query_bind()

    public function query_bind(string $sql, array $data, ?string $return_type = null): mixed

    Description

    Execute a custom SQL query with parameter binding. This method allows executing custom SQL queries with parameter binding. It takes the SQL query to execute as the first parameter, an associative array of parameters to bind to the query as the second parameter, and an optional parameter specifying the type of result to return ('object' or 'array'). It returns the result of the query based on the specified return type.

    Parameters

    Parameter Type Description Default Required
    sql string The SQL query to execute. N/A Yes
    data array An associative array of parameters to bind to the query. N/A Yes
    return_type string|null (optional) The type of result to return ('object' or 'array'). Default is null. null No

    Return Value

    Type Description
    mixed Returns the result of the query based on the specified return type.

    Throws

    Exception Description
    RuntimeException If the query execution fails.

    Example Usage #1

    The code sample below demonstrates how to execute a custom SQL query, using query binding with named parameters.

    // Build the SQL query (using placeholders).
    $sql = "SELECT * FROM users WHERE age > :age AND city = :city";
    
    // Named parameters to bind to the query.
    $data = [
        'age' => 30,
        'city' => 'New York'
    ];
    
    // Execute the query using the named parameters.
    $rows = $this->model->query_bind($sql, $data, 'object');

    Example Usage #2

    The code sample below demonstrates how to execute a custom SQL query, using query binding with unnamed parameters.

    // Build the SQL query (using placeholders).
    $sql = "SELECT * FROM products WHERE category = ? AND price > ?";
    
    // Unnamed parameters to bind to the query.
    $data = ['Electronics', 100];
    
    // Execute the query using the unnamed parameters.
    $rows = $this->model->query_bind($sql, $data, 'array');
    

    resequence_ids()

    public function resequence_ids(string $table_name): bool

    Description

    This method resequences the IDs in a given table, assigning new sequential IDs starting from 1. It uses a temporary column to store the new IDs and avoid potential ID conflicts. If the table is empty, the method resets the auto-increment value to 1.

    Parameters

    Parameter Type Description Required
    table_name string The name of the table to resequence IDs for. Yes

    Return Value

    Type Description
    bool True upon successful resequencing.

    Throws

    Exception Description
    Exception If the operation fails.

    Note

    Warning!

    This method should be used with caution and may produce undesired consequences. Resequencing IDs can lead to potential data inconsistencies and unexpected behaviors, especially in systems with complex relationships or when dealing with large datasets. It's recommended to thoroughly test this method in a controlled environment before applying it to a production system. Additionally, make sure to take proper backups of your data before executing this operation.

    Example Usage

    $this->model->resequence_ids('tasks');

    table_exists()

    public function table_exists(string $table_name): bool

    Description

    Checks whether a specified table exists in the database.

    Parameters

    Parameter Type Description Default Required
    $table_name string The name of the table to check for existence. N/A Yes

    Return Value

    Type Description
    bool True if the specified table exists in the database, false otherwise.

    Example Usage

    $table_exists = $this->model->table_exists('products');

    update()

    public function update(int $update_id, array $data, ?string $target_table = null): bool

    Description

    This method updates a specific record identified by its ID with new data provided as an associative array. Optionally, you can specify the database table to update; if not provided, the table name will be inferred from the first segment of the URL.

    Parameters

    Parameter Type Description Default Required
    update_id int The ID of the record to update. N/A Yes
    data array An associative array containing column names as keys and their corresponding values. N/A Yes
    target_table string|null (optional) The name of the database table to update. If not provided, the table name will be inferred from the first URL segment. 'First URL segment' No

    Return Value

    Type Description
    bool Returns true if the update was successful, false otherwise.

    Throws

    Exception Description
    RuntimeException If the query execution fails.

    Example 1: Updating a User Record

    The code sample below assumes a current URL of the form: example.com/users/update/123.

    // Data to update
    $data["name"] = "John Doe";
    $data["email"] = "[email protected]";
    
    // Update the user record with ID 123 using inferred table name
    $update_success = $this->model->update(123, $data);
    
    if ($update_success) {
        echo "User record updated successfully!";
    } else {
        echo "Failed to update user record.";
    }

    Example 2: Updating a Customer Record with Explicit Table Name

    The code sample below assumes a current URL of the form: example.com/customers/update/456.

    // Fetch record ID from URL
    $update_id = segment(3, 'int');
    
    // Data to update
    $data["name"] = "Alice Smith";
    $data["email"] = "[email protected]";
    
    // Update the customer record in the 'customers' table
    $update_success = $this->model->update($update_id, $data, 'customers');
    
    if ($update_success) {
        echo "Customer record updated successfully!";
    } else {
        echo "Failed to update customer record.";
    }

    Example 3: Updating a Record using Alternative Syntax

    The code example below uses alternative PHP syntax to initialize a data array.

    // ID of the record to update
    $update_id = 123;
    
    // Data to update
    $data = [
        'first_name' => 'John',
        'last_name' => 'Doe',
        'email' => '[email protected]'
    ];
    
    // Perform the update
    $update_success = $this->model->update($update_id, $data, 'members');
    
    if ($update_success) {
        echo "Record updated successfully!";
    } else {
        echo "Failed to update record.";
    }
    Warning!

    Exercise caution when using this method, especially in environments with complex data relationships or large datasets. Always ensure proper testing and consider potential data consistency issues.


    update_where()

    public function update_where(string $column, $column_value, array $data, ?string $target_table = null): bool

    Description

    Updates rows in a database table based on a specific condition. This method takes the column to match for the condition, the value to match for the condition, an associative array containing the data to be updated, and an optional parameter specifying the name of the database table. It constructs and executes an SQL query to perform the update, returning true if the update operation was successful and false otherwise.

    Parameters

    Parameter Type Description Default Required
    column string The column to match for the condition. N/A Yes
    column_value mixed The value to match for the condition. N/A Yes
    data array An associative array containing the data to be updated. N/A Yes
    target_table string|null (optional) The name of the database table. If not provided, the table name will be inferred from the first URL segment. 'First URL segment' No

    Return Value

    Type Description
    bool Indicates whether the update operation was successful.

    Example Usage #1

    In this example, the table name is inferred from the first URL segment, and the update is performed based on the condition where the column 'status' equals 'active'.

    // Fetch current timestamp
    $current_time = date('Y-m-d H:i:s');
    
    // Data to update
    $data["status"] = "inactive";
    $data["updated_at"] = $current_time;
    
    // Update rows where 'status' column equals 'active'
    $update_success = $this->model->update_where("status", "active", $data);
    
    if ($update_success) {
        echo "Rows updated successfully!";
    } else {
        echo "Failed to update rows.";
    }

    Example Usage #2

    In this alternative example, the table name 'products' has been passed into the method as an argument. The method attempts to execute SQL that modifies table records by setting the 'status' to 'out of stock' and updating the 'updated_at' timestamp. The update operation would only be applied to rows where the 'stock_quantity' equals 10.

    // Fetch current timestamp
    $current_time = date('Y-m-d H:i:s');
    
    // Data to update
    $data["status"] = "out of stock";
    $data["updated_at"] = $current_time;
    
    // Update rows in the 'products' table where 'stock_quantity' equals 10
    $update_success = $this->model->update_where("stock_quantity", 10, $data, "products");
    
    if ($update_success) {
        echo "Rows updated successfully!";
    } else {
        echo "Failed to update rows.";
    }
    Warning!

    Exercise caution when using this method, especially in environments with complex data relationships or large datasets. Always ensure proper testing and consider potential data consistency issues.


    The Modules Class

    list()

    function list(bool $recursive = false): array

    Description

    Lists all existing modules.

    Parameters

    Parameter Type Description Default
    $recursive bool Optional. Determines whether the listing should be recursive. Default is false. false

    Return Value

    Type Description
    array Returns an array containing the list of existing modules.

    Example Usage

    $existing_modules = $this->modules->list(true);
    json($existing_modules);
    // Output: Array containing the list of existing modules

    load()

    function load(string $target_module): void

    Description

    Loads a module by instantiating its controller.

    Parameters

    Parameter Type Description Default
    $target_module string The name of the target module. N/A

    Return Value

    Type Description
    void No return value.

    Example Usage

    $this->modules->load("welcome");

    Alternative Technique

    The main Trongate class provides the module() method as a convenient alias to $this->modules->load(). This method offers a semantically clear alternative for developers, ensuring the codebase remains expressive and maintainable while utilizing the same underlying functionality as the load() method.

    Example Usage of Alternative Technique

    $this->module('welcome');

    run()

    function run(string $module_controller_method, mixed $first_value = null, mixed $second_value = null, mixed $third_value = null): mixed

    Description

    Dynamically invokes module's controller method and is specifically designed to be called from within presentation files, such as view files.

    Parameters

    Parameter Type Description Default
    $module_controller_method string The format is "Module/Controller/Method". N/A
    $first_value mixed Optional. First parameter for the method. null
    $second_value mixed Optional. Second parameter for the method. null
    $third_value mixed Optional. Third parameter for the method. null

    Return Value

    Type Description
    mixed The result of the controller method.

    Example Usage

    <?= Modules::run('Accounts/_display_profit', $data) ?>

    The Pagination Class

    display()

    public static function display(array $pagination_data): void

    Description

    Displays pagination links based on provided pagination data. The method automatically detects page numbers and pagination roots if not explicitly specified.

    Parameters

    Parameter Type Description Default
    $pagination_data array The pagination data array. N/A

    Required Array Keys

    Key Type Description
    total_rows int The total number of records available.
    limit int The maximum number of records per page.
    record_name_plural string The plural label for the records.

    Optional Array Keys

    Key Type Description Default
    page_num_segment int The URL segment number indicating the current page. Auto-detected from the last URL segment if numeric
    pagination_root string The base URL for pagination links. Auto-detected from current URL
    include_showing_statement bool Whether to display a "Showing x to y of z" statement. false
    include_css bool Whether to include default pagination styles. false
    num_links_per_page int The number of pagination links to display. 10
    settings array Custom pagination settings for HTML output. Default settings array

    Return Value

    Type Description
    void No return value. The method outputs HTML directly.

    Example Usage

    Minimal Configuration (Using Auto-detection)

    <?php 
    // Controller
    $pagination_data = [
      'total_rows' => count($rows),
      'limit' => 10,
      'record_name_plural' => 'books',
      'include_showing_statement' => true
    ];
    $data['pagination_data'] = $pagination_data;
    
    // View file
    Pagination::display($pagination_data);
    ?>

    Explicit Configuration

    <?php 
    // Controller
    $pagination_data = [
      'total_rows' => count($rows),
      'limit' => 10,
      'record_name_plural' => 'books',
      'page_num_segment' => 3,
      'pagination_root' => 'books/manage',
      'include_showing_statement' => true,
      'include_css' => true
    ];
    $data['pagination_data'] = $pagination_data;
    
    // View file
    Pagination::display($pagination_data);
    ?>

    The Template Class

    display()

    public static function display(?array $data = null): void

    Note: This method accepts only one argument - an optional array parameter. Multiple arguments are not supported.

    Description

    Core template rendering method that loads and displays view files from module directories. This method should be invoked from within a view file or an HTML template.

    This method serves two primary purposes:

    • Rendering the main content area within a template
    • Including module-specific partial views when Template::partial() is insufficient

    The method automatically determines the correct module and view file to load based on the URL structure, but these can be overridden through the $data array.

    Parameters

    Parameter Type Description Default Required
    data array|null An associative array that can contain:
    • view_module: The module directory name
    • view_file: The view file name (without .php extension)
    • Any additional variables needed by the view
    null No

    Return Value

    Type Description
    void This method does not return a value. It outputs the content directly.

    File Path Resolution

    Component Source Example
    view_module First URL segment or $data['view_module'] shop
    view_file $data['view_file'] or 'index' product_list
    Final Path APPPATH/modules/[module]/views/[file].php APPPATH/modules/shop/views/product_list.php

    Common Use Cases

    1. Main Content Area

    Using display() to render the main content in a template:

    <!DOCTYPE html>
    <html>
        <head>
            <title>My Site</title>
        </head>
        <body>
            <header>...</header>
            <main>
                <?= Template::display($data) ?>
            </main>
            <footer>...</footer>
        </body>
    </html>

    2. Module-Specific Partials

    Loading a partial view from a specific module:

    // Inside a controller or view
    $data = [
        'view_module' => 'shop',
        'view_file' => 'product_sidebar',
        'categories' => $categories,
        'featured_products' => $featured_products
    ];
    Template::display($data);

    3. Default Index Page

    When no view_file is specified, it loads index.php:

    // These are equivalent:
    Template::display();
    Template::display(['view_file' => 'index']);

    Dependencies

    Dependency Description
    APPPATH Constant defining the application root path
    get_view_module() Method that retrieves the current view module from the URL
    attempt_include() Private method that handles file inclusion and data extraction

    Error Handling

    If the specified view file does not exist, the script will terminate with an error message showing the attempted file path. This behavior is handled by the attempt_include() method.

    Important Notes

    • All variables in the $data array become available as individual variables in the view file
    • The view_module and view_file values in $data override the URL-based defaults
    • View files must have a .php extension (added automatically)
    • File paths are constructed using directory separators appropriate for the operating system

    get_view_module()

    public static function get_view_module(): string

    Description

    Extracts and processes the view module name from the current URL. This method removes the base URL, sanitizes the remaining path, and returns the first URL segment as the view module name. If no segment is found, it returns a default module value.

    Parameters

    Parameter Type Description Default Required
    This method does not accept any parameters.

    Return Value

    Type Description
    string The name of the view module extracted from the URL. If no module is found in the URL, returns the value of DEFAULT_MODULE constant.

    Dependencies

    Dependency Description
    BASE_URL Constant defining the base URL of the application
    DEFAULT_MODULE Constant defining the fallback module name
    current_url() Function that returns the current URL

    Example Usage

    // Assuming current URL is: http://example.com/admin/dashboard
    $view_module = Template::get_view_module(); // Returns 'admin'
    
    // Assuming current URL is: http://example.com/user-profile
    $view_module = Template::get_view_module(); // Returns 'user/profile'
    
    // Assuming current URL is: http://example.com/
    $view_module = Template::get_view_module(); // Returns value of DEFAULT_MODULE

    partial()

    public static function partial(string $file_name, ?array $data = null): void

    Description

    Loads and includes reusable view components (partials) from the global templates directory. This method is primarily used for including common UI elements that are shared across multiple pages or modules, such as headers, navigation bars, footers, and other reusable components.

    Parameters

    Parameter Type Description Default Required
    file_name string The path to the partial file relative to templates/views/, without the .php extension.

    Example: "partials/header" for templates/views/partials/header.php
    N/A Yes
    data array|null An associative array of variables to be extracted and made available within the partial.

    Example: ['page_title' => 'Welcome', 'user' => $user_object]
    null No

    Return Value

    Type Description
    void This method does not return a value. It outputs the content directly.

    File Path Resolution

    Component Description Example
    Base Path APPPATH . 'templates/views/' /var/www/html/app/templates/views/
    File Name Provided path + .php partials/header.php
    Full Path Complete file path /var/www/html/app/templates/views/partials/header.php

    Common Use Cases

    1. Header with Dynamic Title

    Template usage:

    <!DOCTYPE html>
    <html lang="en">
    <head>
        <?= Template::partial('partials/head', [
            'page_title' => $page_title,
            'meta_description' => $meta_description
        ]) ?>
    </head>

    Partial content (partials/head.php):

    <meta charset="UTF-8">
    <meta name="viewport" content="width=device-width, initial-scale=1.0">
    <title><?= $page_title ?? 'Default Title' ?></title>
    <meta name="description" content="<?= $meta_description ?? '' ?>">
    <link rel="stylesheet" href="<?= BASE_URL ?>css/styles.css">

    2. Navigation with User State

    Template usage:

    <?= Template::partial('partials/navigation', [
        'user_id' => $user_id,
        'is_admin' => $is_admin,
        'active_page' => 'dashboard'
    ]) ?>

    Partial content (partials/navigation.php):

    <nav class="navbar">
        <div class="container">
            <a class="navbar-brand" href="<?= BASE_URL ?>">Site Name</a>
            <ul class="nav-links">
                <?php if (isset($user_id)): ?>
                    <li><a href="<?= BASE_URL ?>dashboard" class="<?= $active_page === 'dashboard' ? 'active' : '' ?>">Dashboard</a></li>
                    <?php if ($is_admin): ?>
                        <li><a href="<?= BASE_URL ?>admin">Admin Panel</a></li>
                    <?php endif; ?>
                    <li><a href="<?= BASE_URL ?>logout">Logout</a></li>
                <?php else: ?>
                    <li><a href="<?= BASE_URL ?>login">Login</a></li>
                <?php endif; ?>
            </ul>
        </div>
    </nav>

    3. Reusable Form Components

    Template usage:

    <?= Template::partial('partials/forms/text_input', [
        'label' => 'Email Address',
        'name' => 'email',
        'value' => $email ?? '',
        'required' => true,
        'error' => $errors['email'] ?? null
    ]) ?>

    Partial content (partials/forms/text_input.php):

    <div class="form-group <?= isset($error) ? 'has-error' : '' ?>">
        <label for="<?= $name ?>">
            <?= $label ?>
            <?php if ($required ?? false): ?>
                <span class="required">*</span>
            <?php endif; ?>
        </label>
        <input type="text" 
               name="<?= $name ?>" 
               id="<?= $name ?>" 
               value="<?= htmlspecialchars($value) ?>"
               <?= ($required ?? false) ? 'required' : '' ?>>
        <?php if (isset($error)): ?>
            <div class="error-message"><?= $error ?></div>
        <?php endif; ?>
    </div>

    Dependencies

    Dependency Description
    APPPATH Constant defining the application root path
    attempt_include() Private method that handles file inclusion and data extraction

    Error Handling

    If the specified partial file does not exist, the script will terminate with an error message showing the attempted file path. This behavior is handled by the attempt_include() method.

    Important Notes

    • Partial files must be located within the templates/views directory
    • All variables in the $data array become available as individual variables in the partial
    • File paths are case-sensitive on Unix-based systems
    • The .php extension is automatically added to the file name
    • For module-specific partials, use Template::display() instead

    The Trongate Class

    module()

    protected function module(string $target_module): void

    Description

    Loads a module using the Modules class. This method serves as an alternative way of invoking the load method from the Modules class. It simply instantiates a Modules object and calls its load method with the provided target module name.

    Parameters

    Parameter Type Description Default
    $target_module string The name of the target module. N/A

    Return Value

    Type Description
    void This function does not return a value.

    Example Usage

    $target_module = "my_module";
    $this->module($target_module);

    template()

    protected function template(string $template_name, array $data = []): void

    Description

    Renders a specific template view by calling a corresponding method in the Templates controller class.

    Parameters

    Parameter Type Description Default
    $template_name string The name of the template method to be called. N/A
    $data array Optional. An associative array containing data to be passed to the template method. []

    Return Value

    Type Description
    void This function does not return a value.

    Example Usage

    $template_name = "my_template";
    $data = ['variable1' => 'value1', 'variable2' => 'value2'];
    template($template_name, $data);

    upload_file()

    protected function upload_file(array $config): ?array

    Description

    Uploads a file using the upload method from the File class. This method serves as a simplified way to invoke the File class's upload functionality within the Trongate framework.

    How It Works:

    • It instantiates a File object.
    • It calls the upload method of the File class, passing the provided $config array as an argument.
    • The upload method handles the file upload process, including validation, security checks, and moving the file to the target destination.
    • If the upload is successful, it returns an array containing details about the uploaded file. If the upload fails, it throws an exception.

    Parameters

    Parameter Type Description Default
    $config array An associative array containing upload configuration options. These options are passed directly to the File class's upload method. For details, refer to the File class documentation. N/A

    Return Value

    Type Description
    array|null Returns an associative array containing details about the uploaded file if the operation is successful. The array includes:
    • file_name: (string) The name of the uploaded file.
    • file_path: (string) The full path to the uploaded file.
    • file_type: (string) The MIME type of the uploaded file.
    • file_size: (int) The size of the uploaded file in bytes.
    If the upload fails, an exception is thrown, and no value is returned.

    Example Usage

    // Example: Uploading a PDF file with custom configuration
    $config = [
        'destination' => 'documents/uploads/',
        'upload_to_module' => false,
        'make_rand_name' => true
    ];
    
    try {
        $file_info = $this->upload_file($config);
        print_r($file_info);
        /*
        Output:
        Array
        (
            [file_name] => random_filename.pdf
            [file_path] => /path/to/documents/uploads/random_filename.pdf
            [file_type] => application/pdf
            [file_size] => 512000
        )
        */
    } catch (Exception $e) {
        echo "Upload failed: " . $e->getMessage();
    }

    Best Practices

    • Validate Configuration: Ensure the upload configuration is valid and the destination path is accessible before calling this method.
    • Use Random Filenames: When handling sensitive files, use 'make_rand_name' => true to generate random filenames and avoid conflicts.
    • Handle Exceptions: Use try-catch blocks to handle exceptions gracefully, especially when working with user-provided paths.

    upload_picture()

    protected function upload_picture(array $config): ?array

    Description

    Handles picture uploads within the Trongate framework with optional thumbnail generation. This method processes uploaded images, performs validation, handles resizing, and optionally generates thumbnails based on the provided configuration.

    Core Features:

    • Validates and processes image uploads
    • Supports automatic image resizing
    • Optional thumbnail generation
    • Flexible storage in either module assets or public directory
    • Supports filename randomization

    Parameters

    Parameter Type Description Required
    $config array Core configuration options:
    • destination: Target upload directory path
    • max_width: Maximum width for main image
    • max_height: Maximum height for main image
    • upload_to_module: Whether to store in module assets
    • make_rand_name: Whether to randomize filenames
    Optional thumbnail settings:
    • thumbnail_dir: Directory for thumbnails
    • thumbnail_max_width: Maximum thumbnail width
    • thumbnail_max_height: Maximum thumbnail height
    Yes

    Return Value

    Type Description
    array|null Returns an array containing:
    • file_name: Name of the uploaded file
    • file_path: Full path to the uploaded file
    • file_type: MIME type of the file
    • file_size: File size in bytes
    • thumbnail_path: Path to thumbnail (if generated)

    Example Usage

    // Example 1: Basic image upload without thumbnails
    function submit_product_picture($update_id) {
        $this->module('trongate_security');
        $this->trongate_security->_make_sure_allowed();
    
        // Validate file upload
        if ($_FILES['picture']['name'] == '') {
            redirect($_SERVER['HTTP_REFERER']);
        }
    
        // Initialize basic settings
        $config = [
            'destination' => 'products_pics/'.$update_id,
            'max_width' => 800,
            'max_height' => 600,
            'upload_to_module' => true,
            'make_rand_name' => false
        ];
    
        try {
            // Perform the upload
            $file_info = $this->upload_picture($config);
            
            // Update database with filename
            $data['picture'] = $file_info['file_name'];
            $this->model->update($update_id, $data);
            
            set_flashdata('Picture uploaded successfully');
            redirect($_SERVER['HTTP_REFERER']);
        } catch (Exception $e) {
            set_flashdata('Upload failed: ' . $e->getMessage());
            redirect($_SERVER['HTTP_REFERER']);
        }
    }
    // Example 2: Image upload with thumbnail generation
    function submit_product_picture_with_thumbnail($update_id) {
        $this->module('trongate_security');
        $this->trongate_security->_make_sure_allowed();
    
        // Validate file upload
        if ($_FILES['picture']['name'] == '') {
            redirect($_SERVER['HTTP_REFERER']);
        }
    
        // Initialize settings with thumbnail configuration
        $config = [
            // Core settings
            'destination' => 'products_pics/'.$update_id,
            'max_width' => 800,
            'max_height' => 600,
            'upload_to_module' => true,
            'make_rand_name' => false,
            
            // Thumbnail settings
            'thumbnail_dir' => 'products_pics_thumbnails/'.$update_id,
            'thumbnail_max_width' => 150,
            'thumbnail_max_height' => 150
        ];
    
        try {
            // Perform upload with thumbnail generation
            $file_info = $this->upload_picture($config);
            
            // Update database with filename
            $data['picture'] = $file_info['file_name'];
            $this->model->update($update_id, $data);
            
            set_flashdata('Picture and thumbnail uploaded successfully');
            redirect($_SERVER['HTTP_REFERER']);
        } catch (Exception $e) {
            set_flashdata('Upload failed: ' . $e->getMessage());
            redirect($_SERVER['HTTP_REFERER']);
        }
    }

    Best Practices

    • Security: Always implement Trongate security checks before processing uploads
    • Validation: Validate file types and sizes before processing
    • Directory Structure: Ensure upload directories exist using _make_sure_got_destination_folders()
    • Database Storage: Store only filenames, not full paths, in the database
    • Error Handling: Implement proper try-catch blocks and user feedback

    view()

    protected function view(string $view, array $data = [], ?bool $return_as_str = null): ?string

    Description

    Renders a view file with optional data. This method can either display the view on the browser or return the generated contents as a string.

    Parameters

    Parameter Type Description Default
    $view string The name of the view file to render. N/A
    $data array Optional. An associative array of data to pass to the view. Default is an empty array. Empty array
    $return_as_str bool|null Optional. Whether to return the rendered view as a string. Default is null. If set to true, the view content will be returned as a string; if set to false or null, the view will be displayed on the browser. Default is null, which means the view will be displayed. null

    Return Value

    Type Description
    string|null If $return_as_str is true, the rendered view as a string; otherwise, null.

    Example Usage

    $view_content = $this->view("my_view", ["name" => "John Doe"], true);
    echo $view_content; // Output: HTML content of the rendered view

    The Validation Class

    run_validation_test()

    private function run_validation_test(array $validation_data, $rules = null): void

    Description

    Executes a specific validation test based on the provided validation data and rules. This method is part of Trongate's robust Validation class.

    Parameters

    Parameter Type Description
    $validation_data array An array containing validation data, including the 'test_to_run' key.
    $rules mixed|null (optional) Additional rules for validation, used in specific cases like file validation. Default is null.

    Return Value

    Type Description
    void This function does not return a value. It updates the internal state of the validation object.

    Example #1

    The code sample below demonstrates how to set up validation rules for a 'username' field in a Trongate controller:

      public function submit(): void {
          $this->validation->set_rules('username', 'Username', 'required|min_length[2]|max_length[255]');
          
          $result = $this->validation->run();
    
          if ($result) {
              echo 'Form submission successful!';
          } else {
              $this->create();
          }
      }
      

    Example #2

    This example shows how to use array-based validation for multiple fields:

      public function submit(): void {
          $validation_rules['username'] = [
              'required' => true,
              'min_length' => 2,
              'max_length' => 255
          ];
          $validation_rules['email_address'] = [
              'required' => true,
              'valid_email' => true
          ];
    
          $result = $this->validation->run($validation_rules);
    
          if ($result) {
              echo 'Form submission successful!';
          } else {
              $this->create();
          }
      }
      

    Notes

    • This is a private method used internally by Trongate's Validation class.
    • The method supports various validation tests including: required, numeric, integer, decimal, valid_email, validate_file, valid_datepicker, valid_datetimepicker, and valid_time.
    • Custom validation rules can be created using callback functions, prefixed with 'callback_' in the set_rules() method.
    • The Validation class automatically includes CSRF protection checks when the run() method is called.
    • To display validation errors, you can use the validation_errors() function after run() returns false.

    set_rules()

    public function set_rules(string $key, string $label, string|array $rules): void

    Description

    Set rules for form field validation.

    Parameters

    Parameter Type Description
    $key string The form field name.
    $label string The form field label.
    $rules string|array The validation rules for the field.

    Return Value

    This method does not return any value (void).

    Example Usage

    $this->validation->set_rules('username', 'Username', 'required|min_length[5]|max_length[20]');
    $this->validation->set_rules('email', 'Email', ['required', 'valid_email']);

    Helpers

    Flashdata Helpers

    flashdata()

    function flashdata(string $opening_html = null, string $closing_html = null): void

    Description

    Outputs a flash message stored in the session, wrapped in specified HTML tags.

    If no HTML tags are provided, it defaults to displaying the message within a paragraph tag with green color.

    Parameters

    Parameter Type Description Default
    $opening_html string Optional. HTML tag(s) to wrap the flash message. If not provided, defaults to `<p style="color: green;">`. null
    $closing_html string Optional. Closing HTML tag(s) if opening tag(s) are provided. If not provided, defaults to `</p>`. null

    Return Value

    Type Description
    void This function does not return anything. It directly outputs the flash message.

    Example Usage

    // Output flash message wrapped in custom HTML tags
    flashdata('<div class="alert alert-success">', '</div>');
    
    // Output flash message with default paragraph tags
    flashdata();

    set_flashdata()

    function set_flashdata(string $msg): void

    Description

    Sets a flash message in the session.

    Parameters

    Parameter Type Description Default
    $msg string The message to be set as flash data. N/A

    Return Value

    Type Description
    void This function does not return anything.

    Example Usage

    set_flashdata("Your data has been saved successfully.");
    // This sets a flash message in the session.

    Form Helpers

    form_button()

    function form_button(string $name, ?string $value = null, ?array $attributes = null): string

    Description

    Generates an HTML button element.

    Parameters

    Parameter Type Description
    $name string The name attribute for the button element.
    $value string|null (optional) The value of the button. If not provided, defaults to "Submit". Default is null.
    $attributes array|null (optional) An associative array of HTML attributes for the button. Default is null.

    Return Value

    Type Description
    string The generated HTML button element.

    Example #1

    The code sample below demonstrates the basic usage of the form_button function with default parameters.

    $name = 'action-btn';
    echo form_button($name);
    // Output:
    // <button type="button" name="action-btn">Submit</button>
      

    Example #2

    The code sample below demonstrates a more complex usage of the form_button function with a custom value and additional attributes.

    $name = 'action-btn';
    $value = 'Click Me';
    $attributes = [
        'class' => 'btn btn-primary', 
        'id' => 'custom-button', 
        'onclick' => 'handleClick()',
        'data-toggle' => 'dropdown'
    ];
    echo form_button($name, $value, $attributes);
    // Output:
    // <button type="button" name="action-btn" class="btn btn-primary" id="custom-button" onclick="handleClick()" data-toggle="dropdown">Click Me</button>
      

    Notes

    • The function automatically sets the type attribute to "button".
    • If no $value is provided, the function uses "Submit" as the default button text.
    • The button's text content is not escaped, so ensure proper sanitization if using user-generated content.
    • The $attributes array can be used to add any valid HTML attributes to the button element.
    • For custom data attributes or non-standard HTML attributes, include them in the $attributes array (e.g., ['data-toggle' => 'dropdown']).

    form_checkbox()

    function form_checkbox(string $name, mixed $value = '1', mixed $checked = false, ?array $attributes = null): string

    Description

    Generates a checkbox form field element.

    Parameters

    Parameter Type Description
    $name string The name attribute for the input element.
    $value mixed (optional) The value attribute for the input element. Default is '1'.
    $checked mixed (optional) Whether the checkbox should be checked. Can be boolean, string, or any truthy/falsy value. Default is false.
    $attributes array|null (optional) Additional attributes for the input element as an associative array. Default is null.

    Return Value

    Type Description
    string The generated HTML input element.

    Example #1

    The code sample below demonstrates the basic usage of the form_checkbox function with default parameters.

    $name = 'subscribe';
    echo form_checkbox($name);
    // Output: '<input type="checkbox" name="subscribe" value="1">'
      

    Example #2

    The code sample below demonstrates a more complex usage of the form_checkbox function with additional attributes.

    $name = 'subscribe';
    $value = 'yes';
    $checked = true;
    $attributes = [
        'class' => 'checkbox-input', 
        'id' => 'subscribe-checkbox', 
        'disabled' => 'disabled',
        'data-toggle' => 'tooltip',
        'data-placement' => 'top',
        'title' => 'Subscribe to newsletter'
    ];
    echo form_checkbox($name, $value, $checked, $attributes);
    // Output: '<input type="checkbox" name="subscribe" value="yes" checked class="checkbox-input" 
    //         id="subscribe-checkbox" disabled data-toggle="tooltip" data-placement="top" 
    //         title="Subscribe to newsletter">'
      

    form_close()

    function form_close(): string

    Description

    Generates hidden CSRF token input field and a closing form tag.

    Parameters

    This function does not accept any parameters.

    Return Value

    Type Description
    string The generated HTML closing tag for the form, including CSRF token.

    Example

    The code sample below demonstrates the basic usage of the form_close function.

      echo form_open('submit_form');
      echo form_input('username');
      echo form_submit('submit', 'Submit');
      echo form_close();
      
      // Output: 
      // '<form action="submit_form" method="post">
      //  <input type="text" name="username">
      //  <input type="submit" name="submit" value="Submit">
      //  <input type="hidden" name="csrf_token" value="...">
      //  </form>'
      

    Additional Notes

    The function automatically handles the insertion of a hidden CSRF token field, so developers do not need to manually include it in their forms. If a CSRF token is not already present in the session, the function generates one using bin2hex(random_bytes(32)) and stores it in the session under the key csrf_token. This ensures that the CSRF token is available for subsequent form submissions and validations.

    The function also plays a role in initializing the rendering of inline form validation errors, if required. For additional information on this topic, please view the documentation for displaying validation errors.


    form_date()

    function form_date(string $name, ?string $value = null, ?array $attributes = null): string

    Description

    Generates a date input form field element.

    Parameters

    Parameter Type Description
    $name string The name attribute for the input element.
    $value string|null (optional) The value attribute for the input element. Default is null.
    $attributes array|null (optional) Additional attributes for the input element as an associative array. Default is null.

    Return Value

    Type Description
    string The generated HTML date input element.

    Example #1

    The code sample below demonstrates the basic usage of the form_date function with default parameters.

    $name = 'dob';
    $value = '1990-01-01';
    echo form_date($name, $value);
    // Output: '<input type="date" name="dob" value="1990-01-01">'
      

    Example #2

    The code sample below demonstrates a more complex usage of the form_date function with additional attributes.

    $name = 'dob';
    $value = '1990-01-01';
    $attributes = ['class' => 'form-control', 'id' => 'dob-input', 'min' => '1900-01-01', 'max' => '2100-12-31'];
    echo form_date($name, $value, $attributes);
    // Output: '<input type="date" name="dob" value="1990-01-01" class="form-control" id="dob-input" min="1900-01-01" max="2100-12-31">'
      

    form_dropdown()

    function form_dropdown(string $name, array $options, ?string $selected_key = null, ?array $attributes = null): string

    Description

    Generates an HTML select menu based on the provided options and parameters.

    Parameters

    Parameter Type Description
    $name string The name attribute for the select element.
    $options array An associative array of options (value => text).
    $selected_key string|null (Optional) The key of the selected option, if any. Default is null.
    $attributes array|null (Optional) An array of additional HTML attributes for the select element. Default is null.

    Return Value

    Type Description
    string The generated HTML string for the select menu.

    Example #1

    Basic usage of form_dropdown with minimal parameters:

    $name = 'fruits';
    $options = ['apple' => 'Apple', 'banana' => 'Banana', 'cherry' => 'Cherry'];
    echo form_dropdown($name, $options);
    // Output:
    // <select name="fruits">
    //     <option value="apple">Apple</option>
    //     <option value="banana">Banana</option>
    //     <option value="cherry">Cherry</option>
    // </select>
    

    Example #2

    Using form_dropdown with a pre-selected value and additional attributes:

    $name = 'fruits';
    $options = ['apple' => 'Apple', 'banana' => 'Banana', 'cherry' => 'Cherry'];
    $selected_key = 'banana';
    $attributes = [
        'class' => 'dropdown',
        'id' => 'fruit-selector',
        'data-live-search' => 'true',
        'aria-label' => 'Fruit Selection'
    ];
    echo form_dropdown($name, $options, $selected_key, $attributes);
    // Output:
    // <select name="fruits" class="dropdown" id="fruit-selector" data-live-search="true" aria-label="Fruit Selection">
    //     <option value="apple">Apple</option>
    //     <option value="banana" selected="selected">Banana</option>
    //     <option value="cherry">Cherry</option>
    // </select>
    

    Example #3

    Adding an initial "placeholder" option and handling edge cases:

    $name = 'fruits';
    $options = ['' => 'Please select...', 'apple' => 'Apple', 'banana' => 'Banana'];
    $selected_key = '';
    $attributes = ['required' => 'required', 'aria-required' => 'true'];
    echo form_dropdown($name, $options, $selected_key, $attributes);
    // Output:
    // <select name="fruits" required="required" aria-required="true">
    //     <option value="" selected="selected">Please select...</option>
    //     <option value="apple">Apple</option>
    //     <option value="banana">Banana</option>
    // </select>
    

    Notes

    • All option values and text are HTML-escaped to prevent XSS attacks.
    • The $selected_key parameter ensures that the corresponding option is marked as selected, if applicable.
    • Use the $attributes parameter to add any valid HTML attributes to the select element, including data attributes, ARIA attributes, and event handlers.
    • The $attributes array can include both standard HTML attributes (like class, id) and custom data attributes (like data-*).

    form_email()

    function form_email(string $name, ?string $value = null, ?array $attributes = null): string

    Description

    Generates an email input form field element.

    Parameters

    Parameter Type Description
    $name string The name attribute for the input element.
    $value string|null (optional) The value attribute for the input element. Default is null.
    $attributes array|null (optional) Additional attributes for the input element as an associative array. Default is null.

    Return Value

    Type Description
    string The generated HTML input element.

    Example #1

    The code sample below demonstrates the basic usage of the form_email function with default parameters.

      $name = 'user_email';
      $value = '[email protected]';
      echo form_email($name, $value);
      // Output: '<input type="email" name="user_email" value="[email protected]">'
      

    Example #2

    The code sample below demonstrates a more complex usage of the form_email function with additional attributes.

      $name = 'user_email';
      $value = '[email protected]';
      $attributes = ['class' => 'email-input', 'id' => 'email-input', 'placeholder' => 'Enter your email'];
      echo form_email($name, $value, $attributes);
      // Output: '<input type="email" name="user_email" value="[email protected]" class="email-input" id="email-input" placeholder="Enter your email">'
      

    form_file_select()

    function form_file_select(string $name, ?array $attributes = null): string

    Description

    Generates an HTML file input element.

    Parameters

    Parameter Type Description
    $name string The name attribute for the file input.
    $attributes array|null (optional) An array of HTML attributes for the file input. Default is null.

    Return Value

    Type Description
    string The generated HTML for the file input element.

    Example #1

    The code sample below demonstrates the basic usage of the form_file_select function.

      $name = 'user_file';
      echo form_file_select($name);
      // Output:
      // <input type="file" name="user_file">
      

    Example #2

    The code sample below demonstrates a more complex usage of the form_file_select function with additional attributes.

      $name = 'user_file';
      $attributes = [
          'id' => 'user-file-input',
          'class' => 'form-control-file',
          'accept' => '.pdf,.doc,.docx',
          'multiple' => true
      ];
      echo form_file_select($name, $attributes);
      // Output:
      // <input type="file" name="user_file" id="user-file-input" class="form-control-file" accept=".pdf,.doc,.docx" multiple>
      

    Notes

    • The function automatically sets the type attribute to 'file'.
    • This function internally calls the form_input() function to generate the HTML.
    • Any attributes passed in the $attributes array will be added to the input element, allowing for customization of the file input's behavior and appearance.
    • The multiple attribute can be added to allow selection of multiple files.
    • The accept attribute can be used to specify which file types are allowed.

    form_hidden()

    function form_hidden(string $name, string|int|float|null $value = null, ?array $attributes = null): string

    Description

    Generates a hidden input form field element.

    Parameters

    Parameter Type Description
    $name string The name attribute for the input element.
    $value string|int|float|null (optional) The value attribute for the input element. Default is null.
    $attributes array|null (optional) Additional attributes for the input element as an associative array. Default is null.

    Return Value

    Type Description
    string The generated HTML input element.

    Example #1

    The code sample below demonstrates the basic usage of the form_hidden function with default parameters.

    $name = 'token';
    echo form_hidden($name, 'abc123');
    // Output: '<input type="hidden" name="token" value="abc123">'
      

    Example #2

    The code sample below demonstrates a more complex usage of the form_hidden function with additional attributes.

    $name = 'token';
    $value = 'abc123';
    $attributes = ['class' => 'hidden-field', 'id' => 'token-field'];
    echo form_hidden($name, $value, $attributes);
    // Output: '<input type="hidden" name="token" value="abc123" class="hidden-field" id="token-field">'
      

    form_input()

    function form_input(string $name, ?string $value = null, ?array $attributes = null): string

    Description

    Generates a text input form field element.

    Parameters

    Parameter Type Description
    $name string The name attribute for the input element.
    $value string|null (optional) The value attribute for the input element. Default is null.
    $attributes array|null (optional) Additional attributes for the input element as an associative array. Default is null.

    Return Value

    Type Description
    string The generated HTML input element.

    Example #1

    The code sample below demonstrates the basic usage of the form_input function with default parameters.

    $name = 'username';
    $value = 'john_doe';
    echo form_input($name, $value);
    // Output: '<input type="text" name="username" value="john_doe">'
      

    Example #2

    The code sample below demonstrates a more complex usage of the form_input function with additional attributes.

    $name = 'username';
    $value = 'john_doe';
    $attributes = ['class' => 'form-control', 'id' => 'username-input', 'placeholder' => 'Enter your username'];
    echo form_input($name, $value, $attributes);
    // Output: '<input type="text" name="username" value="john_doe" class="form-control" id="username-input" placeholder="Enter your username">'
      

    form_label()

    function form_label(string $label_text, ?array $attributes = null): string

    Description

    Generates an HTML label element with optional attributes.

    Parameters

    Parameter Type Description
    $label_text string The text or HTML to display inside the label element. This content is not escaped by default, so ensure proper sanitization if using user-generated content.
    $attributes array|null (optional) An associative array of HTML attributes for the label element. Default is null.

    Return Value

    Type Description
    string The generated HTML label element with any provided attributes.

    Example #1

    The code sample below demonstrates the basic usage of the form_label function with default parameters.

    $label_text = 'Username';
    echo form_label($label_text);
    // Output:
    // <label>Username</label>
      

    Example #2

    The code sample below demonstrates a more complex usage of the form_label function with additional attributes.

    $label_text = 'Username';
    $attributes = ['class' => 'form-label', 'for' => 'username'];
    echo form_label($label_text, $attributes);
    // Output:
    // <label class="form-label" for="username">Username</label>
      

    Notes

    • The $label_text content is not escaped, allowing for more flexibility, such as including HTML. Be cautious when using user-generated content to avoid XSS vulnerabilities.
    • The $attributes array allows for any valid HTML attributes to be added to the label element.

    form_number()

    function form_number(string $name, string|int|float|null $value = null, ?array $attributes = null): string

    Description

    Generates a number input form field element.

    Parameters

    Parameter Type Description
    $name string The name attribute for the input element.
    $value string|int|float|null (optional) The value attribute for the input element. Default is null.
    $attributes array|null (optional) Additional attributes for the input element as an associative array. Default is null.

    Return Value

    Type Description
    string The generated HTML input element.

    Example #1

    The code sample below demonstrates the basic usage of the form_number function with default parameters.

    $name = 'quantity';
    $value = 10;
    echo form_number($name, $value);
    // Output: '<input type="number" name="quantity" value="10">'
      

    Example #2

    The code sample below demonstrates a more complex usage of the form_number function with additional attributes.

    $name = 'quantity';
    $value = 10;
    $attributes = ['class' => 'form-control', 'id' => 'quantity-input', 'min' => '1', 'max' => '100'];
    echo form_number($name, $value, $attributes);
    // Output: '<input type="number" name="quantity" value="10" class="form-control" id="quantity-input" min="1" max="100">'
      

    form_open()

    function form_open(string $location, ?array $attributes = null): string

    Description

    Generates the opening tag for an HTML form.

    Parameters

    Parameter Type Description
    $location string The URL to which the form will be submitted.
    $attributes array|null (optional) An array of HTML attributes for the form. Default is null.

    Return Value

    Type Description
    string The HTML opening tag for the form.

    Example #1

    The code sample below demonstrates the basic usage of the form_open function.

      $location = 'items/submit';
      echo form_open($location);
      
      // Output: '<form action="https://example.com/items/submit" method="post">'
      

    Example #2

    The code sample below demonstrates a more complex usage of the form_open function with additional attributes.

      $location = 'items/submit';
      $attributes = [
          'id' => 'contact-form',
          'class' => 'form-horizontal',
          'method' => 'get'
      ];
      echo form_open($location, $attributes);
      // Output: '<form action="https://example.com/items/submit" method="get" id="contact-form" class="form-horizontal">'
      

    Notes

    • The default method for the form is 'post' if not specified in the attributes.
    • If the 'method' key is present in the $attributes array, it will be used as the form method and removed from the attributes list.
    • The function automatically escapes all attribute names and values to prevent XSS attacks.
    • If the $location is not a valid URL and doesn't start with a forward slash, it will be prepended with DOCS_BASE_URL.
    • The function generates only the opening tag of the form. Don't forget to close your form with a </form> tag.

    form_open_upload()

    function form_open_upload(string $location, ?array $attributes = null): string

    Description

    Generates the opening tag for an HTML form with file upload support.

    Parameters

    Parameter Type Description
    $location string The URL to which the form will be submitted.
    $attributes array|null (optional) An array of HTML attributes for the form. Default is null.

    Return Value

    Type Description
    string The HTML opening tag for the form with enctype set to "multipart/form-data."

    Example #1

    The code sample below demonstrates the basic usage of the form_open_upload function.

      $location = 'upload.php';
      echo form_open_upload($location);
      // Output:
      // <form action="upload.php" method="post" enctype="multipart/form-data">
      

    Example #2

    The code sample below demonstrates a more complex usage of the form_open_upload function with additional attributes.

      $location = 'upload.php';
      $attributes = [
          'id' => 'upload-form',
          'class' => 'form-horizontal',
          'onsubmit' => 'return validateForm()'
      ];
      echo form_open_upload($location, $attributes);
      // Output:
      // <form action="upload.php" method="post" enctype="multipart/form-data" id="upload-form" class="form-horizontal" onsubmit="return validateForm()">
      

    Notes

    • This function automatically sets the enctype attribute to "multipart/form-data", which is required for file uploads.
    • The function internally calls the form_open() function to generate the HTML.
    • If the $attributes array includes an 'enctype' key, it will be overwritten with "multipart/form-data".
    • The method attribute is set to "post" by default (handled by the form_open() function).
    • Remember to close your form with the </form> tag or use a corresponding form_close() function if available.

    form_password()

    function form_password(string $name, ?string $value = null, ?array $attributes = null): string

    Description

    Generates a password input form field element.

    Parameters

    Parameter Type Description
    $name string The name attribute for the input element.
    $value string|null (optional) The value attribute for the input element. Default is null.
    $attributes array|null (optional) Additional attributes for the input element as an associative array. Default is null.

    Return Value

    Type Description
    string The generated HTML input element.

    Example #1

    The code sample below demonstrates the basic usage of the form_password function with default parameters.

    $name = 'user_password';
    $value = 'securePass123';
    echo form_password($name, $value);
    // Output: '<input type="password" name="user_password" value="securePass123">'
      

    Example #2

    The code sample below demonstrates a more complex usage of the form_password function with additional attributes.

    $name = 'user_password';
    $value = 'securePass123';
    $attributes = ['class' => 'form-control', 'id' => 'password-input', 'placeholder' => 'Enter your password'];
    echo form_password($name, $value, $attributes);
    // Output: '<input type="password" name="user_password" value="securePass123" class="form-control" id="password-input" placeholder="Enter your password">'
      

    form_radio()

    function form_radio(string $name, mixed $value = null, mixed $checked = false, ?array $attributes = null): string

    Description

    Generates a radio button form field element.

    Parameters

    Parameter Type Description
    $name string The name attribute for the input element.
    $value mixed (optional) The value attribute for the input element. Default is null.
    $checked mixed (optional) Whether the radio button should be checked. Can be boolean, string, or any truthy/falsy value. Default is false.
    $attributes array|null (optional) Additional attributes for the input element as an associative array. Default is null.

    Return Value

    Type Description
    string The generated HTML input element.

    Example #1

    The code sample below demonstrates the basic usage of the form_radio function with default parameters.

    $name = 'user_option';
    $value = 'option1';
    $checked = true;
    echo form_radio($name, $value, $checked);
    // Output: '<input type="radio" name="user_option" value="option1" checked>'
      

    Example #2

    The code sample below demonstrates a more complex usage of the form_radio function with additional attributes.

    $name = 'user_option';
    $value = 'option2';
    $checked = false;
    $attributes = ['class' => 'form-control', 'id' => 'option2-input', 'data-custom' => 'custom-data'];
    echo form_radio($name, $value, $checked, $attributes);
    // Output: '<input type="radio" name="user_option" value="option2" class="form-control" id="option2-input" data-custom="custom-data">'
      

    form_search()

    function form_search(string $name, ?string $value = null, ?array $attributes = null): string

    Description

    Generates a search input form field element.

    Parameters

    Parameter Type Description
    $name string The name attribute for the input element.
    $value string|null (optional) The value attribute for the input element. Default is null.
    $attributes array|null (optional) Additional attributes for the input element as an associative array. Default is null.

    Return Value

    Type Description
    string The generated HTML input element.

    Example #1

    The code sample below demonstrates the basic usage of the form_search function with default parameters.

    $name = 'search_query';
    $value = 'example';
    echo form_search($name, $value);
    // Output: '<input type="search" name="search_query" value="example">'
      

    Example #2

    The code sample below demonstrates a more complex usage of the form_search function with additional attributes.

    $name = 'search_query';
    $value = 'example';
    $attributes = ['class' => 'form-control', 'id' => 'search-input', 'placeholder' => 'Search...'];
    echo form_search($name, $value, $attributes);
    // Output: '<input type="search" name="search_query" value="example" class="form-control" id="search-input" placeholder="Search...">'
      

    form_submit()

    function form_submit(string $name, ?string $value = null, ?array $attributes = null): string

    Description

    Generates an HTML submit button element.

    Parameters

    Parameter Type Description
    $name string The name attribute for the button element.
    $value string|null (optional) The value of the button. If not provided, defaults to "Submit". Default is null.
    $attributes array|null (optional) An associative array of HTML attributes for the button. Default is null.

    Return Value

    Type Description
    string The generated HTML submit button element.

    Example #1

    The code sample below demonstrates the basic usage of the form_submit function with the default value.

      $name = 'submit_button';
      echo form_submit($name);
      // Output:
      // <button type="submit" name="submit_button">Submit</button>
      

    Example #2

    The code sample below demonstrates a more complex usage of the form_submit function with additional attributes and a custom value.

      $name = 'submit_button';
      $value = 'Send Form';
      $attributes = [
          'id' => 'submit-btn',
          'class' => 'btn btn-primary',
          'onclick' => 'return confirmSubmission()'
      ];
      echo form_submit($name, $value, $attributes);
      
      // Output:
      // <button type="submit" name="submit_button" id="submit-btn" class="btn btn-primary" onclick="return confirmSubmission()">Send Form</button>
      

    Notes

    • The function automatically sets the type attribute to "submit".
    • If no $value is provided, the function uses "Submit" as the default button text and value.
    • The button's text content is not escaped, so ensure proper sanitization if using user-generated content.
    • The $attributes array can be used to add any valid HTML attributes to the button element.
    • This function generates a <button> element rather than an <input type="submit">, allowing for more flexible content and styling.

    form_textarea()

    function form_textarea(string $name, ?string $value = null, ?array $attributes = null): string

    Description

    Generates an HTML textarea element.

    Parameters

    Parameter Type Description
    $name string The name attribute for the textarea element.
    $value string|null (optional) The initial value of the textarea. If not provided, it will be empty.
    $attributes array|null (optional) An associative array of HTML attributes for the textarea. Default is null.

    Return Value

    Type Description
    string The generated HTML textarea element.

    Example #1

    The code sample below demonstrates the basic usage of the form_textarea function with default parameters.

    $name = 'comments';
    $value = 'Your feedback here...';
    echo form_textarea($name, $value);
    // Output: '<textarea name="comments">Your feedback here...</textarea>'
      

    Example #2

    The code sample below demonstrates a more complex usage of the form_textarea function with additional attributes.

    $name = 'comments';
    $value = 'Your feedback here...';
    $attributes = ['class' => 'form-control', 'id' => 'comments-textarea', 'rows' => '5', 'cols' => '50'];
    echo form_textarea($name, $value, $attributes);
    // Output: '<textarea name="comments" class="form-control" id="comments-textarea" rows="5" cols="50">Your feedback here...</textarea>'
      

    post()

    function post(string $field_name, bool $clean_up = false): string|int|float|array

    Description

    Retrieves a value from POST data, handling both traditional form-encoded data and JSON payloads. It can optionally sanitize and convert the value. The function supports dot notation for accessing nested fields in JSON data, providing a versatile way to handle and clean POST data in your application.

    Parameters

    Parameter Type Description
    $field_name string The name of the field to retrieve from the POST data. Supports dot notation for accessing nested fields in JSON data.
    $clean_up bool Optional. Determines whether to sanitize and convert the retrieved value. Default is false.

    Return Value

    Type Description
    string|int|float|array The value retrieved from the POST data. If the field is not found, an empty string is returned. If $clean_up is true, the value is sanitized and potentially converted. For JSON data, it may return an array.

    Behavior

    Content Type Handling:

    • Automatically detects and handles both form-encoded data and JSON payloads.
    • For JSON data, the payload is parsed once and cached for subsequent calls. If parsing fails, an exception is thrown.

    When $clean_up is false (default):

    • Returns the raw value from the POST data if the field exists, or an empty string if it doesn't.
    • No sanitization or type conversion is performed.

    When $clean_up is true:

    • Trimming: Removes leading and trailing whitespace using trim() for string values.
    • Sanitization: Applies htmlspecialchars() to convert special characters to HTML entities in string values, helping prevent Cross-Site Scripting (XSS) attacks.
    • Type Conversion: If the sanitized value is numeric:
      • Converts to int if the value is a whole number.
      • Converts to float if the value contains a decimal point.
    • Array Handling: For array values (e.g., from JSON data), applies trimming and sanitization recursively to all string elements.

    Example Usage

    // Retrieve raw POST data
    $username = post('username');
    
    // Retrieve sanitized and potentially converted POST data
    $age = post('age', true);
    
    // Example with type conversion
    $price = post('price', true);
    // If POST data contains '19.99', $price will be float(19.99)
    // If POST data contains '20', $price will be int(20)
    
    // Handling JSON data
    $jsonData = post('user_data');
    // If POST contains JSON like '{"name": "John", "age": 30}',
    // $jsonData will be an array(['name' => 'John', 'age' => 30])
    
    // Handling nested JSON data
    $street = post('user_data.address.street', true);
    // If POST contains JSON like '{"user_data": {"address": {"street": "123 Main St"}}}',
    // $street will be "123 Main St" (sanitized)

    Security Note

    While the $clean_up option provides basic sanitization, it's recommended to always validate and sanitize data according to its specific use case. For instance, email addresses, dates, or custom formatted strings may require additional validation or different sanitization methods. When working with JSON data, be cautious of deeply nested structures and potential security implications.


    validation_errors()

    function validation_errors(?string $opening_html = null, ?string $closing_html = null): ?string

    Description

    Retrieves and displays validation error messages, if any, from the session. Error messages can be wrapped in custom HTML tags specified by the caller. If no HTML tags are specified, and constants ERROR_OPEN and ERROR_CLOSE are defined, these are used; otherwise, it defaults to paragraph tags with red text color.

    Parameters

    Parameter Type Description Default
    $opening_html string|null Optional. The opening HTML tag to use for each error message. null
    $closing_html string|null Optional. The closing HTML tag to use after each error message. null

    Return Value

    Type Description
    string|null Returns formatted validation error messages if any exist; otherwise, returns null if no errors are found.

    Example Usage

    echo validation_errors('<div class="error-message">', '</div>');
    // Output might be something like:
    // <div class="error-message">Field must not be empty</div>
    // <div class="error-message">Username must be at least 6 characters long</div>

    String Helpers

    extract_content()

    function extract_content(string $string, string $start_delim, string $end_delim): string

    Description

    Extracts a substring from a given string, defined by start and end delimiters. The function searches for the first occurrence of the start delimiter and the first subsequent occurrence of the end delimiter, then returns the text found between them. If either delimiter is not found, or if they are in the wrong order, an empty string is returned.

    Parameters

    Parameter Type Description Default Required
    $string string The full string from which to extract content. N/A Yes
    $start_delim string The starting delimiter of the content to extract. N/A Yes
    $end_delim string The ending delimiter of the content to extract. N/A Yes

    Return Value

    Type Description
    string The content found between the specified delimiters, or an empty string if no content is found.

    Example Usage

    $string = "Hello, start here and end here, thanks.";
    $start_delim = "start here";
    $end_delim = "end here";
    $extracted = $this->extract_content($string, $start_delim, $end_delim);
    // $extracted will be " and "
        

    filter_name()

    function filter_name(string $name, array $allowed_chars = []): string

    Description

    Filters and sanitizes a name, typically used for usernames.

    Parameters

    Parameter Type Description
    $name string The input name to be filtered and sanitized.
    $allowed_chars array Optional. An array of allowed characters.

    Return Value

    Type Description
    string The filtered and sanitized name.

    Example Usage

    $input_name = '<script>alert("Hello");</script>';
    $allowed_chars = ['-', '_'];
    echo filter_name($input_name, $allowed_chars);
    // Output: 'alert("Hello");'

    filter_str()

    function filter_str(string $string, array $allowed_tags = []): string

    Description

    Filters and sanitizes a string, removing any disallowed HTML tags while preserving allowed ones.

    While similar functionality can be achieved using the out() function, filter_str() offers control over which HTML tags are allowed or removed.

    Parameters

    Parameter Type Description
    $string string The input string to be filtered and sanitized.
    $allowed_tags array Optional. An array of allowed HTML tags. Default is an empty array.

    Return Value

    Type Description
    string The filtered and sanitized string.

    Example Usage

    $input_string = '<script>alert("Hello");</script>';
    $allowed_tags = ['<p>', '<a>'];
    echo filter_str($input_string, $allowed_tags);
    // Output: 'alert("Hello");'

    get_last_part()

    function get_last_part(string $str, string $delimiter = '-'): string

    Description

    Retrieves the last part of a string based on a delimiter.

    Parameters

    Parameter Type Description Default
    $str string The input string to retrieve the last part from. N/A
    $delimiter string Optional. The delimiter used to split the string (default: '-'). -

    Return Value

    Type Description
    string The last part of the input string.

    Example Usage

    echo get_last_part("example-string-123");
    // Output: '123'
    
    echo get_last_part("example string", ' ');
    // Output: 'string'

    make_rand_str()

    function make_rand_str(int $length = 32, bool $uppercase = false): string

    Description

    Generates a random string of characters, customizable by length and whether to use uppercase. Ideal for generating secure and unique keys or tokens.

    Parameters

    Parameter Type Description Default
    $length int Optional. The length of the random string to be generated. 32
    $uppercase bool Optional. Whether the string should be returned in uppercase letters. false

    Return Value

    Type Description
    string Returns the randomly generated string. The string will be in uppercase if the $uppercase parameter is set to true; otherwise, it will be in lowercase.

    Example Usage

    echo make_rand_str(); // Output: jk7hjkmq89ph7nqmp89y3q4h3p89h3nq
    echo make_rand_str(10, true); // Output: JH7JKM9PQH

    nice_price()

    function nice_price(float $num, ?string $currency_symbol = null): string|float

    Description

    Formats a number as a price with commas for thousands and optionally adds a currency symbol. If the formatted price is a whole number, decimals are removed.

    Parameters

    Parameter Type Description Default
    $num float The number to be formatted as a price. N/A
    $currency_symbol string|null Optional. The currency symbol to prepend to the price. null

    Return Value

    Type Description
    string|float Returns the formatted price. If no decimals, returns as float, otherwise as string with currency symbol if specified.

    Example Usage

    echo nice_price(123456.00); // Output: 123,456
    echo nice_price(123456.78, '$'); // Output: $123,456.78

    out()

    function out(?string $input, string $encoding = 'UTF-8', string $output_format = 'html'): string

    Description

    Safely escapes and formats a string for various output contexts, providing protection against cross-site scripting (XSS) attacks and ensuring proper encoding for different output formats.

    Parameters

    Parameter Type Description
    $input string|null The string to be escaped. If null, it will be treated as an empty string.
    $encoding string (optional) The character encoding to use for escaping. Default is 'UTF-8'.
    $output_format string (optional) The desired output format. Possible values are 'html' (default), 'xml', 'json', 'javascript', or 'attribute'.

    Return Value

    Type Description
    string The escaped and formatted string ready for safe inclusion in the specified context.

    Example #1: Basic HTML Output

    The code sample below demonstrates the basic usage of the out function for HTML output. This is particularly useful when displaying user-generated content on a webpage, such as comments or forum posts, where you need to prevent potential XSS attacks.

    $input = '<script>alert("XSS Attack")</script>';
    echo out($input); 
    
    // Output:  &lt;script&gt;alert("XSS Attack")&lt;/script&gt;

    Example #2: XML Output

    This example shows how to use the out function for XML output. This is useful when generating XML data, such as when creating RSS feeds or SOAP responses, where proper XML escaping is crucial for maintaining valid XML structure.

    $input = '<title>Example & "Sample"</title>';
    echo out($input, 'UTF-8', 'xml'); 
    
    // Output:  &lt;title&gt;Example &amp; "Sample"&lt;/title&gt;

    Example #3: JSON Output

    This example demonstrates using the out function for JSON output. This is particularly relevant when working with APIs or AJAX requests where you need to ensure that the JSON data is properly escaped and formatted for JavaScript consumption.

    $input = '"Special" characters: <>&';
    echo out($input, 'UTF-8', 'json'); 
    
    // Output:  \"Special\" characters: <>&

    Example #4: JavaScript Output

    This example shows how to use the out function for JavaScript output. This is useful when you need to embed PHP variables directly into JavaScript code, ensuring that the output is properly escaped for use in a script context.

    $input = 'John Doe';
    echo '<script>let name = "' . out($input, 'UTF-8', 'javascript') . '";</script>';
    
    // Output:  &lt;script&gt;let name = "John Doe";&lt;/script&gt;

    Example #5: HTML Attribute Output

    This example demonstrates using the out function for HTML attribute output. This is crucial when dynamically generating HTML attributes, such as when creating data attributes or setting element styles based on user input or database values.

    $input = 'Click "here"';
    echo '<a href="#" title="' . out($input, 'UTF-8', 'attribute') . '">Link</a>';
    
    // Output:  &lt;a href="#" title="Click &quot;here&quot;"&gt;Link&lt;/a&gt;

    Notes

    • The function automatically handles null input by treating it as an empty string.
    • For 'html' and 'attribute' output formats, both single and double quotes are escaped.
    • The 'xml' output format uses the ENT_XML1 flag for XML-specific escaping.
    • The 'json' and 'javascript' output formats use json_encode() with additional flags to ensure proper escaping of special characters.
    • An Exception will be thrown if an unsupported output format is provided.
    • This function is crucial for preventing XSS attacks and should be used whenever outputting user-supplied data.

    remove_substr_between()

    function remove_substr_between(string $start, string $end, string $haystack, bool $remove_all = false): string

    Description

    Removes a portion of a string between two given substrings. If the optional $remove_all parameter is set to true, all matching portions will be removed.

    Parameters

    Parameter Type Description Default Required
    $start string The starting substring. N/A Yes
    $end string The ending substring. N/A Yes
    $haystack string The string from which to remove the substring. N/A Yes
    $remove_all bool Whether to remove all matching portions. false No

    Return Value

    Type Description
    string The modified string.

    Example Usage #1

    The code below demonstrates how to remove a portion of text enclosed within HTML bold tags (<b> and </b>). In this example, the goal is to remove the substring <b>Macbeth</b> from the $haystack variable.

    Note that <b>Macbeth</b> appears more than once in the $haystack variable. However, only the first instance of a matching substring is being removed.

    $start = '<b>';
    $end = '</b>';
    $haystack = 'When <b>Macbeth</b> speaks, all listen. <b>Macbeth</b> is a forbidden word.';
    echo remove_substr_between($start, $end, $haystack);
    // Output:   When  speaks, all listen. <b>Macbeth</b> is a forbidden word.

    Example Usage #2

    In this example, all occurrences of substrings that match the defined conditions are removed by passing a value of true as the optional fourth argument.

    $start = '<b>';
    $end = '</b>';
    $haystack = 'When <b>Macbeth</b> speaks, all listen. <b>Macbeth</b> is a forbidden word.';
    echo remove_substr_between($start, $end, $haystack, true);
    // Output:   When  speaks, all listen.  is a forbidden word.

    remove_html_code()

    function remove_html_code(string $content, string $opening_pattern, string $closing_pattern): string

    Description

    Removes code sections from HTML content based on specified start and end patterns.

    Parameters

    Parameter Type Description Default
    $content string The original HTML content to be processed. N/A
    $opening_pattern string The pattern specifying the start of the code section to remove. N/A
    $closing_pattern string The pattern specifying the end of the code section to remove. N/A

    Return Value

    Type Description
    string The HTML content with specified code sections removed.

    Example Usage

    $html_content = "<html><head></head><body><?php echo 'This is PHP code'; ?></body></html>";
    $cleaned_content = remove_html_code($html_content, '<?php', '?>');
    echo $cleaned_content;
    // Output: <html><head></head><body></body></html>

    replace_html_tags()

    function replace_html_tags(string $content, array $specifications): string

    Description

    Converts HTML content based on given specifications.

    Parameters

    Parameter Type Description Default
    $content string The original HTML content to be converted. N/A
    $specifications array An array containing specifications for conversion, including opening and closing strings. N/A

    Return Value

    Type Description
    string The modified HTML content.

    Example Usage

    $html_content = "<div class='content'><p>This is some content.</p></div>";
    $specifications = [
        'opening_string_before' => '<p>',
        'close_string_before' => '</p>',
        'opening_string_after' => '<div>',
        'close_string_after' => '</div>'
    ];
    $modified_content = replace_html_tags($html_content, $specifications);
    echo $modified_content;
    // Output: <div class='content'><div>This is some content.</div></div>

    truncate_str()

    function truncate_str(string $value, int $max_length): string

    Description

    Truncates a string to a specified maximum length. If the string's length exceeds the maximum, it is shortened and an ellipsis (...) is appended.

    Parameters

    Parameter Type Description Default
    $value string The input string to be truncated. N/A
    $max_length int The maximum length of the truncated string. N/A

    Return Value

    Type Description
    string Returns the truncated string with an ellipsis (...) if the original string's length exceeds the maximum length.

    Example Usage

    echo truncate_str("Hello World! This is a Test String.", 11);
    // Output: Hello World...

    truncate_words()

    function truncate_words(string $value, int $max_words): string

    Description

    Truncates a string to a specified maximum number of words. If the number of words in the string exceeds the maximum, the string is shortened to the maximum number of words and an ellipsis (...) is appended.

    Parameters

    Parameter Type Description Default
    $value string The input string to be truncated. N/A
    $max_words int The maximum number of words allowed in the truncated string. N/A

    Return Value

    Type Description
    string Returns the truncated string with an ellipsis (...) if the original string's word count exceeds the maximum allowed.

    Example Usage

    echo truncate_words("Hello World! This is a Test String for example purposes.", 5);
    // Output: Hello World! This is a...

    url_title()

    function url_title(string $value, bool $transliteration = true): string

    Description

    Converts a string into a URL-friendly slug format. This function will transliterate the string to ASCII if the 'intl' extension is loaded and transliteration is set to true, converts any non-alphanumeric characters to dashes, trims them from the start and end, and converts everything to lowercase.

    Parameters

    Parameter Type Description Default
    $value string The string to be converted into a slug. N/A
    $transliteration bool Optional. Whether to transliterate characters to ASCII, enhancing compatibility with the 'intl' extension. true

    Return Value

    Type Description
    string Returns the slugified version of the string, or the original string in lowercase with non-alphanumeric characters replaced by dashes if transliteration is not applied.

    Example Usage

    echo url_title("Hello World! This is a Test String.");
    // Output: hello-world-this-is-a-test-string

    Timedate Helpers

    create_date_from_array()

    function create_date_from_array(array $day_vars): DateTime|false

    Description

    Attempts to create a DateTime object from provided date and time components.

    Parameters

    Parameter Type Description Default
    $day_vars array An array containing 'day', 'month', 'year', 'hours', and 'minutes' components of the date and time. N/A

    Return Value

    Type Description
    DateTime|false Returns a DateTime object if successful, otherwise returns false.

    Example Usage

    $day_vars = [
        'day' => 12,
        'month' => 5,
        'year' => 2024,
        'hours' => 14,
        'minutes' => 30
    ];
    $result = create_date_from_array($day_vars);
    if ($result !== false) {
        echo $result->format('Y-m-d H:i:s');
    } else {
        echo "Unable to create a valid DateTime object.";
    }
    // Output: 2024-05-12 14:30:00

    format_date_str()

    function format_date_str(string $stored_date_str): string

    Description

    Formats a date string.

    Accepts a date string ($stored_date_str) expected in 'yyyy-mm-dd' format and formats it according to the DEFAULT_DATE_FORMAT constant.

    Parameters

    Parameter Type Description Default
    $stored_date_str string The date string to be formatted (expected format: 'yyyy-mm-dd'). N/A

    Return Value

    Type Description
    string The formatted date string as per the DEFAULT_DATE_FORMAT or the original string if an error occurs.

    Example Usage

    echo format_date_str("2024-05-06");
    // Output: 05/06/2024

    format_datetime_str()

    function format_datetime_str(string $stored_datetime_str): string

    Description

    Formats a date-time string.

    Accepts a date-time string ($stored_datetime_str) expected in 'yyyy-mm-dd HH:ii:ss' format and formats it according to the DEFAULT_DATE_FORMAT constant.

    Parameters

    Parameter Type Description Default
    $stored_datetime_str string The date-time string to be formatted (expected format: 'yyyy-mm-dd HH:ii:ss'). N/A

    Return Value

    Type Description
    string The formatted date-time string as per the DEFAULT_DATE_FORMAT or the original string if an error occurs.

    Example Usage

    echo format_datetime_str("2024-05-06 14:30:00");
    // Output: 05/06/2024, 14:30

    format_time_str()

    function format_time_str(string $stored_time_str): string

    Description

    Formats a time string.

    Accepts a time string ($stored_time_str) expected in 'HH:ii' format and formats it according to the 'h:i' or 'HH:ii' format based on the provided time.

    Parameters

    Parameter Type Description Default
    $stored_time_str string The time string to be formatted (expected format: 'HH:ii'). N/A

    Return Value

    Type Description
    string The formatted time string as per the 'h:i' or 'HH:ii' format or the original string if an error occurs.

    Example Usage

    echo format_time_str("13:45");
    // Output: 01:45

    get_default_date_format()

    function get_default_date_format(): void

    Description

    Initializes the default date format constant if not already defined.

    If DEFAULT_DATE_FORMAT is not defined, sets it to 'mm/dd/yyyy' (US date format).

    Parameters

    This function does not accept any parameters.

    Return Value

    This function does not return a value.

    Example Usage

    get_default_date_format();
    // No output, just initializes the DEFAULT_DATE_FORMAT constant if not already defined.

    get_default_locale_str()

    function get_default_locale_str(): void

    Description

    Initializes the default locale string constant if not already defined.

    If DEFAULT_LOCALE_STR is not defined, sets it to 'en-US' (US English).

    Parameters

    This function does not accept any parameters.

    Return Value

    This function does not return a value.

    Example Usage

    get_default_locale_str();
    // No output, just initializes the DEFAULT_LOCALE_STR constant if not already defined.

    parse_date()

    function parse_date(string $date_str): \DateTime|false

    Description

    Converts a date string into a date object or returns false.

    Parameters

    Parameter Type Description Default
    $date_str string The date string to parse (format: "mm/dd/yyyy" or "mm-dd-yyyy"). N/A

    Return Value

    Type Description
    \DateTime|false Returns a \DateTime object representing the parsed date if successful, otherwise returns false if invalid.

    Example Usage

    $result = parse_date("12/25/2023");
    if ($result !== false) {
        echo $result->format('Y-m-d');
    } else {
        echo "Invalid date string.";
    }
    // Output: 2023-12-25

    parse_datetime()

    function parse_datetime(string $datetime_str): \DateTime|false

    Description

    Parses a datetime string into a date object or returns false.

    Parameters

    Parameter Type Description Default
    $datetime_str string The datetime string to parse (format: "mm/dd/yyyy HH:MM" or "mm-dd-yyyy HH:MM"). N/A

    Return Value

    Type Description
    \DateTime|false Returns a \DateTime object representing the parsed datetime if successful, otherwise returns false if invalid.

    Example Usage

    $result = parse_datetime("12/25/2023 08:30");
    if ($result !== false) {
        echo $result->format('Y-m-d H:i:s');
    } else {
        echo "Invalid datetime string.";
    }
    // Output: 2023-12-25 08:30:00

    parse_time()

    function parse_time(string $time_str): \DateTime|false

    Description

    Converts a time string into a date object or returns false.

    Parameters

    Parameter Type Description Default
    $time_str string The time string to parse (format: "HH:MM"). N/A

    Return Value

    Type Description
    \DateTime|false Returns a \DateTime object representing the parsed time if successful, otherwise returns false if invalid.

    Example Usage

    $result = parse_time("14:30");
    if ($result !== false) {
        echo $result->format('Y-m-d H:i:s');
    } else {
        echo "Invalid time string.";
    }
    // Output: Current date with the time set to 14:30:00

    URL Helpers

    anchor()

    function anchor(string $url, ?string $text = null, array $attributes = []): string

    Description

    Generates an anchor (<a>) tag with optional attributes and partial XSS protection.

    This function creates an anchor tag pointing to a specified URL. If the $text parameter is omitted, the URL itself is used as the link text.

    Important: The $text parameter is NOT escaped, allowing HTML content to be rendered as-is, while the URL and attributes are automatically escaped to prevent XSS attacks.

    Parameters

    Name Type Description
    $url string The URL to link to. This parameter is required and will be automatically escaped.
    $text string|null The text content of the link (optional). If not provided, the URL itself is used. Note: This parameter is NOT escaped.
    $attributes array An optional array of key-value pairs for additional attributes. These values will be automatically escaped.

    Return Value

    Type Description
    string The complete HTML anchor tag as a string.

    Example Usage

    // Basic usage with just URL
    echo anchor('contact');
    // Output: <a href="contact">contact</a>
    
    // Basic usage with URL and text
    echo anchor('contact', 'Get In Touch');
    // Output: <a href="contact">Get In Touch</a>
    
    // With attributes
    echo anchor('logout', 'Sign Out', ['class' => 'btn btn-danger', 'rel' => 'nofollow']);
    // Output: <a href="logout" class="btn btn-danger" rel="nofollow">Sign Out</a>
    
    // External link with target and rel attributes
    echo anchor('https://github.com/trongate', 'View Repo', ['target' => '_blank', 'rel' => 'noopener noreferrer']);
    // Output: <a href="https://github.com/trongate" target="_blank" rel="noopener noreferrer">View Repo</a>
    
    // Using HTML within text parameter (intentionally not escaped)
    echo anchor('contact', '<i class="fa fa-envelope"></i> Contact Us');
    // Output: <a href="contact"><i class="fa fa-envelope"></i> Contact Us</a>

    Security Considerations

    Important: The $text parameter is not automatically escaped. If displaying user-generated content, use the out() function to prevent XSS attacks.

    Unsafe Example (Vulnerable to XSS):

    echo anchor('profile', $user_name); 
    // Output (potentially unsafe): <a href="profile"><script>alert('XSS')</script></a>

    Safe Example (Escaped Output):

    echo anchor('profile', out($user_name)); 
    // Output: <a href="profile">John Doe</a>

    Note: The $url and $attributes parameters are automatically escaped for security.


    current_url()

    function current_url(): string

    Description

    Get the current URL of the web page.

    Return Value

    Type Description
    string The current URL as a string.

    Example Usage

    echo current_url();
    // Output: http://example.com/current_page

    get_last_segment()

    function get_last_segment(): string

    Description

    Retrieves the value of the last segment of the current URL. It extracts the last segment by utilizing the 'get_last_part' function, which splits the URL by '/' and returns the last element.

    Parameters

    Parameter Type Description Default Required
    This method does not accept any parameters.

    Return Value

    Type Description
    string The last segment of the URL.

    Example Usage

    $invoice_ref = get_last_segment();

    get_num_segments()

    function get_num_segments(): int

    Description

    Retrieves the number of segments in the current URL after the base URL. It calculates the number of segments by removing the base URL and then splitting the remaining path into segments using '/' as the delimiter.

    Parameters

    Parameter Type Description Default Required
    This method does not accept any parameters.

    Return Value

    Type Description
    int The number of URL segments after the base URL.

    Example Usage

    $num_url_segments = get_num_segments();

    previous_url()

    function previous_url(): string

    Description

    Retrieves the URL of the previous page, if available.

    Return Value

    Type Description
    string Returns the URL of the previous page as a string.

    Example Usage

    echo previous_url();
    // Output: URL of the previous page if available, otherwise an empty string.

    redirect()

    function redirect(string $target_url): void

    Description

    Perform an HTTP redirect to the specified URL.

    Parameters

    Parameter Type Description
    $target_url string The URL to which the redirect should occur.

    Return Value

    This function does not return a value.

    Example Usage

    redirect("/login");
    // Redirects the user to the login page.
    
    redirect("https://example.com");
    // Redirects the user to https://example.com.

    remove_query_string()

    function remove_query_string(string $string): string

    Description

    Remove query string from a URL.

    Parameters

    Parameter Type Description Default
    $string string The URL with a query string to be processed. N/A

    Return Value

    Type Description
    string The URL without the query string.

    Example Usage

    echo remove_query_string("https://example.com/page?param=value");
    // Output: https://example.com/page

    segment()

    function segment(int $num, ?string $var_type = null): mixed

    Description

    Get a specific URL segment.

    Parameters

    Parameter Type Description Default
    $num int The segment number to retrieve. N/A
    $var_type string|null Optional. The desired data type of the segment value. Default is null. null

    Return Value

    Type Description
    mixed The value of the specified URL segment.

    Example Usage

    echo segment(1);
    // Output: example

    Utilities Helpers

    api_auth()

    function api_auth(): void

    Description

    Authenticate API requests and validate access based on API rules.

    This function validates API requests and ensures access based on defined API rules in 'api.json' files.

    Return Value

    This function does not return a value; it performs authentication and validation.

    Example Usage

    api_auth();

    from_trongate_mx()

    function from_trongate_mx(): bool

    Description

    Checks if the HTTP request has been invoked by Trongate MX. This function inspects the HTTP headers to determine if the request contains a specific header indicating that it originated from Trongate MX. It is useful for distinguishing requests made from Trongate MX from those made by other sources.

    Return Value

    Type Description
    bool Returns true if the request has the X-Trongate-MX-Request header set to true, otherwise false.

    Example

    The code sample below demonstrates basic usage of the from_trongate_mx function.

      if (from_trongate_mx()) {
          echo 'Request is from Trongate MX';
      } else {
          echo 'Request is not from Trongate MX';
      }
      // Output: 'Request is from Trongate MX' if the header is set, otherwise 'Request is not from Trongate MX'
      

    Notes

    The function checks specifically for the X-Trongate-MX-Request header. If the header is not present or is set to a value other than true, the function will return false. Ensure that the header is correctly set in requests where this function needs to be utilized.


    ip_address()

    function ip_address(): string

    Description

    Retrieves the client's IP address.

    Return Value

    Type Description
    string Returns the client's IP address.

    Example Usage

    echo ip_address();
    // Output: Client's IP address.

    json()

    function json(mixed $data, ?bool $kill_script = null): void

    Description

    Outputs the given data as JSON in a prettified format, suitable for debugging and visualization. This function is especially useful during development for inspecting data structures in a readable JSON format directly in the browser. It optionally allows terminating the script immediately after output, which is useful in API development for stopping further processing.

    Parameters

    Parameter Type Description Default
    $data mixed The data to be encoded into JSON format. The data can be any type that is encodable into JSON, such as arrays or objects. N/A
    $kill_script bool|null Optional. Specifies whether to terminate the script after outputting the JSON. If true, the script execution is halted immediately. null

    Return Value

    Type Description
    void Does not return any value; the output is directly written to the output buffer.

    Example Usage

    // Given a data array
    $data = ["name" => "John Doe", "age" => 30];
    
    // Display the JSON and continue execution
    json($data);
    
    // Output with termination after displaying
    json($data, true);

    load()

    function load(string $template_file, ?array $data = null): void

    Description

    Loads a template file with optional data for use within the template.

    Parameters

    Parameter Type Description Default
    $template_file string The filename of the template to load. N/A
    $data array|null (Optional) The data to be passed to the template as an associative array. null

    Return Value

    Type Description
    void This function does not return a value.

    Example Usage

    load("template_file.php", ['variable' => 'value']);

    return_file_info()

    function return_file_info(string $file_string): array

    Description

    Extracts file name and extension from a given file path.

    Parameters

    Parameter Type Description Default
    $file_string string The file path from which to extract information. N/A

    Return Value

    Type Description
    array An associative array containing the 'file_name' and 'file_extension'.

    Example Usage

    $file_info = return_file_info("/path/to/your/file.jpg");
    echo "File Name: " . $file_info['file_name'] . "\n";
    echo "File Extension: " . $file_info['file_extension'] . "\n";
    // Output:
    // File Name: file
    // File Extension: .jpg

    sort_by_property()

    function sort_by_property(array &$array, string $property, string $direction = 'asc'): array

    Description

    Sorts an array of associative arrays by a specified property. This function is useful when you need to organize data within an array of associative arrays based on one of the properties in each array element. The sorting can be done in either ascending or descending order.

    Parameters

    Parameter Type Description
    $array array The array of associative arrays to be sorted. This parameter is passed by reference, meaning the original array will be modified.
    $property string The property within each associative array by which to sort. The property must exist in each element of the array.
    $direction string (optional) The direction in which to sort the array. Acceptable values are 'asc' for ascending (default) and 'desc' for descending.

    Return Value

    Type Description
    array The sorted array of associative arrays.

    Example #1

    The code sample below demonstrates basic usage of the sort_by_property function with default parameters.

      $data = [
          ['name' => 'John', 'age' => 28],
          ['name' => 'Jane', 'age' => 24],
          ['name' => 'Doe', 'age' => 32],
      ];
      
      $sorted_data = sort_by_property($data, 'age');
      
      // Output: [
      //   ['name' => 'Jane', 'age' => 24],
      //   ['name' => 'John', 'age' => 28],
      //   ['name' => 'Doe', 'age' => 32],
      // ]
      

    Example #2

    The code sample below demonstrates a more complex usage of the sort_by_property function, sorting in descending order.

      $data = [
          ['name' => 'Apple', 'price' => 3.5],
          ['name' => 'Orange', 'price' => 2.75],
          ['name' => 'Banana', 'price' => 1.25],
      ];
      
      $sorted_data = sort_by_property($data, 'price', 'desc');
      
      // Output: [
      //   ['name' => 'Apple', 'price' => 3.5],
      //   ['name' => 'Orange', 'price' => 2.75],
      //   ['name' => 'Banana', 'price' => 1.25],
      // ]
      

    Notes

    If the specified property does not exist in any of the associative arrays, the behavior of the function may be unpredictable. Ensure that the property exists in each array element before calling this function.


    sort_rows_by_property()

    function sort_rows_by_property(array $array, string $property, string $direction = 'asc'): array

    Description

    Sorts an array of objects by a specified property. This function is useful when you need to organize a collection of objects based on one of their properties. The sorting can be performed in either ascending or descending order.

    Parameters

    Parameter Type Description
    $array array The array of objects to be sorted. Each element in the array should be an object.
    $property string The property within each object by which to sort. The property must exist in each object of the array.
    $direction string (optional) The direction in which to sort the array. Acceptable values are 'asc' for ascending (default) and 'desc' for descending.

    Return Value

    Type Description
    array The sorted array of objects.

    Example #1

    The code sample below demonstrates basic usage of the sort_rows_by_property function with default parameters.

      $data = [
          (object) ['name' => 'John', 'age' => 28],
          (object) ['name' => 'Jane', 'age' => 24],
          (object) ['name' => 'Doe', 'age' => 32],
      ];
      
      $sorted_data = sort_rows_by_property($data, 'age');
      
      // Output: [
      //   (object) ['name' => 'Jane', 'age' => 24],
      //   (object) ['name' => 'John', 'age' => 28],
      //   (object) ['name' => 'Doe', 'age' => 32],
      // ]
      

    Example #2

    The code sample below demonstrates a more complex usage of the sort_rows_by_property function, sorting in descending order.

      $data = [
          (object) ['name' => 'Apple', 'price' => 3.5],
          (object) ['name' => 'Orange', 'price' => 2.75],
          (object) ['name' => 'Banana', 'price' => 1.25],
      ];
      
      $sorted_data = sort_rows_by_property($data, 'price', 'desc');
      
      // Output: [
      //   (object) ['name' => 'Apple', 'price' => 3.5],
      //   (object) ['name' => 'Orange', 'price' => 2.75],
      //   (object) ['name' => 'Banana', 'price' => 1.25],
      // ]
      

    Notes

    If the specified property does not exist in any of the objects, the behavior of the function may be unpredictable. Ensure that the property exists in each object before calling this function.


    Pre Installed

    Trongate Administrators

    _make_sure_allowed()

    public function _make_sure_allowed(): ?string

    Description

    Ensures that access is allowed for administrators by verifying the presence of a valid token. If the user is not logged in or lacks the required token, they are redirected to the Trongate administrators' login page.

    If accessed in development mode (ENV == 'dev') without a valid token, a token is automatically generated for the first Trongate administrator record.

    Parameters

    Parameter Type Description Default Required
    This method does not take any parameters.

    Return Value

    Type Description
    string|null Returns a token consisting of 32 alphanumeric characters (including uppercase letters, lowercase letters and digits) if access is granted. If access is not granted the method returns null and redirects to the login page for adminstrators.

    Example Usage

    This method is typically accessed via the Trongate_security module using code similar to the following:

    $this->module('trongate_security');
    $token = $this->trongate_security->_make_sure_allowed();

    account()

    public function account(): void

    Description

    Redirects to the 'create' route for the Trongate administrators module based on the user's token. If a valid 'Trongate token' is authenticated, the method constructs a redirect URL to the 'create' route with the user's ID appended.

    Parameters

    Parameter Type Description Default Required
    This method does not take any parameters.

    Return Value

    Type Description
    void This method does not return any value.

    Example Usage

    // Example Usage not available for this method

    conf_delete()

    public function conf_delete(): void

    Description

    Manages the confirmation process for deleting a Trongate administrator record. Validates the deletion request and loads the confirmation template if the record exists. Redirects to the (admin) management page if the record doesn't exist.

    Parameters

    Parameter Type Description Default Required
    This method does not take any parameters.

    Return Value

    Type Description
    void This method does not return any value.

    Example Usage

    // Example Usage not available for this method

    create()

    public function create(): void

    Description

    Renders a page for the creation or updating of Trongate administrator records.

    Parameters

    Parameter Type Description Default Required
    This method does not take any parameters.

    Return Value

    Type Description
    void This method does not return any value.

    Example Usage

    // Example Usage not available for this method

    go_home()

    public function go_home(): void

    Description

    Redirects to the designated dashboard home page.

    Customizing the Redirect URL

    The default dashboard home URL is set to trongate_pages/manage. To change this destination, modify the $dashboard_home property at the top of the Trongate_administrators class in the PHP file.

    To change the dashboard home URL, open Trongate_adminstrators.php and uncomment this line:

    // private $dashboard_home = 'trongate_pages/manage';

    Then, replace 'trongate_pages/manage' with your preferred URL path.

    Parameters

    Parameter Type Description Default Required
    This method does not take any parameters.

    Return Value

    Type Description
    void This method does not return any value.

    Example Usage #1

    The code below demonstrates how to create a hyperlink that redirects users to the dashboard home page upon clicking:

    <?= anchor('trongate_administrators/go_home', 'Dashboard Home') ?>

    Example Usage #2

    In this alternative example, a CSS class named 'button' is added to the dashboard home hyperlink, giving it the appearance and behavior of a button:

    <?= anchor('trongate_administrators/go_home', 'Dashboard Home', array('class' => 'button')) ?>

    login()

    public function login(): void

    Description

    Renders a login page for administrators.

    Accessing The Login Page

    The default administration login page is accessible by navigating to a Trongate application's base URL followed by tg-admin. However, this URL can be customized to a preferred secret login URL by adjusting the 'Trongate_administrators.php' class.

    To set a secret login URL, uncomment the line:

    // private $secret_login_segment = 'tg-admin';

    Subsequently, update the $secret_login_segment variable with the desired URL segment to set an alternative login URL.

    Parameters

    Parameter Type Description Default Required
    This method does not take any parameters.

    Return Value

    Type Description
    void This method does not return any value.

    Example Usage #1

    The code below illustrates how to create a hyperlink that redirects users to the admin login page upon clicking. The assumption, for this example, is that the code would be added inside a view file or an HTML template:

    <?= anchor('tg-admin', 'Admin Login') ?>

    Example Usage #2

    In this alternative example, a CSS class, named as 'button', is added to a login hyperlink. This gives the hyperlink the appearance and behaviour of a button:

    <?= anchor('tg-admin', 'Admin Login', array('class' => 'button')) ?>

    login_check()

    public function login_check(string $submitted_username): string|bool

    Description

    Validates the submitted username and password for login authentication against existing usernames and hashed passwords stored in the 'trongate_administrators' table.

    This method is designed to be invoked as a form validation callback.

    Parameters

    Parameter Type Description Default Required
    $submitted_username string The username submitted for login authentication. N/A Required

    Return Value

    Type Description
    string|bool Returns TRUE (bool) if authentication is successful, otherwise returns an error message (string).

    Example Usage

    if ($submit == 'Login') {
        $submitted_username = post('username');
        // Validate username and password for login.
        $this->validation->set_rules('username', 'username', 'required|callback_login_check');
        $this->validation->set_rules('password', 'password', 'required|min_length[5]');
        $result = $this->validation->run();
    
        if ($result === true) {
            $this->log_user_in($submitted_username);
        } else {
            // Reload login form on validation failure.
            $this->login();
        }
    }

    logout()

    public function logout(): void

    Description

    Handles user logout by destroying tokens and redirects based on the existence of the secret login segment.

    Parameters

    Parameter Type Description Default Required
    This method does not take any parameters.

    Return Value

    Type Description
    void This method does not return any value.

    Example Usage

    The code below illustrates how to create a hyperlink that triggers the logout() method upon clicking:

    <?= anchor('trongate_administrators/logout', 'Log Out') ?>

    manage()

    public function manage(): void

    Description

    Renders a page for the management of records within the 'trongate_administrators' table. Retrieves necessary data such as admin ID, username rows from the model, and loads the management view.

    Parameters

    Parameter Type Description Default Required
    This method does not take any parameters.

    Return Value

    Type Description
    void This method does not return any value.

    Example Usage

    // Example Usage not available for this method

    submit()

    function submit(): void

    Description

    Handles form submission for user data, validates input, updates existing records, or creates new ones accordingly. Redirects to management view or the creation form based on form submission.

    Parameters

    Parameter Type Description Default Required
    This method does not take any parameters.

    Return Value

    Type Description
    void This method does not return any value.

    Example Usage

    // Example Usage not available for this method

    submit_delete()

    public function submit_delete(): void

    Description

    Handles the deletion of a specific user record and related entries based on the given update ID. Performs the deletion of related records from 'trongate_users' and 'trongate_administrators' tables. Redirects to the management page after successful deletion.

    Parameters

    Parameter Type Description Default Required
    This method does not take any parameters.

    Return Value

    Type Description
    void This method does not return any value.

    Example Usage

    // Example Usage not available for this method

    submit_login()

    public function submit_login(): void

    Description

    Handles the submission of login forms, validating user input and logging users in if validation passes. Redirects to the login form on validation failure or to the base URL on 'Cancel' submission.

    Changing The Login Destination

    To change the destination users are sent to upon successful login, modify the $dashboard_home variable at the top of the Trongate_administrators class. By default, it is set to 'trongate_pages/manage'. For example:

    // Where to redirect after successful login.
    private $dashboard_home = 'custom_path/dashboard';

    Parameters

    Parameter Type Description Default Required
    This method does not take any parameters.

    Return Value

    Type Description
    void This method does not return any value.

    Example Usage

    // Example Usage not available for this method

    username_check()

    public function username_check(string $str): string|bool

    Description

    Checks the availability of a username and validates it against existing usernames in the 'trongate_administrators' table.

    This method is designed to be invoked as a form validation callback.

    Parameters

    Parameter Type Description Default Required
    $str string The username to be checked. N/A Required

    Return Value

    Type Description
    string|bool Returns an error message (string) if the username is not available, otherwise returns TRUE (bool).

    Example Usage

    $submit = post('submit');
    
    if ($submit == 'Submit') {
        // Set validation rules for username, password, and repeat password.
        $this->validation->set_rules('username', 'username', 'required|min_length[5]|callback_username_check');
        $this->validation->set_rules('password', 'password', 'required|min_length[5]');
        $this->validation->set_rules('repeat_password', 'repeat password', 'matches[password]');
    
        $result = $this->validation->run();
    
        if ($result == true) {
            // Form validation success.
            echo 'Success!';
        } else {
            // Form validation error(s);
            echo validation_errors('<div class="error-message">', '</div>');
        }
    }

    Trongate Comments

    _pre_insert()

    function _pre_insert(array $input): array

    Description

    Pre-insert hook to be invoked by API manager before inserting a comment.

    Parameters

    Parameter Type Description Default
    $input array The input data for insertion. N/A

    Return Value

    Type Description
    array Processed input data with additional parameters.

    Example Usage

    $input = [
        'token' => 'some_token_string',
        'params' => [
            'user_id' => 123,
            'date_created' => 1621105200,
            'code' => 'abc123'
        ]
    ];
    $processed_input = _pre_insert($input);
    var_dump($processed_input);
    /* Output:
    array(1) {
      ["params"]=>
      array(3) {
        ["user_id"]=>
        int(123)
        ["date_created"]=>
        int(1621242005)
        ["code"]=>
        string(6) "xY8zBh"
      }
    }
    */

    _prep_comments()

    function _prep_comments(array $output): array

    Description

    Prepare comments data with formatted dates and user information. This method is typically called via admin.js.

    Parameters

    Parameter Type Description Default
    $output array The output data containing comments. N/A

    Return Value

    Type Description
    array Processed output data with formatted comments.

    Example Usage

    $output = ['body' => '[{"comment":"This is a comment.","user_id":1,"date_created":1621105200,"target_table":"pages","update_id":1,"code":"abc123"}]'];
    $processed_output = _prep_comments($output);
    var_dump($processed_output);
    /* Output:
    array(1) {
      ["body"]=>
      string(134) "[{"comment":"This is a comment.","date_created":"Posted by user123 on Thursday 15th of May 2024 at 10:00:00 AM","user_id":1,"target_table":"pages","update_id":1,"code":"abc123"}]"
    }
    */

    Trongate Filezone

    _draw_summary_panel()

    function _draw_summary_panel(int $update_id, array $filezone_settings): void

    Description

    Renders the summary panel for a given update ID and Filezone settings.

    Parameters

    Parameter Type Description Default
    $update_id int The ID of the update. N/A
    $filezone_settings array Settings related to the Filezone. N/A

    Return Value

    Type Description
    void N/A

    Example Usage

    The code below demonstrates how to render a Filezone summary panel, within a view file.

    <?= Modules::run('filezone/_draw_summary_panel', $update_id, $filezone_settings) ?>

    NOTE: In order for the summary panel to be succesfully rendered, the code above would be passed into a view file. Also, an array of key / value pairs (in this instance, named as $filezone_settings) should also be passed into the view file. The code sample below shows an example of Filezone settings being initialized from within a controller file.

    public function _init_filezone_settings() {
        $data['targetModule'] = 'tasks';
        $data['destination'] = 'tasks_pictures';
        $data['max_file_size'] = 1200;
        $data['max_width'] = 2500;
        $data['max_height'] = 1400;
        $data['upload_to_module'] = true;
        return $data;
    }

    uploader()

    public function uploader(): void

    Description

    Renders a page that displays the uploader view. This method is responsible for setting up the necessary data and rendering the uploader view for the Trongate Filezone module, which is a multi-file uploader that allows users to drag and drop files. The method also handles authentication using Trongate's token system.

    Parameters

    Parameter Type Description Default Required
    This method does not take any parameters.

    Return Value

    Type Description
    void This method does not return any value.

    Settings

    The Trongate Filezone module is configured using the following settings, which are typically declared inside the main controller file of the respective module:

    Setting Type Description
    targetModule string The name of the module where the files will be uploaded.
    destination string The directory within the module where the files will be stored.
    max_file_size int The maximum file size allowed for uploads (in kilobytes).
    max_width int The maximum width allowed for uploaded images (in pixels).
    max_height int The maximum height allowed for uploaded images (in pixels).
    upload_to_module bool A flag indicating whether the files should be uploaded to the module's directory or not.

    Example Usage

    To access the Filezone uploader page, go to your base URL followed by 'trongate_filezone/uploader/module_name/n', replacing 'module_name' with the name of your target module and 'n' with the 'id' of the record for which you'd like to upload files.

    In addition, a 'public' method named '_init_filezone_settings' should be added inside the controller file of the target module. This method should contain settings that are to be applied to the Filezone uploader. For example:

    public function _init_filezone_settings() {
        $data['targetModule'] = 'tasks';
        $data['destination'] = 'tasks_pictures';
        $data['max_file_size'] = 1200;
        $data['max_width'] = 2500;
        $data['max_height'] = 1400;
        $data['upload_to_module'] = true;
        return $data;
    }

    Trongate Pages

    _make_sure_allowed()

    function _make_sure_allowed(): string|false

    Description

    Ensures that the current user is allowed to access the protected resource. By default, only users with a user level ID of 1 (i.e., 'admin' users) are granted access. However, this functionality can be modified to suit individual use cases.

    Parameters

    Parameter Type Description Default Required
    This method does not take any parameters.

    Return Value

    Type Description
    string|false The security token if the user is authorized, or false otherwise.

    Example Usage

    // Example Usage not available for this method

    attempt_display()

    function attempt_display(): void

    Description

    Attempts to display a page by invoking the display() method of the Trongate Pages module. It is designed to be triggered automatically in instances where normal URL routing has failed to match a URL to a corresponding page and immediately before displaying a 404 (Not Found) page. This triggering behavior is governed by the INTERCEPT_404 constant, which is commonly configured within the config.php file of the Trongate framework.

    Parameters

    Parameter Type Description Default Required
    This method does not take any parameters, however, it delegates the task of displaying a page to the display() method of the Trongate Pages module.

    Return Value

    Type Description
    void This method does not return any value.

    Example Usage

    // Example Usage not available for this method

    display()

    function display(): void

    Description

    Attempts to display a page by reading a value from the URL. If the last segment of the URL is 'edit' the method also verifies if the user is an admin so that permissions may be granted for editing. If no matching record is found in the 'trongate_pages' table, a 404 error page is displayed. Additionally, it ensures that only published pages are displayed unless the page is being edited.

    Parameters

    Parameter Type Description Default Required
    This method does not take any parameters, however, it does attempt to fetch a record from the 'trongate_pages' database table based on a value that is read from the URL.

    Return Value

    Type Description
    void This method does not return any value.

    Example Usage

    // Example Usage not available for this method

    manage()

    function manage(): void

    Description

    The default admin page for managing 'trongate_pages' records. By default, this method can only be accessed by users who are logged in and who have a user level of 'admin'.

    Parameters

    Parameter Type Description Default Required
    This method does not take any parameters.

    Return Value

    Type Description
    void This method does not return any value.

    Example Usage

    // The 'manage' page can be loaded by navigating to 'trongate_pages/manage'.

    reset()

    function reset(): void

    Description

    Restores the 'default' homepage content. This method checks the environment and responds with an HTTP 403 Forbidden status if it's not in 'dev' mode. It then determines whether to create a new homepage record or update the existing one based on the number of records in the 'trongate_pages' table.

    Parameters

    Parameter Type Description Default Required
    This method does not accept any parameters.

    Return Value

    Type Description
    void Returns nothing.

    Example Usage

    $this->module('trongate_pages');
    $this->trongate_pages->reset();

    Trongate Security

    _make_sure_allowed()

    function _make_sure_allowed(string $scenario = 'admin panel'): string

    Description

    Ensures the user is allowed access for the specified scenario.

    Parameters

    Parameter Type Description Default
    $scenario string Optional. The scenario for access control. admin panel

    Return Value

    Type Description
    string Returns a (trongate) token or initializes the 'not allowed' procedure.

    Example Usage #1

    $this->module('trongate_security');
    $token = $this->trongate_security->_make_sure_allowed();

    Example Usage #2

    $this->module('trongate_security');
    $this->trongate_security->_make_sure_allowed('members area');

    Trongate Tokens

    _attempt_get_valid_token()

    public function _attempt_get_valid_token($user_levels = null): string|bool

    Description

    Attempts to validate and return a token based on optional user level(s) condition. This method checks for a valid token in the following locations, in order of priority:

    • HTTP headers ($_SERVER['HTTP_TRONGATETOKEN'])
    • Cookies ($_COOKIE['trongatetoken'])
    • Session ($_SESSION['trongatetoken'])

    The method then verifies the token against the provided user levels, if any, and returns the valid token if found.

    Parameters

    Parameter Type Description Default Required
    $user_levels int|array|null User levels to filter tokens. null No

    Return Value

    Type Description
    string|bool The valid token if found, or false if none is found.

    Attaching Tokens To Headers Using XMLHttpRequest

    The code below demonstrates how to attach a 'Trongate token' to an HTTP GET request using JavaScript. In the example, a PHP variable named $trongate_token has been made available within the JavaScript, and is being assigned to a JavaScript constant named, token.

    <script>
    const targetUrl = 'your_api_endpoint_here';
    const token = '<?= $trongate_token ?>';
    
    const http = new XMLHttpRequest();
    http.open('GET', targetUrl);
    http.setRequestHeader('Content-type', 'application/json');
    http.setRequestHeader('trongateToken', token);
    http.send();
    http.onload = function() {
      console.log(http.status);
      console.log(http.responseText);
    }
    </script>

    The code below demonstrates similar usage of XMLHttpRequest. However, in this example we are submitting values to an endpoint via an HTTP POST request, using JavaScript.

    <script>
    const targetUrl = 'your_api_endpoint_here';
    const token = '<?= $trongate_token ?>';
    
    const params = {
      firstName: 'John',
      lastName: 'Smith',
      age: 21
    }
    
    const http = new XMLHttpRequest();
    http.open('POST', targetUrl);
    http.setRequestHeader('Content-type', 'application/json');
    http.setRequestHeader('trongateToken', token);
    http.send(params);
    http.onload = function() {
      console.log(http.status);
      console.log(http.responseText);
    }
    </script>

    Attaching Tokens To Headers Using Fetch API

    The Fetch API provides an alternative method for making HTTP requests in JavaScript, offering a more modern and flexible approach. Below are examples of how to achieve the same functionality as demonstrated with XMLHttpRequest, but using the Fetch API instead.

    The code below demonstrates how to attach a 'Trongate token' to an HTTP GET request using the Fetch API.

    <script>
    const targetUrl = 'your_api_endpoint_here';
    const token = '<?= $trongate_token ?>';
    fetch(targetUrl, {
        method: 'GET',
        headers: {
            'Content-Type': 'application/json',
            'trongateToken': token
        }
    })
    .then(response => response.json())
    .then(data => {
        console.log(data);
    })
    .catch(error => console.error('Error:', error));
    </script>

    The code below demonstrates similar usage of the Fetch API. However, in this example, we are submitting values to an endpoint via an HTTP POST request.

    <script>
    const targetUrl = 'your_api_endpoint_here';
    const token = '<?= $trongate_token ?>';
    
    const params = {
        firstName: 'John',
        lastName: 'Smith',
        age: 21
    }
    
    fetch(targetUrl, {
        method: 'POST',
        headers: {
            'Content-Type': 'application/json',
            'trongateToken': token
        },
        body: JSON.stringify(params)
    })
    .then(response => response.json())
    .then(data => {
        console.log(data);
    })
    .catch(error => console.error('Error:', error));
    </script>

    Example Usage #1

    The PHP code sample below demonstrates how to fetch any valid 'Trongate token' from any user level.

    $this->module('trongate_tokens');
    $token = $this->trongate_tokens->_attempt_get_valid_token(); // Any user level

    Example Usage #2

    The code below demonstrates how to fetch and return a valid 'Trongate token' for a logged-in user with an 'admin' user level. This example assumes that the 'trongate_user_levels' database table contains a row with an 'id' of 1 and a 'level_title' of 'admin'.

    $this->module('trongate_tokens');
    $token = $this->trongate_tokens->_attempt_get_valid_token(1); // admin

    Example Usage #3

    In the final example, the code attempts to fetch and return a valid 'Trongate token' for a user with either an 'admin' or a 'member' user level. This example assumes that the 'trongate_user_levels' database table contains two specific rows: one with an 'id' of 1 and a 'level_title' of 'admin', and another with an 'id' of 2 and a 'level_title' of 'member'.

    $this->module('trongate_tokens');
    $token = $this->trongate_tokens->_attempt_get_valid_token([1, 2]); // admin or member

    _delete_old_tokens()

    public function _delete_old_tokens(?int $user_id = null): void

    Description

    Deletes old tokens from the database. This function deletes tokens that have expired. If a user ID is provided, it also deletes tokens associated with that user.

    Parameters

    Parameter Type Description Default Required
    $user_id int|null Optional user ID to delete tokens for a specific user. null No

    Return Value

    Type Description
    void This method does not return any value.

    Example Usage

    $this->module('trongate_tokens');
    $this->trongate_tokens->_delete_old_tokens();

    _destroy()

    public function _destroy(): void

    Description

    Destroys tokens from session, cookie, and HTTP headers. This method removes tokens from session, cookie, and HTTP headers storage, and deletes them from the database. Additionally, it cleans up expired tokens from the database.

    Parameters

    Parameter Type Description Default Required
    This method does not take any parameters.

    Return Value

    Type Description
    void This method does not return any value.

    Example Usage

    $this->module('trongate_tokens');
    $this->trongate_tokens->_destroy();

    _generate_token()

    public function _generate_token(array $data): string

    Description

    Generates a token based on provided data. The token is a 32-character random string that can be optionally set as a cookie and has an optional expiration date.

    Parameters

    Parameter Type Description Default Required
    $data['user_id'] int The user's Trongate user ID. None Yes
    $data['expiry_date'] int Unix timestamp for token expiration. time() + $this->default_token_lifespan No
    $data['set_cookie'] bool If true, set the token as a cookie. false No

    Return Value

    Type Description
    string The generated token.

    Example Usage

    In the code sample below, a token is generated for a user with ID 1, with an expiration date set, and the token is also set as a cookie.

    $data = [
        'user_id' => 1,
        'expiry_date' => time() + 3600, // 1 hour from now
        'set_cookie' => true
    ];
    
    $this->module('trongate_tokens');
    $token = $this->trongate_tokens->_generate_token($data);

    _get_user_id()

    public function _get_user_id(?string $token = null): int|false

    Description

    Retrieves the Trongate user ID based on a provided token. If no token is provided, the method attempts to fetch and use a token from the session, cookie, or page header values. If no valid token is found, the method returns false.

    Parameters

    Parameter Type Description Default Required
    $token string|null Optional. The token to retrieve the user ID for. null No

    Return Value

    Type Description
    int|false The Trongate user ID if found, or false if not found.

    Example Usage #1

    In the code sample below, a token is passed into the _get_user_id() method in an attempt to return a Trongate user ID.

    $token = 'agFauQmexzstRnBmKv5BNDgewsWgD32j';
    $this->module('trongate_tokens');
    $trongate_user_id = $this->trongate_tokens->_get_user_id($token);

    Example Usage #2

    In this alternative example, no token has been passed into the _get_user_id() method. This means that the method will attempt to retrieve a token from the session, cookie, or page header values. If a valid token is found in any of those locations, the method will then attempt to fetch and return an associated Trongate user ID.

    $this->module('trongate_tokens');
    $trongate_user_id = $this->trongate_tokens->_get_user_id();

    _get_user_level()

    public function _get_user_level(?string $token = null): string|false

    Description

    Retrieves the user level associated with the given token or the current user token. If a token is provided, it retrieves the user level for that token. If no token is provided, it retrieves the user level for the current user.

    Parameters

    Parameter Type Description Default Required
    $token string|null The token used to identify the user. If not provided, the token of the current user is used. null No

    Return Value

    Type Description
    string|false The user level title if found, otherwise false.

    Example Usage

    $this->module('trongate_tokens');
    $user_level = $this->trongate_tokens->_get_user_level();
    echo $user_level;  // This will output something like 'admin'

    _get_user_obj()

    public function _get_user_obj(?string $token = null): object|false

    Description

    Retrieves the Trongate user object based on a provided token. If no token is provided, the method attempts to fetch and use a token from the session, cookie, or page header values. If no valid token is found, the method returns false.

    Parameters

    Parameter Type Description Default Required
    $token string|null Optional. The token to use for fetching the user object. null No

    Return Value

    Type Description
    object|false The Trongate user object if found, or false if not found.

    Sample Data

    When a valid token is found, the method will return an object. The JSON string below shows an example of the kind of data that can be expected, within a returned object, when a valid token is found:

    {
        "trongate_user_code": "Tz8tehsWsTPUHEtzfbYjXzaKNqLmfAUz",
        "user_level_id": 1,
        "user_level": "admin",
        "token": "CmtMsmUWxEPeXkafsdDwsfHY87ax9ku4",
        "trongate_user_id": 1,
        "expiry_date": 1716918038
    }

    Example Usage #1

    In the code sample below, a token is passed into the _get_user_obj() method in an attempt to return a Trongate user object.

    $token = 'agFauQmexzstRnBmKv5BNDgewsWgD32j';
    $this->module('trongate_tokens');
    $trongate_user_obj = $this->trongate_tokens->_get_user_obj($token);

    Example Usage #2

    In this alternative example, no token has been passed into the _get_user_obj() method. This means that the method will attempt to retrieve a token from the session, cookie, or page header values. If a valid token is found in any of those locations, the method will then attempt to fetch and return an associated Trongate user object.

    $this->module('trongate_tokens');
    $trongate_user_obj = $this->trongate_tokens->_get_user_obj();

    regenerate()

    public function regenerate(): void

    Description

    Regenerates a token with a new expiration date. It validates the input format of the old token and the expiration date before proceeding. If the input format is invalid or the old token does not exist, appropriate HTTP response codes are set to indicate the failure reason.

    Parameters

    Parameter Type Description Default Required
    This method does not take any parameters.

    Return Value

    Type Description
    void This method does not return any value.

    Example Usage

    The JavaScript code sample below illustrates extending a user's login session by regenerating their token using an HTTP GET request. This approach involves appending the existing token to the target URL string. While exposing tokens in URLs is generally considered poor practice due to security concerns, in this specific scenario, any validated tokens passed via the URL are immediately invalidated and removed from the database, rendering them useless.

    <script>
    const baseUrl = '<?= BASE_URL ?>';
    let token = 'user-token';
    
    function regenerateToken() {
      const expiryDate = new Date();
      expiryDate.setHours(expiryDate.getHours() + 4);
      const expiryTimestamp = Date.parse(expiryDate) / 1000;
      const targetUrl = baseUrl + 'trongate_tokens/regenerate/' + token + '/' + expiryTimestamp;
    
      fetch(targetUrl, {
        method: 'GET',
        headers: {
          'Content-Type': 'application/json'
        }
      })
      .then(response => {
        if (response.ok) {
          return response.text();
        } else {
          throw new Error('Network response was not ok');
        }
      })
      .then(data => {
        token = data;
        alert("Token successfully renewed!");
      })
      .catch(error => {
        alert("Token renewal failed: " + error.message);
      });
    }
    
    regenerateToken();
    </script>

    Trongate Users

    _create_user()

    function _create_user(int $user_level_id): int

    Description

    Creates a new trongate user record with a specified user level ID.

    Please note that this method cannot be invoked directly via the URL and is designed to be invoked by other modules, such as the Trongate Administrators module.

    Parameters

    Parameter Type Description Default
    $user_level_id int The user level ID for the new user. N/A

    Return Value

    Type Description
    int The Trongate user ID of the newly created user.

    Example Usage

    $this->module('trongate_users');
    $trongate_user_id = $this->trongate_users->_create_user(3);

    Welcome

    index()

    function index(): void

    Description

    Renders the (default) homepage for public access. This method loads the 'trongate_pages' module and calls its 'display()' method to render the homepage.

    Parameters

    Parameter Type Description Default Required
    This method does not take any parameters.

    Return Value

    Type Description
    void This method does not return any value.

    Example Usage #1

    The code below shows the current implementation of the Welcome module's index method.

     /**
     * Renders the (default) homepage for public access.
     *
     * @return void
     */
    public function index(): void {
      $this->module('trongate_pages');
      $this->trongate_pages->display();
    }

    Example Usage #2

    The code sample below demonstrates how to render a simple, 'hello world' message when the application's (default) homepage is loaded.

     /**
     * Renders the (default) homepage for public access.
     *
     * @return void
     */
    public function index(): void {
      echo 'hello world';
    }

    Example Usage #3

    The code sample below demonstrates how a website template, with corresponding view file, could be rendered when the application's (default) homepage is loaded.

     /**
     * Renders the (default) homepage for public access.
     *
     * @return void
     */
    public function index(): void {
      $data['view_module'] = 'welcome';
      $data['view_file'] = 'homepage_content';
      $this->template('public', $data);
    }

    Trongate CSS

    The Trongate PHP Framework Complete API Reference Guide Trongate MX


    Introduction

    What is Trongate CSS?

    Trongate CSS is a lightweight CSS library designed to make plain HTML visually appealing with minimal effort. Unlike other CSS frameworks that require extensive usage of utility classes or component structures, Trongate CSS enhances standard HTML elements automatically, providing a seamless and elegant experience.

    Do We Really Need Another CSS Library?

    With the plethora of CSS libraries and frameworks available, it's natural to ask, "do we really need Trongate CSS?":

    The answer is simple: you don't have to use it.

    Trongate CSS is entirely optional and works independently of the Trongate PHP framework. If you already have a CSS library or framework that suits your needs, you can continue using it alongside Trongate CSS - or not at all. The choice is yours.

    While many CSS libraries are excellent, some come with significant challenges. For instance:

    1. Rewrite culture: Many of the world's most popular CSS frameworks are subjected to ruthless rewrite and reversioning schedules with breaking changes. Astonishingly, the makers of some of these other CSS frameworks appear to be proud of their ongoing endeavours to break their own intellectual assets. Rewrite culture is a huge problem across the CSS landscape and - sadly - it has ruined many good PHP projects.
    2. Steep learning curves: Modern CSS frameworks often introduce a labyrinth of utility classes, configuration files, and dependencies. This forces developers to spend hours, if not days, poring over exhaustive documentation just to accomplish what should be straightforward tasks. For instance, creating a responsive layout might require mastery of grid systems, flex utilities, and component-based styling approaches. Instead of speeding up development, these frameworks can make it feel like you're taking a crash course in a new programming language.
    3. Bloated code: Many CSS frameworks bundle an overwhelming array of pre-built components, styles, and utilities, most of which are irrelevant to your project. This can lead to unnecessarily large CSS files, slowing down page load times and bloating your source code. Even worse, developers often include the entire framework rather than just the parts they need, adding kilobytes - or even megabytes - of unused styles to their projects. The result is wasted bandwidth and poorer performance for end users.
    4. Framework lock-in: Dependency on framework-specific classes often leads to a scenario known as "framework lock-in," where your entire project becomes tethered to the quirks and updates of a particular library. Over time, this can make migrating to another framework - or even updating to a new version of the same framework - a monumental task. Designs that once felt modern can become outdated overnight, requiring extensive rework to achieve compatibility. For developers, this can mean a choice between starting from scratch or enduring endless frustration.

    Consider this simple HTML code:

    With most CSS frameworks, styling this button would require multiple classes:

    With Trongate CSS, the basic HTML element is all you need - it's beautifully styled by default!

    Key Features

    How It's Different

    • No classes required: Unlike Bootstrap or Tailwind, basic elements are styled without additional classes.
    • Minimal learning curve: Familiarity with HTML is all you need to get started.
    • Pure simplicity: Focus on content, not styling classes.
    • Fast development: Build professional web pages quickly and efficiently.

    Example: Form Styling Comparison

    Here's how Trongate CSS simplifies form development compared to other frameworks:

    Conclusion

    Think of Trongate CSS as being a patch (or, if you prefer, a fix) for pure HTML.

    Here's three huge benefits that Trongate CSS brings to the table:

    1. There's not much to learn! Trongate CSS makes pure HTML look beautiful.
    2. Trongate CSS encourages developers to write pure HTML - thereby giving projects massive degrees of stability.
    3. Since Trongate CSS is very lightweight and produces beautiful source code, it makes websites built with Trongate CSS very attractive to search engines like Google.

    Getting Started

    Trongate CSS is contained within a single CSS file named 'trongate.css'. This file is located in:

    Basic Usage

    Trongate CSS comes with every new installation of Trongate. Getting up and running with Trongate CSS is easy!

    Let's assume your starting point is a webpage (within a Trongate application) containing the following source code:

    Step 1: Add a <base> element to the <head> section of your webpage with the 'href' attribute set to your application's base URL:

    The BASE_URL constant is defined inside the file 'config.php'. This constant should be set to a website address pointing to the homepage of your web application.

    The config.php file is located in:

    Step 2: Load the Trongate CSS stylesheet onto your webpage by adding the following new line of code to the <head> section:

    After completing the steps above, Trongate CSS will automatically style your HTML elements without requiring additional classes or configuration.

    Boilerplate HTML

    The HTML code below demonstrates a basic, reusable template containing the essential structure and elements needed to start working with Trongate CSS:


    CSS Fundamentals

    CSS Variables

    Trongate CSS uses CSS custom properties (variables) to maintain consistent styling across your website. These variables control colors, borders, and other visual properties throughout the framework.

    Default Variables

    The following variables are defined in Trongate CSS:

    The variable of --modal-margin-top is different from the other CSS variables. It gets used to declare the top margin of modal windows whereas all of the other variables are used to set color values.

    Default Color Palette

    Here are the default color variables that are set within Trongate CSS:

    --primary
    #4682b4
    --primary-dark
    #38678f
    --primary-darker
    #294d6b
    --secondary
    #af46b4
    --secondary-dark
    #943f99
    --secondary-darker
    #77337a
    --success
    #4bb446
    --success-dark
    #368532
    --info
    #b2cce1
    --warning
    #b47846
    --danger
    #b4464b
    --danger-dark
    #8f383b
    --inverse
    #333
    --silver
    gradient
    --gold
    gradient
    --neutral
    #f5f5f5
    --alt
    #fff
    --border
    #c5c5c5

    Understanding the Variables

    The Primary Color

    In addition to the above colors, Trongate CSS has a class named as '.primary-color'. This class is intened to provide the default font color for a variety of elements including buttons and elements that use the '.primary' background color.

    The code sample below demonstrates an element that uses the --primary-color CSS variable to set the font color of an element.

    And, here's the result:

    The quick brown fox jumps over the lazy dog

    Customizing Variables

    To override these variables, add your own :root declaration after loading Trongate CSS:

    Only override the variables you want to change. The others will keep their default values.

    How To Use CSS Variables

    Once you've defined your CSS variables, you can use them anywhere within your CSS. For example, here's how you could apply the .primary background color to a footer element.


    Fonts And Typography

    Trongate CSS uses Tahoma as its default font family, providing excellent readability across all modern browsers without requiring external font downloads.

    Default Font Settings

    Tahoma was chosen because it's a web-safe font that's available on all modern devices, ensuring consistent rendering without loading external resources. It also has excellent readability characteristics and isn't as commonly used as Arial or Verdana, giving your site a distinctive look.

    Heading Sizes

    Headings are pre-configured with appropriate sizes:

    Default 'h1' element

    Default 'h2' element

    Default 'h3' element

    Default 'h4' element

    All font sizes use relative units (em, rem) rather than fixed pixels, ensuring proper scaling across different screen sizes and user preferences.

    Paragraph Text

    Paragraphs are styled for optimal readability with comfortable line spacing:

    Lorem ipsum dolor sit, amet consectetur adipisicing elit. Quibusdam fuga saepe mollitia officiis labore repudiandae ea rem, eos tenetur dolores sequi ad blanditiis natus, minima commodi vitae odio modi quam.

    Lorem ipsum dolor sit amet consectetur, adipisicing, elit. Sunt magni nihil autem doloremque est, facere dolorem culpa voluptatem amet aperiam adipisci consequuntur porro hic libero voluptates odit vel eum perferendis.

    List Styling

    Unordered lists are styled with clear spacing and custom bullets:

    • Item 1
    • Item 2
    • Item 3

    Ordered lists are styled in a similar manner with readability as a priority:

    1. Apples
    2. Oranges
    3. Bananas

    Lists use circle bullets by default and have generous vertical margins to separate them from surrounding content. List items have slightly increased line height for better readability.

    Key Features

    The increased line height on list items (1.8em vs 1.5em for regular text) helps distinguish list content from regular paragraphs.

    Summary

    That's all there is to it! No complicated font configurations or external dependencies - just clean, readable text that works everywhere. The typography system provides:


    Container Classes

    Trongate CSS provides a range of container classes to help control content width and maintain consistent margins across different screen sizes, all while remaining highly responsive.

    Default Container

    The default container class sets content width to 90% of the viewport with a maximum width of 940px, ensuring readability and proper content organization across all device sizes.

    Container Sizes

    Trongate CSS offers seven container variations to accommodate different content needs:

    The visual examples below are shown within the documentation's own container, so they cannot demonstrate their true maximum widths. To see the actual container widths in action, try the code examples on your own page.

    container-xxs (450px)
    container-xs (640px)
    container-sm (760px)
    container-md (820px)
    container (940px)
    container-lg (960px)
    container-xl (1100px)
    container-xxl (1300px)

    All container classes maintain 90% width on smaller screens and automatically center themselves using margin: 0 auto. The 1em padding ensures content doesn't touch the container edges.

    Container Specifications

    Each container class is optimized for specific use cases:

    All container classes automatically adjust their width to 90% on mobile devices, ensuring a consistent margin on smaller screens while maintaining content readability.

    Common Use Cases

    Here's an example of nested containers for creating complex layouts:

    Summary

    Trongate's container system provides:


    Text Alignment

    In HTML, paragraphs and text blocks are usally aligned to the left by default. However, Trongate CSS offers three utility classes for controlling text alignment. There are:

    1. .text-left
    2. .text-right
    3. .text-center

    Within the internals of Trongate CSS, each of the above text align classes are written with a declaration of !important. For example:

    The !important declaration in CSS is used to give a style rule higher priority, overriding other conflicting rules for the same property on an element.

    Normally, when working with CSS, using !important should generally be avoided as it can make debugging and maintaining CSS more difficult.


    Left Alignment

    To align text to the left, use the .text-left class. This is the default alignment for text, but you can apply it explicitly if needed.

    Here's the result:

    This text is left-aligned.


    Right Alignment

    To align text to the right, use the .text-right class. This can be useful for aligning elements like captions, footnotes, or certain types of content.

    Here's the result:

    This text is right-aligned.


    Center Alignment

    To center text, use the .text-center class. This is commonly used for headings, titles, or any content you want to highlight in the center of the page.

    Here's the result:

    This text is centered.

    The .text-center class aligns the text to the center of the container, making it perfect for headlines or emphasizing certain content.

    Summary

    Trongate CSS provides three text alignment classes for your convenience:

    All classes use the !important declaration to ensure they take precedence over other styles, providing a quick and reliable way to manage text alignment across your website.


    Float Classes

    Trongate CSS provides two utility classes for floating elements either to the left or right side of their container.

    1. .float-left
    2. .float-right

    Within Trongate CSS, float classes are combined with relative positioning to maintain proper layout control. For example:

    The combination of float and relative positioning ensures that floated elements maintain their position in the document flow while allowing other content to wrap around them.


    Left Float

    To float an element to the left, use the .float-left class. This is commonly used for images that should have text wrapping around their right side.

    Here's how it affects the layout:

    This text demonstrates how content wraps around a left-floated element. Notice how the text flows naturally around the blue box. This text demonstrates how content wraps around a left-floated element. Notice how the text flows naturally around the blue box. This text demonstrates how content wraps around a left-floated element. Notice how the text flows naturally around the blue box. This text demonstrates how content wraps around a left-floated element. Notice how the text flows naturally around the blue box. This text demonstrates how content wraps around a left-floated element. Notice how the text flows naturally around the blue box.


    Right Float

    To float an element to the right, use the .float-right class. This is useful for elements that should align to the right with content wrapping around their left side.

    Here's how it affects the layout:

    This text demonstrates how content wraps around a right-floated element. Notice how the text flows naturally around the blue box. This text demonstrates how content wraps around a right-floated element. Notice how the text flows naturally around the blue box. This text demonstrates how content wraps around a right-floated element. Notice how the text flows naturally around the blue box. This text demonstrates how content wraps around a right-floated element. Notice how the text flows naturally around the blue box. This text demonstrates how content wraps around a right-floated element. Notice how the text flows naturally around the blue box.

    Float classes are especially useful for working with images and other media elements within text content, enabling more dynamic and engaging layouts.

    When you float an item, such as an image, it's a good practice to add margins to create a gap between the floated element and the surrounding text. If you examine the two examples above closely, you'll notice this is achieved through the use of the .ml-1 and .mr-1 classes. These classes set a left margin of '1em' and a right margin of '1em', respectively.

    Summary

    Trongate CSS provides two float utility classes:

    Both classes include relative positioning to maintain proper layout control while allowing content to flow naturally around the floated elements.


    Horizontal Rules

    Horizontal rules (<hr>) in Trongate CSS provide clean dividing lines to separate content sections. They're styled minimally by default but can be easily customized.

    Default Styling

    The basic horizontal rule is styled as a subtle gray line with consistent spacing:

    Note that the border: 0 is used in combination with height and background to ensure consistent rendering across browsers.

    Basic Usage

    The code below demonstrates how to add a horizontal rule to your page:

    Here's how it looks:

    This is some content above the horizontal rule.


    This is some content below the horizontal rule.

    Customization Examples

    Here are some common ways to customize horizontal rules:

    Colored Rule Example

    Here's the result (look closely and you'll notice it's using the --secondary color).


    Thicker Rule Example


    Shorter Rule with Center Alignment


    Dotted Rule


    Spacing Considerations

    By default, horizontal rules include:

    You can adjust the margins using Trongate's margin utility classes like mt-1 or mb-2 if needed.

    Here's an example of some code that use margin utilities:

    Default spacing:


    Reduced top margin (mt-1):


    Increased bottom margin (mb-3):


    Summary

    Trongate CSS horizontal rules provide:

    Use horizontal rules to create visual breaks between content sections while maintaining your site's design aesthetics.


    Responsive Design

    Trongate CSS is built with responsive design principles at its core, ensuring websites adapt seamlessly across different device sizes. The framework implements a pragmatic mobile-first approach with a single breakpoint system.

    Mobile-First Features

    Below is a summary of the key responsive features that are built into Trongate CSS by default:

    Responsive Images

    Images automatically scale within their containers:

    The combination of max-width: 100% and height: auto ensures images scale proportionally without exceeding their container width.

    Breakpoint System

    Trongate CSS uses a single breakpoint at 550px for mobile adaptations. This streamlined approach simplifies responsive design while covering the most critical layout adjustments.

    Mobile Adaptations

    At the 550px breakpoint, several UI elements automatically adapt:

    Button Stacking

    Buttons automatically stack vertically and expand to full width on mobile devices:

    On mobile screens (below 550px), these buttons will:

    Modal Adaptations

    Modals receive several mobile-optimized adjustments:

    To learn more about how to create dynamic modals, please refer to our Trongate MX documentation. From there, you'll be able to view an entire section on the subject of Building Dynamic Modals.

    Button Container Behavior

    Button containers automatically adjust their layout on mobile:

    Form Elements

    Form elements automatically adjust to 100% width of their container while maintaining proper padding and spacing.

    When building responsive layouts with Trongate CSS:

    • Test your interface at the 550px breakpoint to ensure proper adaptation
    • Group related buttons together for proper mobile stacking
    • Utilize the built-in image responsiveness instead of fixed dimensions
    • Consider mobile users when ordering stacked elements

    Summary

    Trongate CSS's responsive features provide:


    Forms

    Forms Overview

    Trongate CSS provides elegant, responsive form styling out of the box. Forms are styled automatically without requiring additional classes - just write standard HTML and let Trongate CSS handle the presentation.

    Basic Example

    The form below uses pure HTML and looks beautiful on both desktop devices and mobile devices. You may be surprised to discover, there are no classes or special attributes - in the source code - whatsoever.

    Here's the source code for the above form:

    Core Features

    When you create forms with Trongate CSS, the following styles are automatically applied:

    Form Layout Options

    Control form width by wrapping your form in one of Trongate's container classes:

    For additional information about containers, see our documentation for Container Classes.

    Label Spans

    Span elements within labels are automatically styled in green. This is useful for letting users know if a form field is optional. For example:


    Form Elements

    This guide explores the various form elements available in Trongate CSS and demonstrates their behaviors, states, and common usage patterns.

    Input Field States

    Every form input has multiple visual states to provide clear user feedback:

    Input Type Variations

    Different input types provide specialized functionality while maintaining consistent styling:

    Select Elements

    Select dropdowns support option grouping for better organization:

    Textarea Variations

    Textareas can be configured for different use cases:

    Input Groups

    In the example below, two buttons are positioned side-by-side by adding the .flex-row class to a containing element.

    Below is the source code for the example shown above. Notice how the second form field contains a class of .ml-1. The purpose of this additional class is to add a left margin (with a value of '1em') onto the second form field element, thereby creating a small gap between the two form fields.

    Horizontal Search Bar

    The example below uses .flex-row, a little custom CSS to produce an attractive horizontal search bar. The search button contains a Font Awesome icon. The icon depicts a small magnifying glass (a commonly used icon for submit buttons that appear on search forms).

    To get the magnifying glass icon appearing, you'll have to load Font Awesome into your webpage. This can be achieved by adding the following line of code onto the <head> section of your webpage:

    Checkbox and Radio Groups

    Checkboxes and radio buttons can be organized into intuitive groups:

    Alternative Example

    The example below uses classes of .mb-0 and .mt-0 to adjust top and bottom margins. The result is a more compact assortment of form elements.


    Form Buttons

    Trongate CSS provides several button styles and variations that can be used within forms. This guide explores the various button options and their common use cases.

    Basic Buttons

    The standard button style is achieved using either the button element or an anchor tag with the .button class:

    Link Button

    Trongate CSS file gives buttons a top margin. The relevant rule is:

    To mitigate this, a class of .mt-0 can be added to buttons. For example:

    Alternative Style

    Add the .alt class to create buttons with an outline style:

    Back

    Status Buttons

    Trongate CSS provides contextual button styles for different actions and states:

    Button Sizes

    Buttons can be sized using Trongate's size classes:

    Form Actions

    When positioning multiple buttons at the bottom of a form, consider using .justify-between for optimal spacing:

    Special Button Styles

    Trongate CSS includes metallic button styles for emphasis:

    Disabled State

    Use the disabled attribute to indicate inactive buttons:

    Disabled buttons maintain their basic styling but have reduced opacity and a "not-allowed" cursor to indicate their inactive state.


    Tables

    Tables Overview

    Trongate CSS provides clean, responsive table styling out of the box. Tables are automatically styled for readability with alternating row colors, borders, and hover effects - all without requiring additional classes.

    Basic Example

    Here's a simple table that demonstrates the default styling:

    Name Position Location
    John Smith Software Engineer London
    Sarah Johnson UX Designer Berlin
    Michael Brown Project Manager New York

    Table Structure

    A well-structured HTML table should include both <thead> and <tbody> sections. While these tags are technically optional, using them provides several benefits:

    The <thead> Element

    The <tbody> Element

    Default Features

    Trongate CSS applies the following styles to tables automatically:

    Basic Table Example with Data

    Here's a more comprehensive example showing a data-rich table with multiple columns:

    Product ID Product Name Category Price Stock
    001 Wireless Mouse Electronics $29.99 45
    002 USB-C Cable Accessories $12.99 132
    003 Bluetooth Speaker Electronics $79.99 28
    004 Laptop Stand Accessories $34.99 56

    While tables are great for displaying tabular data, they should not be used for layout purposes. For layout, use CSS Grid or Flexbox instead.

    • Always use <th> elements for header cells instead of <td> with bold text.
    • Include both <thead> and <tbody> tags for better structure.
    • Keep tables as simple as possible - avoid nested tables.
    • Use appropriate column widths to prevent content from being squeezed.
    • Consider using a container class to control the table's maximum width.

    Table Variations

    While Trongate CSS provides excellent default table styling, you may want to customize tables for specific use cases. This guide explores various ways to modify table appearance and behavior.

    Compact Tables

    You can create more compact tables by adjusting cell padding using custom CSS:

    ID Name Status
    1 John Doe Active
    2 Jane Smith Pending

    Custom Header Colors

    You can modify table header colors using CSS variables or direct color values:

    Package Price Features
    Basic $19.99 Essential features
    Pro $49.99 Advanced features

    Remember that while customizing tables, it's important to maintain good contrast ratios for accessibility. Test your custom styles with different color combinations to ensure readability.


    Highlighted Rows

    You can highlight specific rows for emphasis using custom classes:

    Plan Users Price
    Basic 5 users $29/mo
    Professional 25 users $99/mo
    Enterprise Unlimited $299/mo

    Responsive Tables

    For better mobile display, wrap your table in a container with horizontal scroll:

    Product Category Price Stock Rating Actions
    Premium Laptop Electronics $1,299.99 45 4.5/5 Edit | Delete
    Wireless Mouse Accessories $49.99 132 4.8/5 Edit | Delete

    Custom Cell Alignment

    You can align cell content using text alignment classes:

    Product Quantity Price
    Premium Widget 5 $99.99
    Basic Widget 3 $49.99

    Status-Based Row Colors

    Inside of defining a brand new color/class for table rows, you can also access pre-existing CSS variables to create status-based row colors. This technique guarantees that your table row styling is kept in alignment with underlying CSS variables. For example:

    Order ID Customer Status
    001 John Doe Completed
    002 Jane Smith Pending
    003 Bob Wilson Cancelled

    What is color-mix()?

    The color-mix() function in CSS lets you blend two colours together to create new ones. It's a simple way to create effects like transparent overlays, gradients, and custom colour combinations dynamically.

    How Does It Work?

    The function combines two colours in a specified colour space. Here's the syntax:

    Example Use Case

    Here's how you can blend 10% of your primary colour with transparency:

    Understanding sRBG

    The 'srgb' value in the color-mix() function refers to the sRGB (Standard RGB) colour space, which is a commonly used colour space for web and digital design. sRGB defines how colours are represented and rendered on screens. It is the default colour space for most web content and displays.

    Browser Support and Fallback

    Modern browsers support color-mix(). To ensure compatibility with older browsers, provide a fallback:

    Pro Tips

    • Adjust percentages to fine-tune blending effects.
    • Combine with CSS variables to maintain consistent theming.
    • Use it for hover effects, overlays, and accent colours in your designs.

    Advanced Customization Tips


    Cards And Modals

    Working With Cards

    Cards are versatile containers that help organize and present content in a clean, structured way. Trongate CSS provides built-in card styling with minimal markup requirements.

    Basic Card Structure

    A basic card consists of two main parts: a heading and a body. Here's a simple example:

    Welcome Message

    Welcome to our platform! This is a basic card example showing how content can be organized using Trongate's card component.

    Cards with Different Content Types

    Cards can contain various types of content including text, lists, buttons, and more:

    Product Features
    • Responsive Design
    • Easy Integration
    • Modern Architecture

    Multiple Cards Layout

    Cards can be arranged side by side using Trongate's flex utilities:

    Basic Plan

    Perfect for individuals and small teams with a focus on efficiency.

    Pro Plan

    Ideal for growing businesses and organizations that need more.

    In the example, we also use .text-center to center-align the modal body content. Here's the source code:

    Customizing Card Appearance

    You can customize cards using CSS variables and additional styles:

    Custom Styled Card

    This card demonstrates custom styling possibilities.

    Top Tips

    Cards automatically inherit your theme's primary color for their headings. You can override this using CSS variables or custom styles as shown in the examples above.


    Working With Modals

    Modals are popup dialogs that appear over the main content of a webpage. The Trongate ecosystem provides elegant modal styling along with JavaScript functionality for seamless modal interactions. Click the button below to see an example of a basic modal:

    Basic Modal Structure

    A basic modal consists of a heading and body section. Here's the standard structure:

    Setting Up Modals

    To use modals in your project, follow these steps:

    1. Ensure you've included an appropriate JavaScript file (app.js/admin.js/trongate-mx.js) in your project.
    2. Using style="display: none" to hide your modal element upon initial page load.
    3. Add a trigger element (like a button) that calls openModal(), passing in the 'id' of the modal element that you'd like to have opened.

    Here's a complete example:

    Closing Modals

    Opened modal elements can be closed by invoking the JavaScript function, closeModal(). This function can be easily attached to elements, like buttons. For example:

    Modal with Footer

    You can add a footer section to your modal for action buttons:

    Form Inside Modal

    Modals are perfect for containing forms:

    Close Modal Icons

    It's also possible to add 'close modal' icons onto modals, producing a result that's similar to the kind of user experience that we may find on a native desktop application.

    Click the button below to see a working example of a modal that contains a 'close modal' icon:

    In the example, the following CSS classes are being used to control the layout of the .modal-header element:

    1. .flex-row
    2. .align-center
    3. .justify-between

    Here's the source code:

    In the example, we're using Font Awesome to render a 'close modal' icon. Font Awesome can be loaded onto your webpage by adding the following line of code onto the <head> section of your webpage:

    Don't forget to also add a CSS rule that turns the cursor into a pointer upon mouseover events!

    If you don't like using Font Awesome, you're free to use any other icon of your choosing. You may wish to even consider rendering a 'close icon' using pure HTML. For example:

    • Always provide a way to close the modal (close button or cancel option).
    • Keep modal content focused and concise.
    • Use appropriate modal sizes for different types of content.
    • Consider mobile responsiveness.
    • Use clear and descriptive heading text.
    • Ensure all modals have unique IDs.

    JavaScript Functions

    Two main functions are available for modal control:

    1. openModal(modalId): Opens the modal with the specified ID
    2. closeModal(): Closes the currently open modal
    Example usage:

    Loading The JavaScript Code

    The JavaScript code for handling modals is contained within the following JavaScript files:

    1. app.js
    2. admin.js
    3. trongate-mx.js

    The JavaScript files are located in:

    All three of these files are provided with every installation of Trongate.

    You only have to load one of the above JavaScript files to enjoy full modal opening and closing functionality.

    • If you're working with one of Trongate's pre-built admin panels, use admin.js.
    • If you're working with Trongate MX, use trongate-mx.js.
    • For all other situations, use app.js.

    IMPORTANT NOTE: It's perfectly acceptable to load Trongate MX ('trongate-mx.js') onto a webpage that already uses either 'app.js' or 'admin.js'.

    The following code demonstrates an example of basic HTML boilerplate required for implementing modal functionality with Trongate.

    Dynamic Modal Generation

    Trongate MX pushes the boundaries of modern web development by providing a mechanism for generating modals entirely dynamically. This means that developers who'd like to have modal elements within their applications no longer have a requirement to hard-code hidden modal elements into their source code.

    For example, if you click the button below, a modal will be dynamically generated. The contents of the modal will be extracted by fetching the headline element from the homepage of this website. Give it a try!

    To the untrained eye, the end result may look and behave like an ordinary modal. However, what's happening behind the scenes is remarkable. That's because the entire modal (both the contents and the modal window itself) are being generated and rendered dynamically.

    Here's the source code:

    To make the above example work, you'll have to load Trongate MX onto your webpage.

    The example above is an attempt to introduce you to the general topic of dynamic modal generation. Full instructions and guidance, pertaining to dynamic modal generation, is beyond the scope of the 'Trongate CSS' documentation.

    If dynamic modal generation and advanced front-end development, with Trongate, is something you'd like to learn more about, please refer to the Trongate MX Documentation.


    Utility Classes

    Size Classes

    Trongate CSS provides utility classes for adjusting sizes. These classes scale elements relative to their base size using em units.

    Available Size Classes

    There are four size modifier classes available:

    1. .xl
    2. .lg
    3. .sm
    4. .xs

    The code below shows the effect that these classes have upon text.

    Extra Large Text (.xl)

    Large Text (.lg)

    Default Text Size (no class)

    Small Text (.sm)

    Extra Small Text (.xs)

    Using Size Classes with Buttons

    Size classes can be applied to buttons to create clear visual hierarchies in your interfaces:

    For more on this, check out our documentation on Form Buttons.

    Practical Applications

    Size classes can effectively establish content hierarchy. Here's an example showing different size classes working together in card element:

    Product Features

    Premium Package

    Main description of the product goes here.

    • Feature One
    • Feature Two

    Terms and conditions apply. See details below.

    *Prices may vary by region

    Size Class Specifications

    The size classes use the following scale:

    Size classes can be combined with other utility classes like margin utilities (mt-1, mb-1, etc.) for more precise control over element presentation.


    Margin Utilities

    Trongate CSS provides utility classes for controlling margins. These classes follow a simple naming convention where the first letter indicates the margin direction (t, b, l, r for top, bottom, left, right) and the number indicates the size in em units.

    Margin Direction Classes

    There are four types of margin utilities available:

    Where {n} can be 0 through 7, representing the size in em units.

    Top and Bottom Margins

    Here's a demonstration of top margin (mt-) and bottom margin (mb-) utilities:

    Default spacing
    mt-3 adds 3em top margin
    mt-5 adds 5em top margin

    Left and Right Margins

    Here's how to use left margin (ml-) and right margin (mr-) utilities:

    Common Use Cases

    Margin utilities are particularly useful for:

    Blog Post Example

    This paragraph has a 2em bottom margin.

    Subheading with 1em bottom margin

    Another paragraph with 3em bottom margin.

    Available Sizes

    Each margin utility class is available in these sizes:

    Removing Margins

    Use the zero value to remove margins when needed:

    Margin utilities can be combined to control spacing in multiple directions. For example, mt-2 mb-3 ml-1 would set different margins for top, bottom, and left respectively.


    Flexbox Layout Classes

    Trongate CSS provides utility classes for flexbox layouts, making it easy to create responsive and dynamic layouts. These classes control flex container direction, alignment, spacing, and item behavior.


    Basic Flex Containers

    Use .flex-row or .flex-column to create flex containers with different directions:

    Item 1
    Item 2
    Item 3
    Item 1
    Item 2
    Item 3

    Justify Content Classes

    Control horizontal alignment using justify content classes:


    Align Items Classes

    Control vertical alignment using align items classes:

    Top
    Center
    Bottom

    Flex Grow

    Use .flex-grow to allow an item to fill available space:

    Trongate CSS file gives buttons a top margin. The relevant rule is:

    To mitigate this, a class of .mt-0 is added to the button, in the example.


    Flex Wrap

    Flex containers in Trongate CSS allow you to control whether flex items stay on one line or wrap onto additional lines. This behaviour is controlled using the .flex-wrap and .flex-nowrap classes.

    The .flex-wrap class makes items wrap onto the next line when they exceed the container's width, ensuring a responsive layout. In contrast, the .flex-nowrap class forces all items to remain on a single line, even if they overflow the container.

    Example: Wrapping Items

    In this example, the .flex-wrap class is applied to a flex container. Items automatically wrap to a new line when there is not enough horizontal space in the container. Each button is styled with flex: 1 1 auto;, which allows them to grow and shrink proportionally, while also having consistent spacing through margins.

    Example: Preventing Wrapping

    The following example uses the .flex-nowrap class to keep all items on a single line. Notice how the container may overflow horizontally, which can be addressed with overflow-x: auto;. This is particularly useful for layouts where items need to remain in a single row.

    When working with flex wrap utilities, remember to combine them with appropriate margins, padding, and overflow styles to achieve the desired layout and usability. Wrapping is ideal for responsive designs, while preventing wrapping suits controlled, fixed-width layouts.


    Practical Example

    Here's a common layout pattern combining multiple flex utilities:

    Product Details

    Price: $99.99

    In stock: 42 units

    Conclusion

    Flexbox utilities in Trongate CSS empower developers to build responsive and highly customisable layouts with ease. By combining these utilities with margin, padding, and size classes, you can achieve precise alignment and spacing. Always keep in mind that flexbox properties only affect immediate child elements, making it essential to structure your HTML hierarchy thoughtfully for optimal results. Whether creating adaptive, wrapping designs or enforcing strict alignment, flexbox is a versatile tool to meet your layout needs.


    Cloaking Elements

    Trongate CSS provides utility classes to control element visibility and display behavior. These classes are particularly useful for managing content visibility across different states and scenarios.

    The Cloak Class

    The .cloak class is used to completely hide elements from view. Elements with this class will have display: none applied, removing them from the document flow.

    This block of code contains three paragraphs. This is the first paragraph. It is visible.

    This paragraph is hidden with .cloak

    This is the third paragraph. It is also visible. Notice how the second paragraph is hidden.

    Common Use Cases

    The .cloak class is particularly useful in the following scenarios:

    Dynamic Display Example

    Below is an example of how the .cloak class might be used in a practical scenario with a toggle button:

    This content can be toggled visible/hidden

    Form Field Example

    Here's a practical example showing how the .cloak class can be used to manage conditional form fields:

    The .cloak class is different from setting visibility: hidden or opacity: 0. While those properties would hide elements visually, .cloak completely removes the element from layout flow, ensuring no space is reserved for it.

    Best Practices

    When using display utilities, keep these guidelines in mind:

    Other Cloaking Techniques

    The Trongate ecosystem gives developers access to other cloaking techniques, beyond the .cloak class.

    Modals

    One commonly used example of a situation where an element is cloaked upon initial page load is when dealing with modals. For example:

    For more information about this, please refer to our section on Working With Modals.

    Loading Indicators

    Trongate CSS also contains a class named as .mx-indicator. This class gets used by Trongate MX to hide an element by default but to then display the element as a loading indicator during the HTTP request.

    Click the button below to see a loading indicator in action:

    In order for the code above to work with your application, you'll have to set up and API endpoint and also load Trongate MX onto your webpage.

    For the purposes of avoiding repetition, we won't cover that here. However, if you are interested in learning more about Trongate's powerful front-end framework, we strongly encourage you to check out the Trongate MX Documentation.


    Pagination

    Trongate CSS provides a sleek, user-friendly pagination system that ensures smooth navigation across multiple pages. By following the correct HTML structure, you can effortlessly implement consistent and visually appealing pagination components.

    Basic Pagination

    To create a basic pagination component, wrap your pagination links inside a container with the .pagination class:

    Styling Highlights

    Using Multiple Pagination Blocks

    Place pagination components at the top and bottom of your content. The first pagination block includes a bottom margin for spacing, while subsequent blocks add a top margin for consistency:

    Content Area

    Extended Example

    For pages with more content, you can extend the pagination component to include additional page numbers and states:

    By default, the previous and next links use « and ». You can replace these with icons or other symbols for custom designs.


    Media And Animations

    Video Containers

    Trongate CSS provides utility classes to help you embed videos responsively. The .video-container and .video classes work together to ensure embedded videos maintain proper aspect ratios and remain responsive across all device sizes.

    Basic Implementation

    To embed a responsive video, wrap the <iframe> in a container with the .video-container class, and add the .video class to the <iframe> itself. For example:

    Note: The width and height attributes are intentionally omitted from the <iframe> tag as the CSS rules dynamically control the dimensions to ensure responsiveness.

    Different Aspect Ratios

    While the default aspect ratio is 16:9, you can specify different ratios using modifier classes:

    How It Works

    The video container classes use CSS custom properties to maintain the correct aspect ratio. The key is the padding-bottom value, which is calculated based on the aspect ratio:

    By combining the .video-container and .video classes, your videos will maintain their proper proportions and adapt seamlessly to different screen sizes.


    Working With Images

    Trongate CSS provides simple yet powerful image handling capabilities out of the box. Images are automatically made responsive while maintaining their aspect ratios, ensuring they look great across all devices.

    Basic Image Styling

    By default, all images in Trongate CSS are responsive. Simply use the standard HTML <img> tag, and Trongate CSS will handle the rest:

    Example responsive image

    This works because Trongate CSS automatically applies max-width: 100%; and height: auto; to all images, ensuring they scale proportionally within their containers while maintaining aspect ratio.

    Image Alignment

    Trongate CSS provides several utility classes for controlling image alignment:

    Left aligned image
    Right aligned image
    Center aligned image

    Responsive Image Grids

    Create flexible image galleries using Trongate's flexbox utilities:

    Grid image 1 Grid image 2 Grid image 3

    Images in Cards

    Images work seamlessly within card components:

    Card image example

    Images automatically fit within card boundaries while maintaining their aspect ratio.

    When working with images in responsive layouts, consider these best practices:

    • Always include meaningful alt text for accessibility.
    • Use appropriate container classes to control maximum image width.
    • Consider using different aspect ratios for different types of content.
    • Test images across different screen sizes to ensure proper scaling.

    While Trongate CSS handles responsive image scaling automatically, it's still important to serve appropriately sized images to optimize loading times and performance.


    Animation Classes

    Trongate CSS includes built-in animations for both loading indicators and attention-grabbing effects. These animations help provide visual feedback and draw user attention to important elements.

    Loading Spinner

    The loading spinner animation is created using the .spinner class. This creates a rotating circular indicator perfect for loading states.

    Spinner Variations

    The spinner can be aligned differently using additional classes:

    Left-Aligned Spinner

    Center-Aligned Spinner

    Right-Aligned Spinner

    Common Use Cases for Spinners

    Spinner elements often appear when content is being loaded via Ajax requests. Often, they'll be used inside dynamic modal elements or card elements, like so:

    Loading Content

    Customizing Spinners

    By default, the spinner uses your primary theme color. However, you can create custom spinners with different colors, sizes, and animation speeds using CSS.

    Different Colors

    To change a spinner's color, override the border color in your CSS:

    Custom Sizes and Thicknesses

    You can modify the size and border thickness of spinners:

    Animation Speed

    Customize the animation speed by modifying the animation duration:

    When customizing spinners, remember to always keep the border-right-color and border-top-color as transparent to maintain the spinning effect. Also, ensure sufficient contrast against your background for visibility.

    Attention Effects

    The .blink class provides a blinking animation effect to draw attention to important elements.

    Combining Effects

    Loading and attention effects can be combined with other Trongate CSS classes to create more complex UI patterns:

    System Status
    Processing Request
    • Use spinners to indicate loading states or processing actions.
    • Apply the blink effect sparingly and only for truly important notifications.
    • Consider accessibility implications when using attention-grabbing animations.
    • Combine with appropriate text to provide context for the animation.
    • Test animations across different browsers to ensure consistent behavior.

    Success & Failure Animations

    Trongate MX includes success animations and error animations, which are automatically rendered after HTTP requests are triggered by Trongate MX. Click the button below to see a demonstration of how 'success' or 'error' animations respond to user feedback.

    Details about how this functionality works is beyond the scope of Trongate CSS documentation. However, we recommend exploring the Trongate MX Documentation for comprehensive details on this feature. In particular, we suggest reviewing the section on UI Enhancements.


    Trongate MX

    The Trongate PHP Framework Complete API Reference Guide Trongate CSS


    Introduction

    Introduction to Trongate MX

    Trongate MX empowers you to build modern, highly interactive web applications with minimal coding. Acting as the perfect companion to the Trongate PHP framework, it bridges the gap between server-side development and modern front-end development.

    Key Features

    Trongate MX is a JavaScript library for developers who don't like writing JavaScript! Here's what sets it apart from other JavaScript libraries that you may have heard of:

    Getting Started

    Trongate MX comes pre-installed with the Trongate framework, meaning you can dive right in without additional setup. It's designed to help you add powerful, dynamic behaviors to your web pages with just a few well-placed attributes - no need to write heaps of JavaScript.

    In the next sections, you'll learn how to:

    Whether you're building a lightweight website or a feature-rich application, Trongate MX equips you with the tools to create interactive, server-driven interfaces efficiently, letting you focus on what matters - building something amazing.


    Frequently Asked Questions

    What is Trongate MX?

    Trongate MX is a powerful front-end framework that turns simple HTML attributes into sophisticated web functionality. It's designed specifically for the Trongate PHP framework, allowing you to create dynamic, interactive web applications without writing JavaScript code.

    Think of it as your bridge between static HTML and modern web applications. By adding straightforward attributes to your HTML elements, you can handle form submissions, update content dynamically, trigger success and error animations, manage modals, implement authentication, and create rich user experiences - all while maintaining clean, maintainable HTML code.

    Why was Trongate MX built?

    In today's fast-paced world of web development, there is an increasing demand for web applications to deliver the responsiveness and fluidity typically seen in native software.

    Before the introduction of Trongate MX, PHP developers faced a tough choice: they could either:

    1. Ignore modern front-end development trends.
    2. Master a complex JavaScript framework.
    3. Write large amounts of custom JavaScript code.

    None of these options were ideal.

    Trongate MX was built to solve this challenge. With Trongate MX, developers can produce sophisticated, dynamic front-end interactions without having to write any JavaScript code!

    What technical problem does Trongate MX solve?

    The Trongate PHP framework is written in PHP, a server-side technology. Unfortunately, PHP frameworks have limitations when it comes to supporting sophisticated front-end web development tasks, primarily due to their server-side nature.

    Trongate MX solves this by enabling the creation of real-time, dynamic web experiences without relying on heavy JavaScript frameworks or excessive custom JavaScript code. With Trongate MX, you can:

    • Create modern, interactive applications without writing JavaScript code.
    • Save time and avoid headaches from extensive front-end development.
    • Bypass the complexities, bloat, and rewrite culture that are an unfortunate norm for developers who have to work with large JavaScript frameworks.

    In short, it lets you deliver cutting-edge front-end functionality while keeping your codebase clean and efficient.

    How does Trongate MX fit into the broader Trongate ecosystem?

    Trongate MX is a game changer for both Trongate developers and also for the makers of Trongate.

    FOR DEVELOPERS

    The addition of Trongate MX changes "Trongate" from a PHP framework to a cohesive ecosystem for building modern web applications. The idea of having a complete modern web development suite that has no third-party dependencies and prioritises stability is a rarity. It might even be an industry first!

    FOR THE MAKERS OF TRONGATE

    Trongate MX gives the makers of Trongate an opportunity to push the boundaries of what's possible for the Trongate ecosystem. The plan, moving forward, is to use Trongate MX to build an exciting assortment of intellectual assets that other PHP frameworks simply cannot offer.

    Is Trongate MX open-source?

    Absolutely! Trongate MX is fully open-source and released under the MIT License. You're free to use it in personal and commercial projects alike.

    Can I use Trongate MX without using the Trongate (PHP) framework?

    Yes, you can. Technically, all you need is to include the Trongate MX JavaScript file on your web pages, and you're good to go.

    However, using it without the Trongate PHP framework means missing out on features like; dynamic modal building, token authorisation, CSRF protection, advanced animations and more.

    Are there any plans for additional features in future versions?

    Like the Trongate PHP framework, Trongate MX will be subjected to ongoing, continuous improvement. However, adding more features to Trongate MX is not the primary focus for the makers of Trongate.

    Moving forward, the focus will be on creating groundbreaking tools using Trongate MX. For example, work has already begun on an exciting new content management system (built using Trongate MX), scheduled for release in the spring of 2025.

    When that's ready, it'll be shipped with Trongate - free of charge.

    How can I contribute to the development of Trongate MX?

    Since Trongate MX is bundled with the Trongate framework, any contributions to the ecosystem are welcome. Feel free to submit a pull request via our GitHub repository:

    https://github.com/trongate/trongate-framework


    Trongate MX Quick Start Guide

    This guide will help you quickly get started with Trongate MX. Please ensure you have the latest version of Trongate installed before proceeding.

    Step 1: Include Required Files

    Trongate MX requires two main files to function properly:

    1. The JavaScript file "trongate-mx.js" located in:

    2. The CSS stylesheet "trongate.css" located in:

    To activate these files, add the following lines to your website template:

    The JavaScript file can be placed either:

    Both placements are valid because Trongate MX initializes after the page loads. The choice of placement can depend on your specific needs and preferences for page loading behaviour. However, the CSS stylesheet should always be included in the <head> section.

    It's highly recommended to include a <base> tag in the head section of any webpage that uses Trongate MX. For example:

    Adding this to the head section of your page offers several benefits:

    • It simplifies your URLs, resulting in less typing.
    • It makes your code cleaner and more maintainable.
    • It allows for easier migration or changing of your base URL in the future.

    With the <base> tag, instead of writing:

    You can simply write:

    Step 2: Create an API Endpoint

    Before using Trongate MX to make API calls, you'll need to create an endpoint in your controller. Here's an example of a simple API endpoint that returns HTML:

    Notice how this endpoint returns pure HTML instead of JSON. This is one of the powerful features of Trongate MX!

    Step 3: Invoke AJAX Requests without Writing Any JavaScript!

    The code below invokes an HTTP request. Notice that it's just pure HTML with a couple of 'mx' attributes added.

    Here's the solution written using Trongate's form_button() form helper:

    When using Trongate MX, you can take advantage of Trongate's form helper functions. However, if you prefer writing the syntax as pure HTML with 'mx' attributes, that's perfectly fine too.

    In the above example, when clicked, the button will:

    The key components are:

    Congratulations! You've just taken your first step with Trongate MX. Unlike traditional approaches that force you to work with JSON and complex JavaScript code, Trongate MX lets you enjoy all the benefits of JavaScript but without having to actually write any JavaScript at all! Best of all, you can return pure HTML directly from your endpoints. This means faster development, cleaner code and smashed deadlines!


    Regarding View File Syntax

    In Trongate MX, there are two main ways to create form elements and other HTML content. This section will guide you through both approaches:

    1. Using Trongate's Form Helper Functions
    2. Writing Plain HTML

    Let's explore both approaches.


    1) Using Trongate's Form Helper Functions

    Trongate's form helper functions provide a clean and consistent way to generate HTML elements. These functions are designed to streamline your code and ensure it follows best practices.

    For example, here's how to create a form button using Trongate's form_button() form helper:

    This generates the following HTML:

    Now, let's look at how to add attributes to create more complex elements. This can be achieved by passing in an array of key-value pairs. For example, a button that triggers an API call (with Trongate MX) could be rendered using the following syntax:

    This generates the following HTML:

    When using form helpers like form_button() , certain attributes, such as the 'name' attribute, are rendered by default. However, not all of these attributes are essential for Trongate MX to function properly.


    2) Writing Pure HTML

    While Trongate's form helpers are recommended, you can still write pure HTML for form elements, if you prefer. Here's an alternative syntax the produces the same result as the example shown above:

    Both approaches are fully supported and will function correctly with Trongate MX.


    The Pros And Cons Of These Approaches

    The choice between using form helpers or writing plain HTML is entirely up to you. Both methods will work seamlessly with Trongate MX.

    Form Helpers

    Pros

    • Consistent code structure across your application.
    • Built-in security features and sanitization.
    • Shorter, more readable code in complex scenarios.

    Cons

    • Requires learning the helper function syntax.
    • Slightly more typing required for very simple elements.
    • May generate additional attributes you don't need.
    Plain HTML

    Pros

    • Complete control over the output HTML.
    • No learning curve for developers familiar with HTML.
    • Familiar syntax for developers experienced with libraries like HTMX.

    Cons

    • No built-in security features.
    • May require excessive code for complex forms.

    Regardless of the method you choose, Trongate MX's attributes (such as mx-get, mx-target, etc.) will function the same way in both scenarios. The underlying functionality remains consistent.


    Core HTTP Operations

    HTTP Methods in Trongate MX

    Trongate MX provides a set of attributes that allow you to make various types of HTTP requests directly from your HTML elements. These attributes correspond to different HTTP methods and enable you to create dynamic, interactive web applications with minimal JavaScript.

    Available HTTP Method Attributes

    Trongate MX supports the following HTTP method attributes:

    Trongate MX fully supports REST-style HTTP request methods like PUT, PATCH, and DELETE. However, these methods are entirely optional. Many developers choose to rely on GET and POST requests - a trusted and effective standard within the PHP ecosystem.

    HTTP Method Attributes at a Glance

    The table below shows all of the different types of HTTP requests that can be made with Trongate MX, along with their corresponding 'MX attributes' and typical use cases.

    Attribute HTTP Method Typical Use
    mx-get GET Retrieve data
    mx-post POST Submit new data
    mx-put PUT Update existing data
    mx-patch PATCH Partially update data
    mx-delete DELETE Delete data

    How Trongate MX Handles HTTP Methods

    Trongate MX provides flexible handling of various HTTP methods:

    1. Client-Side (Trongate MX):
      • The JavaScript library supports all HTTP method attributes (mx-get, mx-post, mx-put, mx-patch, mx-delete).
      • Sends requests using the specified HTTP method.
    2. Server-Side (Trongate PHP):
      • Check the HTTP method using: $_SERVER['REQUEST_METHOD'].
      • Get request data using the post() function, which handles all HTTP methods.

    Example Usage in Controllers:

    What this means for you: You can use any HTTP method attribute in your HTML when making requests. On the server side, use $_SERVER['REQUEST_METHOD'] to determine the HTTP method and post() to get the request data.

    Basic Usage

    To use these attributes, simply add them to your HTML elements with the URL you want to request as the value.

    GET Request Example

    Here's an alternative syntax, for those who prefer to work with pure HTML:

    When the button is clicked, an HTTP GET request is sent to 'api/get_data'. The response will be displayed in the element with id="result".

    Remember to include a <base> tag in your webpage's head section:

    Post Request Example

    The code below demonstrates how to invoke an HTTP POST request, when a button in clicked, using Trongate MX:

    Here's an alternative syntax for those who prefer to use pure HTML:

    The code above would produce a button that has the text, 'Submit'. For example:

    Clicking on the 'Submit' button would invoke an HTTP POST request which would be sent to a URL of the following form:

    You may assume that <base-url> would be replaced by the base URL of your web application. In reality, this means that your target URL may be more like this:

    Once a response is received from the API endpoint (at 'form/submit'), the response text would then be displayed inside a div with an 'id' of 'form-result'.

    Remember, you don't have to use Trongate's form helper functions (like form_button() ) if you don't want to. With Trongate MX, you can choose to work with the syntax that you like best.

    So, what will it be? Form helpers or pure HTML? The choice is yours!


    Targeting Elements

    The mx-target attribute in Trongate MX is a powerful feature that allows you to specify which element in the DOM should be updated with the server response. This enables fine-grained control over where and how content is dynamically inserted or replaced, enhancing the interactivity and responsiveness of your web application without writing JavaScript.

    If no mx-target attribute is specified, Trongate MX will automatically update the triggering element itself with the server response.

    Basic Element Targeting:

    With the code below, the response from the server will be inserted into the <div> element with the id "result". You can use any valid CSS selector to target elements.

    Here's how to achieve this using Trongate's form_button() form helper:

    Alternatively, the same functionality can be built with pure HTML as shown below.

    Advanced Element Targeting

    The mx-target attribute supports several advanced targeting options to provide more flexibility:

    Option Description Example Syntax
    CSS Selector Any valid CSS selector that targets a specific element. mx-target="#myDiv"
    closest <selector> Finds the closest ancestor matching the selector. mx-target="closest li"
    find <selector> Finds the first descendant matching the selector. mx-target="find .target"
    none Makes the request without updating any content. mx-target="none"

    More Examples:

    Finding the First Descendant (find <selector>):

    In this example, when the form is submitted, the server response will be inserted into the .status-message div that exists within the form. The find selector locates the first descendant element matching the given selector, making it perfect for updating specific parts within a larger component.

    Using Trongate's form helper functions:

    Here's an alternative syntax, written in pure HTML:

    Finding the Closest Ancestor (closest <selector>):

    The closest selector finds and updates the nearest parent element that matches the given selector. This is particularly useful when you need to update a containing element from a control that's nested within it.

    Here's an example that uses Trongate's form_button() form helper:

    And here's how the same result can be achieved with pure HTML:

    Using Tag Selectors:

    You can target any HTML element using its tag name as a selector (e.g., 'body', 'main', 'footer'). The server response will replace the entire contents of the first matching element on the page.

    Using Trongate's form_button() form helper:

    If you'd rather work directly with HTML, here's the code:

    No Content Replacement (none):

    When mx-target="none" is specified, the server request will be made but no content will be updated on the page. This is useful when you need to trigger a server action without needing to update the UI, such as logging events or performing background tasks.

    Here's an example, using Trongate's form_button() form helper:

    Here's how the same result can be achieved with pure HTML:


    Identifying Trongate MX Requests

    When working with Trongate MX, it's often useful to know whether a request originated from Trongate MX or from another source. Trongate's PHP framework includes a function called from_trongate_mx() in its engine directory that helps identify these requests.

    Note: The from_trongate_mx() function resides in Trongate's engine directory and is part of the PHP framework. While Trongate MX automatically sets the required header, the detection happens on the server side using this PHP function.

    How It Works

    Trongate MX automatically adds a special header (Trongate-MX-Request: true) to all requests it makes. The from_trongate_mx() function checks for the presence of this header.

    Scenario Description Result
    Trongate MX Request Request made using mx-get, mx-post, etc. from_trongate_mx() returns true
    Regular HTTP Request Standard form submission, AJAX, etc. from_trongate_mx() returns false
    Page Load Direct URL visit or page refresh from_trongate_mx() returns false

    The code examples below use if (from_trongate_mx() === true) for explicit boolean checks. However, the simpler syntax if (from_trongate_mx()) will also work. Both approaches are valid, and you can choose the one that best suits your coding style or project requirements.

    Common Use Cases

    1. Differentiating Response Formats

    The code sample below demonstrates a method (i.e., a function within a class) that could serve as an API endpoint for an HTTP request. In the example, we're using from_trongate_mx() to determined if the inbound HTTP request was submitted using Trongate MX.

    2. Handling Form Submissions

    This next example demonstrates a method handles form submissions differently depending on the context of the request. Specifically, it uses from_trongate_mx() to determine if the form submission originated from a Trongate MX request or a traditional form submission.

    In the code example above, if the request is found to have originated from Trongate MX:

    If the request is found to have not originated from Trongate MX:

    In the example above, we haven't actually processed any form data! So, please do keep in mind the fact that some of these examples have been deliberately simplified. In a real-world application, you'd probably have a requirement to do something with submitted form data.

    3. API Response Formatting

    The final example shows how to adjust API responses based on the request type. If the request comes from Trongate MX, the method returns HTML for seamless frontend updates. For other requests, it outputs JSON, making the endpoint suitable for both Trongate MX usage as well as more traditional API use.

    • Use from_trongate_mx() when you need different response formats for dynamic updates versus direct visits
    • Consider using it for form submissions where you want different success behaviors
    • Leverage it to provide appropriate error responses based on the request source
    • Remember that the function is part of Trongate's PHP framework, not Trongate MX itself

    Summary

    Being able to identify Trongate MX requests enables you to create endpoints that can serve both dynamic updates and traditional page loads effectively. The from_trongate_mx() function provides a simple way to detect these requests and adjust your response accordingly, making it easier to build applications that work seamlessly with both Trongate MX and traditional HTTP requests.


    Swapping Content

    Swap Operations

    The mx-swap attribute determines how the response content is inserted into the target element, as specified by the mx-target attribute. If the mx-swap attribute is not provided, it defaults to innerHTML, which replaces the inner HTML of the target element.

    Available Swap Methods:

    Method Description Example Syntax
    innerHTML (default) Replaces the inner HTML of the target element with the response content. mx-swap="innerHTML"
    outerHTML Replaces the entire target element with the response content. mx-swap="outerHTML"
    textContent Replaces the text content of the target element with the response content. mx-swap="textContent"
    beforebegin Inserts the response content before the target element. mx-swap="beforebegin"
    afterbegin Inserts the response content as the first child of the target element. mx-swap="afterbegin"
    beforeend Inserts the response content as the last child of the target element. mx-swap="beforeend"
    afterend Inserts the response content after the target element. mx-swap="afterend"
    delete Removes the target element from the DOM. mx-swap="delete"
    value Sets the value property of form elements (inputs, textareas, selects) with the response content. mx-swap="value"
    none Does not insert any content into the DOM. Useful for out-of-band swaps where no direct DOM update is needed. mx-swap="none"

    Examples:

    Prepend Data:

    This code sample below uses the mx-swap="afterbegin" method to insert the response content as the first child of the target element.

    PLEASE NOTE: This example uses Trongate's form_button() function. There's no obligation to use Trongate's form helper functions and it's acceptable to work with pure HTML, if you wish.

    Here's how you can accomplish the same using pure HTML:

    Clicking the button adds a new task to the top of the task list. For example, if the response text from the server is <li>Schedule team meeting</li>, it will become the first item in the list.


    Replace Entire Element:

    Here, mx-swap="outerHTML" is used to replace the entire target element with the response content.

    Using Trongate's form_button() function:

    For those who prefer working with pure HTML, the equivalent solution is here:


    Insert Before Target:

    This example demonstrates how to insert content before the target element using mx-swap="beforebegin".

    Using Trongate's form_button() form helper:

    Alternatively, the same functionality can be achieved with pure HTML:


    Repopulate Form Field:

    In the following example, mx-swap="value" is used to update the value of a form textarea element. This approach can be particularly useful for applications such as code beautifiers, date-pickers or any other tool that modifies form input values.

    PLEASE NOTE: The code sample below utilises a variety of Trongate's form helper functions; however, their usage is entirely optional:

    If you prefer a more HTML-centered approach, you could use the following syntax:

    Building web applications with pure HTML forms could potentially expose your application to Cross-Site Request Forgery (CSRF) attacks. For more information, please refer to our documentation pertaining to CSRF Protection.


    Selecting Content

    The mx-select attribute in Trongate MX is a powerful feature that allows you to extract and use specific parts of a server response, rather than the entire response. This capability is particularly useful when dealing with large HTML documents where only a portion of the content is needed.

    Understanding mx-select

    When you use mx-select, you're telling Trongate MX to look inside the server's response and pick out only the parts you've specified. This is done using CSS selector syntax, allowing for precise targeting of elements within the response.

    When to Use mx-select

    The mx-select attribute is particularly useful in scenarios where:

    Example Scenario

    Let's consider a practical example to illustrate the use of mx-select:

    Imagine having an API that returns a complete HTML page but you only need one element from it (like a specific table). With mx-select you can fetch just that element and add it onto your current page. Here's how:

    In the example above, we're fetching a <table> element - from a target endpoint. The target HTML table (i.e., the table that we are fetching) has an 'id' of 'user-data'. Once the table has been fetched, it would then being inserted inside our <div> element that has an id of 'data-container'.

    Here's an alternative way to build the same solution, using Trongate's form_button() form helper function:

    Breaking Down the Example

    Benefits of Using mx-select

    This approach offers several advantages:

    Advanced Usage

    The mx-select attribute is not limited to simple selectors. You can use complex CSS selectors to pinpoint exactly what you need:

    The example above selects a <table> element that is the second child of a <div> with class 'data-section', which is inside the <main> element.

    Below is the solution, written with pure HTML:

    Note: The mx-select attribute uses CSS selector syntax. You can use any valid CSS selector to pinpoint the exact element you need from the response. This includes IDs, classes, attributes, and even pseudo-selectors.
    • Use specific and unique selectors to ensure you're getting exactly what you need.
    • Consider the structure of your server responses when designing your selectors.
    • Test your selectors thoroughly, especially when working with dynamic content.

    Out-of-Band Swaps

    Have you ever wanted to update several different parts of your webpage with a single request? That's exactly what Trongate MX's out-of-band swaps let you do, using the mx-select-oob attribute. Let's explore how it works.

    What Are Out-of-Band Swaps?

    Imagine you're redecorating a room. Your main focus might be replacing the sofa, but while you're at it, you might want to update the curtains and swap out some cushions too. That's what out-of-band swaps do for your webpage - they let you update multiple elements in one go, even if they're in different places on the page.

    Two Ways to Write Your Swaps

    1. The Simple Way: Using Lists

    This is like writing a shopping list. You simply write what you want to get from the server and where you want to put it, separated by colons:

    Each pair works like this:

    2. The Detailed Way: Using JSON

    This method gives you more control, letting you specify exactly how you want to insert your content:

    A Real-World Example

    Let's say you're building a dashboard that needs to update several areas at once. The code below shows how you could do this using Trongate's form_button() function:

    Here's how the same result can be achieved with pure HTML:

    Cleaner Syntax Using JSON

    Take another look at the code samples above. You'll surely have noticed that the code pertaining to mx-select-oob is cumbersome and slightly messy. The good news is, you can make your code much cleaner by combining Trongate's form_button() function with some JSON encoding.

    Here's how it's done:

    That's much neater, right?

    The trick is to use json_encode() - a PHP function that comes as part of the PHP language. You can learn more about the 'json_encode' function here.

    For those who prefer to write using pure HTML, we've got you covered! Here's your alternative syntax:

    Think of your selectors like addresses. The more specific they are, the more certainty you have that your content will end up exactly where you want it.

    Top Tips

    Summary

    Out-of-band swaps are your secret weapon for creating smooth, efficient page updates. Instead of making multiple requests or reloading the entire page, you can update exactly what you need, where you need it, all in one go. Whether you choose the simple list approach or the more detailed JSON method, you now have the power to create more dynamic and responsive web applications.


    Dynamic Browser Tabs

    With the mx-swap-title attribute, you can update your browser tab titles instantly as users navigate through your content - no page reloads required!

    Why Update Page Titles?

    Imagine you're building a movie review website. When visitors browse different films, you'd want the browser tab to show which film they're currently viewing. This helps users:

    How to Update Page Titles

    Using mx-swap-title is straightforward. Here's a simple example:

    For an HTML-only approach, here's the corresponding code:

    Understanding the Code

    Let's break down what's happening:

    1. When the button is clicked, it fetches content from films/view/123.
    2. The film details are loaded into the #film-details div.
    3. The page title automatically updates to match the page title from the target API endpoint.

    Important: Your server response needs to include a <title> tag. For example:

    Real-World Example

    Here's how you might use this in a product catalog:

    Now when customers browse different products, your page title will automatically update to show the current product name - perfect for when they have multiple items open in different tabs!

    Top Tips for Title Swapping

    • Keep Titles Descriptive: Include both the specific content (e.g., product name) and your site name
    • Be Consistent: Maintain a consistent title format across all your pages
    • Test Navigation: Ensure titles update correctly when users use browser back/forward buttons
    • Mind Your Length: Keep titles under 60 characters - they'll look better in browser tabs and history

    Summary

    Dynamic page titles might seem like a small detail, but they significantly improve the user experience of your web applications. With mx-swap-title, Trongate MX makes it easy to implement this professional touch. Just add the attribute to your elements, ensure your server returns the right title tags, and you're ready to go!


    After Swap Operations

    The mx-after-swap attribute in Trongate MX allows you to execute JavaScript functions immediately after content updates. It's a powerful feature that helps you create dynamic, interactive web applications.

    Usage

    Here's a simple example showing how to use the mx-after-swap attribute:

    The code above uses Trongate's form_button() function. If you'd rather work directly with HTML, here's the code:

    When the button is clicked, content is fetched from 'api/message' and placed into the message-area div. Once the content update is complete, a JavaScript function named showMessage() will be invoked. The JavaScript function - in this instance - produces a simple alert message to confirm the successful update.

    More Examples

    Smooth Scroll After Update

    Let's imagine you're viewing a page with lots of content, and you dynamically load new data into a specific section of the page. After the content updates, you may the page to scroll smoothly back to the top for better usability.

    Here's how we can achieve this with Trongate MX:

    The scrollToTop function is a JavaScript function that scrolls the page smoothly to the top when called.

    This example is particularly useful for long pages where new content is loaded by clicking a button that is further down the page. After the content update occurs, the page smoothly scrolls back to the top.

    If you do not wish to use Trongate's form_button() function, you could produce the same results with the following code:

    Complex Update with Multiple Operations

    You're not restricted to just performing just one task after elements have been swapped. The code below demonstrates how to invoke several JavaScript functions after a successful element swap:

    This more complex example demonstrates how to handle dashboard updates that require multiple initialization steps. After the dashboard content is loaded, the code sets up event listeners, initializes various widgets, and updates related content - all common requirements when working with dynamic dashboards.

    • Keep it Simple: After-swap functions should be focused and perform clear tasks
    • Use the Event Object: Access swap information through the customEvent parameter
    • Consider Timing: These functions run immediately after content updates
    • Ensure Availability: Keep functions in global scope for Trongate MX to access them

    Summary

    The mx-after-swap attribute provides a straightforward way to execute JavaScript after content updates. It accepts a single function name and passes a custom event object containing swap operation details. This enables you to create responsive applications where content updates and post-update processing work seamlessly together.


    Target Element Control

    The mx-target-loading attribute lets you control how target elements behave during HTTP requests. You can either temporarily hide elements or swap their content with loading messages while waiting for the server to respond.

    Usage

    Here's a simple example showing how to use the mx-target-loading attribute:

    In this example, when the button is clicked the content inside the result div will temporarily disappear while new data is being fetched. Once the request completes, the new content will appear.

    You can achieve the same result, using pure HTML, with the following code:

    Use the style of syntax that you like best!

    Two Ways to Handle Loading States

    1. Hiding Content (Cloaking)

    Here's how the same result can be achieved using pure HTML:

    Using cloak temporarily hides the target element while the request is in progress. This is perfect for hiding forms when an HTTP request has been invoked.

    2. Showing a Loading Message

    This approach replaces the target's content with a loading message during the request. Once the request completes, the new content replaces the loading message.

    Here's a pure HTML example that accomplishes the same goal:

    PHP is extremely fast! When testing this kind of functionality, it's advisable to use PHP's in-built sleep() function - on your API endpoints. Doing so, provides an opportunity to clearly see if your application is behaving as expected during HTTP requests.

    Here's an example of how you could use PHP's sleep() function to force an API endpoint to wait two seconds before responding to a request:

    Important Implementation Notes

    1. Hiding Placeholders

    Always hide placeholder elements using style="display: none":

    Correct:

    Incorrect:

    2. Placeholder Content Structure

    When using placeholders, remember that only the inner HTML is transferred:

    Correct:

    Incorrect:

    When using Trongate CSS, any content that is contained within an element with a class of 'blink' will alternately fade in and out with a smooth easing effect, creating a blinking animation that repeats infinitely. Here's an example of a paragraph that has a class of 'blink' applied:

    Understanding The CSS

    The above is achieved with the following code:

    The CSS class of 'text-center' aligns the text to the center of the containing element. The CSS class of 'blink' makes the text fade in and out infinitely.

    IMPORTANT NOTE: In HTML, it's perfectly acceptable to stack multiplate CSS class names on one element like so;

    Conclusion

    The mx-target-loading attribute in Trongate MX provides a means of controlling the target element during an HTTP request. During an HTTP request, the mx-target-loading attribute can:

    1. Swap in the inner contents of the target element.
    2. Hide the target element entirely.

    Since the attribute has a swapping capability, it has been added onto this chapter which has the title, 'Swapping Content'. However, it's worth noting that Trongate MX has a variety of other attributes that can be used to control application appearance during HTTP requests. More details regarding those other attributes can be found in this chapter and also in the Trongate MX Attribute Reference.


    Events And Responses

    Triggers in Trongate MX

    The mx-trigger attribute in Trongate MX allows you to specify events that trigger HTTP requests. This powerful feature enhances the interactivity and responsiveness of your web application by defining when and how requests should be initiated.

    Usage

    Set the mx-trigger attribute on an element to control the event that triggers the request. If not specified, Trongate MX uses default events based on the element type.

    Basic Example:

    In the following example, the HTTP GET request is triggered when the button is clicked.

    For those who prefer to work with pure HTML, here's an alternative way to write the code:

    In the example above, there is - strictly speaking - no need to declare an mx-trigger attribute with a value of 'click'. This is because button elements are automatically assigned click events as their default triggers by Trongate MX. In other words, even if we did not specify an mx-trigger value of 'click' on the button, it would still behave as if the mx-trigger had been set to 'click'.

    This means that the following code would have produced the same result as the two code snippets shown above:

    Default Trigger Events

    When the mx-trigger attribute is not provided, Trongate MX determines the natural trigger event based on the element type. The following table shows the default trigger events for different HTML elements:

    Element Type Default Trigger Event
    form submit
    button click
    input (type="submit") click
    input (other types) change
    textarea change
    select change
    other elements click

    Supported Events

    Trongate MX listens for various events and triggers the appropriate HTTP requests based on the mx-trigger attribute:

    Load Event

    The load event is a special case that triggers the request when the page is loaded:

    This will fetch data from the API as soon as the page loads.

    • Use specific events: Specify the exact event that should trigger the request to avoid unintended behavior.
    • Combine with other attributes: Use mx-trigger in conjunction with other Trongate MX attributes like mx-get, mx-post, and mx-target for more complex interactions.
    • Consider performance: Be mindful of the frequency of triggered events to avoid excessive server load and client-side performance issues.
    • Error handling: Implement appropriate error handling for failed requests to ensure a smooth user experience.

    Programmatic Activation

    The special value of 'activate' can be used to specify that an element should only respond to programmatic triggers (e.g., from mx-on-success or mx-on-error) rather than user events:

    Using mx-trigger="activate" serves a specific purpose. When you add this attribute to an element, it prevents that element from responding to any user events (like clicks or changes) while still allowing it to be triggered programmatically through mx-on-success or mx-on-error. Without this attribute, the element would respond to both user events AND programmatic triggers, which might not be what you want.

    Think of mx-trigger="activate" as a way of saying "this element should respond to programmatic triggers, never to default trigger events."

    In this example, the table won't respond to user clicks or other events, but will refresh when the button's POST request succeeds.

    When you add an mx-trigger attribute to an element, all default triggers that would otherwise be associated with the element are disabled. For example, if you add mx-trigger="load" to a button, it will no longer respond to clicks (which would normally be the default for buttons).

    Note that elements can still be triggered programmatically through mx-on-success or mx-on-error attributes on other elements, regardless of their mx-trigger value.

    For an HTML-only approach, here's the corresponding code:

    Documentation covering the mx-on-success attribute is available from here.

    Documentation covering the mx-on-error attribute is available from here.

    Summary

    By leveraging the mx-trigger attribute, you can create more dynamic and responsive web applications with Trongate MX, allowing for sophisticated event-driven interactions with minimal JavaScript code.


    On Trigger Operations

    The mx-on-trigger attribute in Trongate MX allows you to execute your own custom JavaScript functions immediately after a trigger event occurs, but before any HTTP request is made. This enables you to perform actions like showing messages, manipulating the page, or performing checks before a request begins.

    Basic Usage

    The mx-on-trigger attribute works alongside other Trongate MX attributes like mx-get or mx-post. It executes your specified JavaScript function when the trigger event (like a click) happens, but before any HTTP request is invoked by Trongate MX.


    Simple Example:

    In the following example, when the button is clicked, the user sees a "Hello" pop-up alert before the system fetches data from the target URL.

    Here's how the code looks when written entirely in HTML:

    As a reminder, there's no obligation to use Trongate's form helpers when working with Trongate MX.

    This means that you can use Trongate form helpers (like form_button() ) or, alternatively, you can work with pure HTML.

    Passing Event Information Into Functions

    Functions invoked by mx-on-trigger automatically receive event information related to the trigger. This allows for greater flexibility, such as dynamically interacting with the clicked element.

    Example Of Automatic Event Handling

    In this example, the JavaScript function buildCustomSpinner gets invoked the moment after the form button is clicked (and before a response has been received from any API endpoint!). The following JavaScript code could be used to test this basic functionality.

    Practical Example Using Event Information

    Here's a more practical implementation where the triggering button is disabled and a loading class is added:

    More Examples

    1. Scroll to Top Before Loading

    This example shows how to smoothly scroll the page back to the top before loading new content into a target element.

    Here's an alternative syntax for developers who prefer to work with pure HTML:


    2. Simple Confirmation Check

    This example demonstrates how to implement a confirmation dialog before proceeding with a checkout process, preventing the HTTP request if the user cancels.

    Here's how the code looks when written without using any of Trongate's form helper functions:


    Advanced Usage: Async Functions

    3. Async Inventory Check Example

    This example demonstrates how to use an async function to check inventory status before proceeding with a submission, preventing the request if the item is out of stock.

    Here's an alternative syntax for those who prefer to work with pure HTML:

    If you're not familiar with async/await, stick to regular functions like in the earlier examples - they'll work fine for most use cases!

    Summary

    The mx-on-trigger attribute provides a way to run custom JavaScript code before Trongate MX invokes HTTP requests. You can use it for simple tasks like showing messages or scrolling the page, or for more complex tasks like validation. The event object is automatically passed to your functions, giving you access to information about the triggering element. By throwing errors in your functions, you can prevent requests from proceeding when needed.


    Handling Successful Requests

    The mx-on-success attribute lets you trigger elements after an HTTP request has been made and a response code within the success range has been received. This makes it possible for one action (such as the submission of a form) to result in several different parts of a page being updated.

    The mx-on-success attribute (which happens to be the focus of this page) is designed for reinitialising elements, not for executing custom JavaScript!

    To execute your own custom JavaScript code after an HTTP request, use the mx-after-swap attribute. You can find the relevant documentation here.

    Syntax

    When working with mx-on-success, we should assign a CSS selector value to indicate which element should be updated (i.e., triggered) after a successful request.

    How It Works

    When Trongate MX completes an AJAX request successfully, here's what happens:

    1. Trongate MX checks the element (that invoked the HTTP request) for an mx-on-success attribute.
    2. If an mx-on-success attribute is found, the value that has been assigned to the attribute is read.
    3. Trongate MX identifies an element whose CSS selector matches the value of mx-on-success.
    4. Any HTTP requests tied to the target element are triggered, reinitialising it.

    This makes it easy to refresh multiple, dynamic sections of your application or set up chained actions.

    Throughout this documentation, you'll see phrases like:

    • "receives a response within the 'success' range"
    • "completes an AJAX request successfully"

    Whenever you see phrases like that, it's usually a reference to the HTTP response status code that has been received from an API endpoint.

    Success Range (2xx)

    HTTP response status codes within the range of 200-299 indicate that the request was successful.

    Common examples include:

    • 200 OK: Request was successful and data is returned.
    • 201 Created: A new resource has been created.
    • 204 No Content: Request was successful but no content is returned.

    Example

    In the following example, we have a form that submits a POST request to an API endpoint.

    When a response is received from the server that has an HTTP response status code within the success range, a <div> element with an "id" of "order-summary" is triggered.

    Since the targetted element has an mx-get attribute, a second HTTP request will immediately be made. Specifically, this will be a GET request to the target URL of 'api/get_order_summary'.

    Since the usage of Trongate's form helper functions is optional, here's an alternative syntax that uses pure HTML:

    Understanding The Code

    The example above demonstrates a common code pattern. It's therefore worth taking a few moments to understand how it works. Don't worry if the example above seems overwhelming at first. It'll become clearer with patience and a little practice!

    So, what's the point?

    To be clear, the goal we're trying to achieve - with this code - is as follows:

    We're trying to update multiple different parts of a page after an HTTP request - made by Trongate MX - has been successfully completed.


    Why does this matter?

    Having the ability to update multiple different parts of a page, without refreshing the entire page allows us to build extremely powerful applications. It's the kind of advanced functionality that we might expect to find on sophisticated admin panels that get used in business.


    Do we really need Trongate MX for this?

    Of course we don't! However, without Trongate MX you'd have to either:

    1. Writes lots of custom JavaScript code.
    2. Refresh the entire page every time an update happens.
    3. Use a JavaScript framework that might get rewritten tomorrow!

    Surely you'll agree, none of those three options are ideal - particularly if you're trying to build a modern application quickly and with massive degrees of stability.

    By the way, if you're still not sold on Trongate MX - just imagine a stock market trading website where you had to manually refresh the entire page every time a stock price changed. Such an application would be considered to be hopelessly old-fashioned and perhaps even useless!

    This is why Trongate MX is a really important tool for the Trongate ecosystem. It lets you build modern web applications quickly and easily.

    How does the code example above work?

    The best way to understand the code example, shown above, is to start from the bottom and work our way up. So, let's consider this element:

    The element above is an empty div with an id of 'order-summary'. If you look closely, you'll see that the div contains an attribute of mx-trigger with a value of 'load'. From this, we know that the element is going to be triggered the moment the page has finished loading.

    Have a closer look and you'll notice that the '#order-summary' div also has an mx-get attribute with a value of 'api/get_order_summary'.

    From this, we now know that as soon as the page loads, a GET request will be made and (if all goes well!) order details will be added inside the '#order-summary' element.

    If the behaviour of the #order-summary element is confusing, you are encouraged to refer to our section on Triggers In Trongate MX.

    Moving up, we see another div element:

    This empty div with an id of 'order-confirmation' will be used to display the response from our form submission. Notice that it doesn't have any Trongate MX attributes of its own - it's simply a target for our server response.

    You may wonder,

    "What is the server response going to be?"

    Good question!

    Well... it could be something as simple as some text containing the words,

    The order was successfully updated.

    It's no big deal and perhaps not as complicated as you may have assumed!

    The Form Structure

    Now let's examine the form, in our example:

    This form has three important Trongate MX attributes:

    1. mx-post: When the form is submitted, it will make a POST request to 'api/submit_order'.
    2. mx-target: The response from this POST request will be displayed in the '#order-confirmation' div.
    3. mx-on-success: If the POST request is successful (returns a 2xx status code), the '#order-summary' div will be triggered.

    The Complete Flow

    Now that we understand each piece, here's how it all works together:

    1. When the page first loads, the '#order-summary' div is automatically triggered (due to mx-trigger="load"), making a GET request to fetch and display the initial order summary.
    2. When a user clicks the "Place Order" button, the form submits a POST request to 'api/submit_order'.
    3. The response from this POST request is displayed in the '#order-confirmation' div.
    4. If the POST request was successful, the '#order-summary' div is triggered again.
    5. This trigger causes another GET request to 'api/get_order_summary', refreshing the order summary with the latest data.

    Why This Pattern Is Useful

    This pattern is particularly helpful when you need to update multiple elements after a successful form submission. The initial form submission can return a success message, while the triggered element can fetch and display updated data without requiring a full page reload.

    If you look closely at the code example above, you might notice a hash ('#') symbol being passed into the form_open() function as an argument. This might seem unusual since the first argument is typically expected to be the target URL where the form will post.

    The hash symbol is used here because the mx-post attribute overrides any 'action' or 'method' properties that would normally be found in a standard form opening tag.

    Working With Pure HTML

    As a reminder, you're not obligated to use Trongate's form helper functions when working with Trongate MX. If you prefer to work with pure HTML, the following code could be used:

    Things to Keep in Mind


    Triggering Multiple Elements

    The previous page covered how to update/trigger one element after a successful HTTP request has been made. This was achieved by using the mx-on-success attribute.

    With mx-on-success it's also possible to trigger multiple elements by separating their selectors with spaces. Here's an example:

    For those who prefer to work with pure HTML, here's an alternative syntax that produces the same result:

    You may have noticed that in the examples shown, the elements to be triggered have all been given the attribute, mx-trigger="activate".

    The reason for this is to prevent default trigger behaviour from activating the target elements. By adding mx-trigger="activate", we are effectively saying, "This element should only be activated when it is programmatically triggered by another element."

    If we did not include mx-trigger="activate" on the elements, they could potentially be triggered by clicks, which is - of course - not desirable.

    Understanding The Code

    In this example, when the form submission is successful:

    1. The order confirmation message appears in the target div.
    2. The order summary gets refreshed.
    3. The customer's balance is updated.
    4. The recent orders list is refreshed.

    All of these updates happen simultaneously, making it perfect for situations where you need to refresh multiple pieces of information after a successful operation.

    Conclusion

    Fully appreciating the power of mx-on-success requires a touch of imagination.

    Picture an exceptionally sophisticated admin panel for a powerful web application.

    Now, imagine a demanding client requesting a feature that updates multiple sections of a page entirely independently of one another.

    For instance, one part of the page could display a live stock market chart, another part of the page could display real-time enquiries, a third part of the page might track the price of Bitcoin, and yet another part of the page could display internal messages sent by logged-in users.

    Building such a dynamic application without Trongate MX would be an immense challenge! Even for a JavaScript guru, it would involve wrangling with observables, subscriptions, and multiple layers of complex, esoteric code.

    Fortunately, Trongate MX simplifies this process. Now, you can effortlessly declare and activate the components you need, making even the most demanding applications easy to build.

    This is why the mx-on-success attribute is arguably one of the most important features in Trongate MX.


    Handling Request Errors

    The mx-on-error attribute in Trongate MX lets you specify which elements should update or reinitialise when an AJAX request fails. It offers a means of handling errors gracefully and keeping your users informed when things don't go quite as planned.

    The mx-on-error attribute (which happens to be the focus of this page) is designed for triggering elements, not for executing custom JavaScript!

    To execute your own custom JavaScript code after an HTTP request, use the mx-after-swap attribute. You can find the relevant documentation here.

    Syntax

    Use a CSS selector as the value of mx-on-error. This tells Trongate MX which element should be updated or reinitialised after a request fails.

    How It Works

    When Trongate MX encounters a failed AJAX request, here's what happens:

    1. It checks if the triggering element has an mx-on-error attribute.
    2. If it does, the framework finds the target element using your CSS selector.
    3. Page load events tied to the target element are triggered, reinitialising it.

    This makes it easy to display error messages or trigger fallback options when things go wrong.

    Example

    The code sample below demonstrates a form that posts data to an API endpoint. When something goes wrong, an error message is fetched from the url api/get_error_details and the message is displayed within a <div> that has an id of 'error-message'.

    Usually, if a form is submitted - and something goes wrong - it'll be appropriate to display form validation errors. That's not what's happening here!

    In our example, the assumption is that we have a more sophistated error message to display when things go wrong. For example, let's imagine a user is enrolling to join a course. Let's further assume that - at the last moment - somebody else has enrolled and there are no more spaces left!

    As complicated as it may seem, this is precisely the kind of situation where a more sophisticated error message would be appropriate (as opposed to just a form validation error).

    In the error message, we might explain that there are no more spaces left and we may wish to give the user an opportunity to join a waiting list so that they can be kept informed of future courses or even cancellations.

    For information on how to render form validation errors with Trongate MX, click here.

    The code sample above uses pure HTML. Below is a more secure solution that uses Trongate's form helper functions:

    What's Happening?

    1. If the form submission fails, the mx-on-error="#error-message" attribute kicks in.
    2. This triggers the #error-message element.
    3. Since #error-message has mx-get and mx-trigger="activate", it fetches and displays the error details.

    You might notice we're using a hash ('#') symbol in the form_open() function. This is because the mx-post attribute takes care of the form's destination and method.

    Consider using in combination with mx-trigger="activate". Without this attribute, the element may respond to both user events AND programmatic triggers, which might not be what you want. For more information on this topic, refer to our documentation on Triggers in Trongate MX.

    Things to Keep in Mind


    Redirect on Success

    In certain situations, you may wish to redirect users to a different URL after receiving a success status code (200-299) from an API endpoint. The mx-redirect-on-success attribute is specifically designed for this purpose.

    Usage

    To use mx-redirect-on-success, add it to any element that triggers an HTTP request (such as forms or buttons) and set its value to "true". The redirect URL should be returned as plain text in the response body from the server.

    The redirect happens immediately upon receiving a successful response from the target API endpoint. Because of this, mx-redirect-on-success should not be combined with animation attributes or other success handlers since they won't have time to execute.

    Basic Example:

    The code sample below would render a form button that - when clicked - invokes an HTTP post request. If the server responds with an HTTP status code in the 'success' range (for example, 200), the user will be immediately redirected to the URL that is specified in the response body.

    Here's an alternative syntax for developers who prefer to work with pure HTML:

    The code sample above assumes that a $trongate_token value has been passed into the view file from a controller file.

    Server-Side Implementation

    For the redirect to work correctly, your API endpoint must:

    1. Return a success status code (200-299).
    2. Return only the redirect URL as plain text in the response body.

    Example Controller Code:

    Common Use Cases

    1. Login Form

    2. Multi-Step Process

    The following considerations should be taken into account:

    • The response body must contain only the URL - any additional content will prevent the redirect.
    • The redirect occurs immediately upon receiving a successful response.
    • Cannot be used with animation attributes since the redirect is immediate.

    URL Handling

    The redirect URL can be specified in several ways:

    Note: For relative URLs to work correctly, your page should include a <base> tag in the head section. For example:

    Without a base tag, relative URLs might not resolve to the correct location.

    For comprehensive navigation flows, consider using both mx-redirect-on-success and mx-redirect-on-error together to handle both successful and failed scenarios.

    Summary

    The mx-redirect-on-success attribute is a handy way to redirect users after a successful form submission. However, there are a wide variety of other scenarios where it could be useful.

    By simply specifying a URL, you can guide users seamlessly to the next step in their journey - no extra JavaScript required! Whether you're using pure HTML or Trongate's helper functions, this attribute makes building smooth, user-friendly experiences a breeze.


    Redirect on Error

    Sometimes, you may wish to redirect users to a different URL when an API endpoint returns an error status code (400-599). The mx-redirect-on-error attribute makes this process straightforward.

    Usage

    Simply add mx-redirect-on-error to any element that triggers an HTTP request (such as forms or buttons) and set its value to "true". The redirect URL should be returned as plain text in the response body from your server.

    The redirect happens immediately upon receiving an error response from the target API endpoint. Because of this, mx-redirect-on-error should not be combined with animation attributes or other error handlers since they won't have time to execute.

    Basic Example:

    In the example below, clicking a form button invokes an HTTP POST request. If the server responds with an HTTP response code that is in the success range, the element with an id of 'result' will be updated. However, if the server responds with an HTTP response code in the error range, the user will be redirected to the URL that is specified in the response body.

    Here's an alternative syntax, for users who prefer to work with pure HTML:

    The code sample above assumes that a $trongate_token value has been passed into the view file from a controller file.

    Server-Side Implementation

    For the error redirect to work correctly, your API endpoint must:

    1. Return an error status code (400-599).
    2. Return only the redirect URL as plain text in the response body.

    Example Controller Code:

    Common Use Cases

    1. Login Form

    2. Protected Resource Access

    A few friendly reminders:

    • Make sure your response body contains only the URL - any additional content will prevent the redirect from working properly.
    • The redirect happens straight away when an error response is received.
    • You can't use this with error animation attributes since the redirect happens immediately.
    • For handling successful scenarios, consider using mx-redirect-on-success.

    URL Handling

    You can specify the redirect URL in several ways:

    Tip: For relative URLs to work properly, make sure your page includes a <base> tag in the head section. For example:

    Without a base tag, relative URLs might not resolve to the correct location.

    For seamless navigation flows, consider using both mx-redirect-on-error and mx-redirect-on-success together to handle both successful and failed scenarios.

    Summary

    The mx-redirect-on-error attribute provides a simple way to handle error scenarios in your web applications. It is especially useful for managing authentication failures, missing resources, or any situation where you need to gracefully redirect users to a different page when things don't go as planned.

    Best of all, no extra JavaScript is required — simply return a URL from your API endpoint, and you're good to go! Whether you're building a complex authentication system or a simple form handler, this attribute helps create smooth, user-friendly experiences with minimal effort.


    Ui Enhancements

    Loading Indicators

    Trongate MX makes it incredibly easy to add loading indicators to your web applications. These indicators give users clear feedback that something is happening behind the scenes, improving your application's professionalism and user experience.

    Quick Demonstration

    Click the button below to see a loading indicator in action:

    What Are Loading Indicators?

    Loading indicators are temporary visual cues displayed while your application processes requests or fetches data. Trongate MX makes implementing these indicators simple and intuitive.

    Getting Started

    1. Add a Spinner Element

    Trongate comes with a built-in spinner. To create one, add a <div> element with the class spinner. For example:

    To make the spinner function as a loading indicator, add the mx-indicator class:

    2. Use the mx-indicator Attribute

    Assign the mx-indicator attribute to the button (or any element) that triggers the HTTP request. The attribute value should match the CSS selector for your spinner element:

    Here's a complete example, using Trongate's form_button() function:

    For an HTML-only approach, here's the corresponding code:

    During development, use PHP's sleep() function to introduce a delay in your API responses. This gives you time to see how your indicators work:

    Note: The spinner class is part of the Trongate CSS library. It works straight out of the box without additional styles or JavaScript.

    Custom Loading Indicators

    You're not limited to the default spinner. You can create custom indicators using any HTML element:

    Here's an example of using a custom loading indicator in a form:

    For an HTML-only approach, here's an alternative syntax:

    The class blink in Trongate CSS creates a smooth, fading animation that makes the text blink.

    Advanced Usage: Multiple Indicators

    Need different indicators for different areas of your page? No problem! Assign unique mx-indicator attributes to each button:

    Here's how the solution looks when written entirely in HTML:

    Summary

    Loading indicators are an essential part of any modern web application. With Trongate MX, implementing them is simple, intuitive, and requires no JavaScript. Whether you use the built-in spinner or create custom indicators, you can deliver a polished and professional experience to your users.


    Element Removal

    Trongate MX makes it super easy to remove elements from your webpage with its mx-remove attribute. You won't need to write a single line of JavaScript - it just works!

    Demonstration

    Try clicking on the 'Remove' buttons and notice how the items are immediately removed from the page.

    • Bread
    • Milk
    • Eggs

    The mx-remove attribute only removes elements from the current page - it doesn't delete anything from your database or make any HTTP requests.

    How Does It Work?

    The mx-remove attribute can work in two specific ways:

    1. Remove Immediate Parent Element

    When you set mx-remove="true", it will remove the clicked element's immediate parent.

    In this example, clicking the button removes the surrounding span element, since it's the button's immediate parent.

    2. Remove Specific Ancestor Using Selectors

    When you provide a CSS selector value to mx-remove, it will remove the closest ancestor that matches that selector.

    Here, clicking the button removes the entire notification div since it matches the .notification selector.

    Basic Examples

    Simple List Item Removal

    The buttons above remove the closest li ancestor when clicked, deleting entire list items.

    Alert Dismissal

    Clicking the × button removes the entire alert because it targets the closest element with the 'alert' class.

    What's The Point?

    You might wonder: "If mx-remove doesn't make HTTP requests or affect my database, why would I use it?"

    Good question! The beauty of mx-remove lies in its simplicity and flexibility. While it only modifies the page display on its own, it becomes incredibly powerful when combined with other MX attributes like mx-post. This allows you to remove elements visually while handling server-side operations behind the scenes.

    Practical Use Case: Shopping Cart with Error Handling

    Here's how you can create a robust shopping cart system where items are removed visually and server communication is handled seamlessly.

    Example Code: Cart Item Removal

    Below is the same solution, expressed without using Trongate's form_button() function:

    Even though no data is being explicitly posted in the deletion request, there's a very important reason we're using mx-post here. According to REST principles, DELETE operations should be made using either POST or DELETE HTTP methods, not GET.

    This is because:

    • GET requests should be idempotent (they shouldn't change server state).
    • GET requests are often cached by browsers and can be pre-fetched.
    • GET requests can be accidentally triggered (e.g., by search engine crawlers).

    While mx-delete would also be valid here (and arguably more semantically correct), mx-post is often chosen because:

    • Some legacy systems might not properly handle DELETE requests.
    • Some firewalls might block DELETE methods.
    • Older browsers might not fully support DELETE methods.

    So while we could use either mx-post or mx-delete, using mx-post for deletion operations is a common and safe choice. The key point is that we're avoiding mx-get for operations that modify server data.

    How It Works

    While using mx-remove with mx-post can provide immediate visual feedback, a more conventional approach is to refresh the affected content after server confirmation. Here's an example:

    This pattern ensures UI updates only occur after successful server operations, maintaining data consistency and providing clear visual feedback through spinners. It's particularly suitable for data-critical operations like deletions in admin interfaces.

    Backend Example: Handling Item Removal

    Here's an example of the kind of code that could potentially be used for the item removal API endpoint. This is just one of many possible methodologies.

    • Use mx-remove="true" to remove the immediate parent element.
    • Use mx-remove="<CSS Selector>" to target and remove a specific ancestor.
    • Combine mx-remove with attributes like mx-post or mx-target to handle backend operations while updating the UI.
    • Remember:
      1. Class selectors require a dot (e.g., .notification).
      2. ID selectors require a hash symbol (e.g., #message).
    • Test error scenarios to ensure robust error handling.

    Technical Details

    When a click event occurs on an element with the mx-remove attribute, Trongate MX performs the following steps:

    1. Check Attribute Value

      The system checks the attribute value and processes it in one of two ways:

      • For mx-remove="true": Identifies the immediate parent using parentElement
      • For mx-remove="selector": Finds the closest matching ancestor using closest(selector)
    2. Update DOM

      The matched element is immediately removed from the DOM, with all changes applied instantly without additional JavaScript.

    • Client-Side Only: mx-remove doesn't send HTTP requests or modify your database. Combine it with mx-post for server-side operations.
    • Immediate Changes: Removal is instant and cannot be undone without refreshing the page.
    • Value Requirements: The mx-remove attribute must be set to either true or a valid CSS selector.
    • Versatility: Works with any clickable element (e.g., buttons, links).

    Summary

    The mx-remove attribute lets your remove UI elements easily. Whether you're removing a notification, dismissing an alert, or updating a shopping cart, mx-remove provides a simple yet powerful solution. When paired with other MX attributes, it becomes a complete tool for managing client-side interactions with minimal effort.


    Success Animations

    The mx-animate-success attribute triggers a checkmark animation when an API endpoint returns an HTTP success status code that's in the 'success' range (i.e., 200 - 299).

    Demonstration

    Click the button below to see an example of a 'success' animation:

    How It Works

    The mx-animate-success attribute attaches a success animation to elements initiating HTTP requests, such as buttons or forms. When the request succeeds, users see a checkmark animation, giving immediate feedback that the operation was successful.

    Example

    Here's how you can implement mx-animate-success:

    For an HTML-only approach, here's the corresponding code:

    Clicking the submit button sends a POST request to endpoint/submit. If the request succeeds (HTTP status 200-299), the checkmark animation is displayed over the form.

    Important: The mx-animate-success attribute must be added to the element initiating the HTTP request. Adding it to unrelated elements will not trigger the animation.

    Syntax

    The syntax for mx-animate-success is simple:

    Setting the attribute value to "true" activates the animation.

    Placement Rules

    The placement of the success animation depends on the context:

    Tip: Use mx-animate-success alongside mx-post for a seamless combination of server-side operations and client-side feedback.

    Advanced Example

    Here's a practical example combining mx-animate-success with other MX attributes:

    If you'd rather work with pure HTML, here's the code:

    In this example:

    1. The form submits data to submit_data via AJAX.
    2. Upon success, a checkmark animation appears within the form.
    3. After a second or two, the animation disappears.
    4. The response text, from the API, is then inserted inside the #response element.

    The 'autocomplete' attribute, when set to 'off' on a form's opening tag, prevents the browser from suggesting or automatically filling in previously entered values for any of the form fields. This is especially useful for forms that collect sensitive or unique information, as it ensures the browser won't try to pre-fill fields with stored data.

    Things To Keep In Mind

    Summary

    The mx-animate-success attribute provides immediate feedback for successful operations. It can be used with buttons, forms, or modals, and works alongside other Trongate MX attributes to create interactive experiences.

    Best Practices:

    • Add mx-animate-success="true" to elements initiating HTTP requests.
    • Combine with mx-post for AJAX-driven forms or buttons.

    Error Animations

    The mx-animate-error attribute triggers an error animation when an API endpoint returns an HTTP status code outside the 'success' range (i.e., not between 200 and 299).

    Demonstration

    Click the button below to see an example of an 'error' animation:

    How It Works

    The mx-animate-error attribute attaches an error animation to elements initiating HTTP requests, such as buttons or forms. When the request fails, users see an error animation, giving immediate feedback that the operation was unsuccessful.

    Example

    Here's how you can implement mx-animate-error:

    For an HTML-only approach, here's the corresponding code:

    Here's a PHP method that can be used to return an 'error' response:

    Clicking the submit button sends a POST request to endpoint/submit_simulate_error. If the request fails (HTTP status outside 200-299), the error animation is displayed over the form.

    Important: The mx-animate-error attribute must be added to the element initiating the HTTP request. Adding it to unrelated elements will not trigger the animation.

    Syntax

    The syntax for mx-animate-error is simple:

    Setting the attribute value to "true" activates the animation.

    Placement Rules

    The placement of the error animation depends on the context:

    Tip: Use mx-animate-error alongside mx-post for a seamless combination of server-side operations and client-side feedback.

    Advanced Example

    Here's a practical example combining mx-animate-error with other MX attributes:

    If you'd rather work directly with HTML, here's the code:

    Building web applications using pure HTML forms introduces potential security risks. For more details, refer to our documentation pertaining to CSRF Protection

    If in doubt, use Trongate's form helper functions whenever possible.

    In this example:

    1. The form submits data to submit_data.
    2. Upon error, an error animation appears within the form.
    3. After a second or two, the animation disappears.
    4. The original form then reappears.

    The 'autocomplete' attribute, when set to 'off' on a form's opening tag, prevents the browser from suggesting or automatically filling in previously entered values for any of the form fields. This is especially useful for forms that collect sensitive or unique information, as it ensures the browser won't try to pre-fill fields with stored data.

    Things To Keep In Mind

    Best Practices:

    • Add mx-animate-error="true" to elements initiating HTTP requests.
    • Combine with mx-post for AJAX-driven forms or buttons.

    Summary

    The mx-animate-error attribute provides immediate feedback for failed operations. It can be used with buttons, forms, or modals, and works alongside other Trongate MX attributes to create interactive experiences.


    Building Dynamic Modals

    The mx-build-modal attribute in Trongate MX allows you to dynamically create and populate modal dialogs with content fetched via AJAX. This feature lets you craft interactive, on-demand modal experiences without requiring pre-defined modal structures in your HTML.

    Demonstration

    Click on the 'Create Modal' button to see a demonstration of dynamical modal creation. The modal that is created will fetch the headline from the homepage of this website and insert the headline inside the modal body.

    Syntax

    The modalOptions can either be a string (representing the modal ID) or a JSON object for detailed configuration.

    Basic Usage

    Here's an example of using mx-build-modal with a string:

    Here's a pure HTML representation of the solution:

    Key details about this example:

    Advanced Usage

    For more precise control, use a JSON object to configure the modal:

    For an HTML-only approach, here's the corresponding code:

    Key details about this advanced example:

    Modal Footers

    Trongate MX gives you the ability to easily add beautiful modal footers onto dynamically generated modals. These footers can contain anything you like. However, a typical use case would be to have modal footers containing form submit buttons and, if required, 'Cancel' buttons.

    Click the 'View Example' button below to see an example of a modal with a footer.

    In order to have footer elements being added to dynamic modals, add a property of 'modalFooter' within the mx-build-modal attribute. The 'modalFooter' property should be assigned with a value that represents the HTML code that is to be rendered within the modal footer. For example:

    In the example shown above, two buttons have been added inside the footer element.

    • We have a 'Cancel' button and, when clicked, it will close the modal. This closing effect is achieved by adding: onclick="closeModal()" within the cancel button element.
    • The form 'Submit' button is technically not inside the form opening and closing tags within the rendered modal body. However, in the example, the submit button has been associated with the form by giving the button an attribute of "form" with a value equal to the 'id' of the target form element. In the example, the rendered form has an ID of 'sample-form'. So, the button is associated with the form by adding, form="sample-form" to the submit button.

    And Finally...

    Don't forget to add backslashes when adding double quotes within the value that is being assigned to modalFooter!

    Modal Options

    When using a JSON object, the following options are available:

    Important Note About Modal Headers

    When using mx-build-modal with a modalHeading property, Trongate MX automatically adds a close icon (×) to the top-right corner of your modal window. The system detects whether Font Awesome is available in your project. If it is, Trongate MX will use the fa-times icon. If Font Awesome isn't available, the system automatically generates a similar-looking SVG close icon instead.

    Controlling the Close Icon

    If you don't want the close icon to appear automatically when using a modalHeading, you can prevent this by setting the 'renderCloseIcon' property to 'false' in your modal options. This will create a modal header without any close button.

    Additional Features

    Extend modal functionality with these related attributes:

    For example:

    Alternatively, the same functionality can be achieved with pure HTML:

    Additional Notes

    By combining mx-build-modal with other Trongate MX attributes, you can effortlessly create dynamic and engaging modal experiences.


    Automatically Closing Modals

    Trongate MX has two attributes for closing dynamic modals: mx-close-on-success and mx-close-on-error. These attributes work in conjunction with dynamically created modals to provide enhanced modal control.

    Demonstration

    Click on the 'Create Modal' button to see a demonstration of automatic modal closing.

    Basic Modal Creation and Closure

    Let's start by creating a module that we can use for testing purposes.

    We'll call the module 'test' and the URL for displaying your basic 'Create Modal' button will be:

    The <base-url> string is a placeholder for your website's base URL.

    The controller file for your 'test' module should be named as 'Test.php'. In addition, the name of the method that will be used for rendering your test page will be 'demo1'. Here's the starter code for the 'Test.php' controller file:

    And here's the corresponding view file (demo1.php):

    Here's a pure HTML example that accomplishes the same goal:

    Setting Up the Modal Content Endpoint

    Now, let's create an endpoint that serves the modal content. This endpoint should return the HTML for your modal body. For this example, let's create a method named 'simple_modal_content'. Below is the code for this method and please do add this to your 'Test.php' controller file:

    Here's the corresponding view file content (simple_modal_content.php):

    If you'd rather not using Trongate's form helper functions, here's an alternative syntax that could be used:

    Building applications with pure HTML forms can create potential security risks. See our CSRF Protection documentation for details.

    There are no form fields in the code above since the goal is to produce the most basic example possible. After the 'Submit' button is pressed, the goal is to return a 'success' response from the API, regardless of what has been posted to the endpoint.

    Handling Form Submission

    The endpoint that handles the form submission is going to be really simple. It will return an HTTP response status code of 200, indicating form submission success.

    Our endpoint will be served via a method named as 'simulate_form_success'.

    Complete Controller File Code

    If you've been following along, your controller file - for this first demonstration - should be as follows:

    Adding Visual Feedback

    For a better user experience, we can add animations to provide visual feedback. This can be achieved by adding the mx-animate-success attribute to the form and giving it a value of 'true':

    For an alternative HTML-centered approach, here's the corresponding code:

    This page covers how to automatically close modal windows after an HTTP request has been executed using Trongate MX.

    Whilst this feature may be useful (and we hope it is!), don't forget that you can make manual closing of modal elements possible by usage of the JavaScript function closeModal().

    Below is an example of a simple button that - when clicked - will close any modal windows that are currently visible:

    Handling Error Responses

    While the previous example demonstrated closing modals on successful API responses, Trongate MX also supports automatic modal closure when receiving error responses (HTTP status codes outside 200-299).

    To implement this, modify two key attributes in your form:

    Here's an alternative syntax for developers who prefer to work with pure HTML:

    For this to work, your API endpoint should return an appropriate error status code. For example:

    The key changes from the success example are the introduction of; mx-close-on-error="true" (which triggers modal closure when receiving error responses) and mx-animate-error="true" (which displays a red cross animation before the modal closes).

    When the form submission results in an error response, Trongate MX will draw a red cross animation before closing the modal.

    Summary

    Trongate MX provides two specialized 'mx' attributes for automatic closing of modal elements:

    These can be enhanced with animation attributes that render 'success' or 'error' animations immediately before modal closure:

    These attributes, alongside other Trongate MX features, can be combined to create highly responsive, interactive user interfaces while minimizing JavaScript dependencies.

    Don't forget, you can also add onclick="closeModal()" to elements, like buttons, to have modal windows close with user interaction such as clicks.


    YouTube Tutorial

    Here's a YouTube tutorial that brings together many of the parts discussed in this chapter.

    In this video tutorial you'll learn how to create and use modal animations with Trongate MX, including:

    YouTube tutorial

    Data Management

    Posting Additional Parameters

    The mx-vals attribute in Trongate MX allows you to attach additional values to your HTTP requests as if they were submitted as part of an ordinary HTML form.

    Syntax Options

    The mx-vals attribute requires a JSON object where each key-value pair represents a form field and its value. Here are the different ways to use this attribute:

    1. Direct JSON String

    Using Trongate's form helper functions:

    Pure HTML equivalent:

    2. Using PHP's json_encode()

    Using Trongate's form helper functions:

    Pure HTML equivalent:

    3. Using Predefined Arrays (Recommended)

    Using Trongate's form helper functions:

    Pure HTML equivalent:

    Usage with Forms

    The mx-vals attribute is particularly powerful when combined with form submissions. Here's a complete example:

    Using Trongate's form helper functions:

    Pure HTML equivalent:

    When this form is submitted, it will send:

    Server-Side Handling

    Here's how to handle the submitted data in your PHP endpoint:

    Technical Details

    1. Use json_encode()
      • Prefer json_encode() over manual JSON string construction.
      • Helps prevent syntax errors and ensures proper escaping.
    2. Organize Values
      • Define mx-vals arrays separately for better code organization.
      • Makes it easier to modify values dynamically.
    3. Value Types
      • Numbers don't need quotes: "age": 30.
      • Booleans are supported: "is_active": true.
      • Strings must use double quotes: "name": "John".
    4. Security
      • Always validate mx-vals data on the server side.
      • Don't trust client-side values for critical operations.
      • Use appropriate data types and validation rules.

    Common Pitfalls to Avoid

    Error Handling

    If the JSON in mx-vals is invalid:

    Summary

    The mx-vals attribute provides a powerful way to include additional data with your HTTP requests in Trongate MX. Whether you're adding hidden parameters to a button click or combining additional data with form submissions, mx-vals offers flexibility and convenience. By using PHP's json_encode() with predefined arrays, you can maintain clean, organized code while ensuring all your required data is properly transmitted to your server endpoints.


    Attaching DOM Values To Requests

    The mx-dom-vals attribute in Trongate MX enables you to dynamically attach values from DOM elements to your HTTP requests. This powerful feature allows you to capture and transmit information from specific elements on your page, such as text content or input values.

    Syntax

    The mx-dom-vals attribute requires a JSON object where each key represents a parameter name and the value is an object containing two properties:

    Basic Example

    Using Trongate's form helper functions:

    Pure HTML equivalent:

    When clicked, this button will:

    Real-World Examples

    Example 1: Capturing Paragraph Text

    Using Trongate's form helper functions:

    Pure HTML equivalent:

    Example 2: Using json_encode with PHP Arrays

    Using Trongate's form helper functions:

    Pure HTML equivalent:

    Example 3: Capturing Multiple Elements

    Using Trongate's form helper functions:

    Pure HTML equivalent:

    Available Properties

    You can use any of these properties in your mx-dom-vals:

    Server-Side Handling

    The captured values are accessible in your controller using the post() function:

    1. Use Specific Selectors
      • Prefer IDs and unique class names.
      • Avoid relying on element position or order.
    2. Choose Appropriate Properties
      • Use value for form inputs.
      • Use innerText for capturing text content.
      • Use innerHTML when HTML markup is needed.
    3. Validation
      • Always validate captured values server-side.
      • Don't trust DOM values for critical operations.
      • Apply appropriate sanitization for HTML content.

    Common Pitfalls

    Summary

    The mx-dom-vals attribute provides a powerful way to capture and transmit DOM values with your HTTP requests. By using specific selectors and appropriate properties, you can easily include dynamic page content in your form submissions. Remember to use json_encode() when working with complex values and always validate the captured data server-side.


    Form Handling

    Form Handling Overview

    Building modern web applications requires forms that are both powerful and user-friendly. Trongate MX transforms traditional form handling into a seamless experience, eliminating page reloads while maintaining the robust security you expect from the Trongate PHP framework.

    Understanding the Evolution

    Traditional form handling follows a predictable pattern: users fill out forms, submit data through POST requests, and servers respond with either validation errors or success redirects. While reliable, this approach often creates a jarring experience as pages reload and users wait for responses.

    Trongate MX retains this trusted foundation while adding powerful dynamic capabilities:

    The Power of MX Attributes

    At the heart of Trongate MX's form handling are special mx- attributes. These declarative HTML attributes unlock dynamic functionality without requiring JavaScript knowledge. For example:

    This simple markup creates a form that:

    The view file code (displayed above) renders the following HTML:

    The mx-post attribute ensures the form's behaviour is both dynamic and intuitive.

    About Form Opening Tags

    In Trongate MX, if mx-post is used alongside action and method properties (within a form opening tag), the mx-post attribute takes precedence.

    To learn more about the mx-post attribute, click here.

    An Enhancement, Not a Replacement

    Trongate MX enhances rather than replaces traditional form handling. All security features from the Trongate PHP framework remain fully functional. All of Trongate's helper functions continue to work, the validation class operates seamlessly, server-side validation remains robust, CSRF protection is automatic, and you can freely mix traditional and enhanced form handling approaches within the same application.

    In the following sections, we'll explore how to implement these features in your own applications, starting with the basics of form construction and moving on to advanced interaction patterns.


    Form Display Methods

    When integrating forms into your web application, Trongate MX offers three powerful approaches to form presentation: default display, modal windows, and hidden forms with triggers. Each method serves different user experience needs while maintaining the dynamic capabilities of Trongate MX.

    Default Display Method

    The simplest approach is to display forms directly on the page load. This method works well for primary actions where form completion is the main goal.

    Here's how to create a basic form using Trongate's helper functions:

    For those who prefer working with pure HTML, here's how to achieve the same result:

    Modal Window Forms

    Modal windows create focused interactions by displaying forms in overlay dialogs. This approach is perfect for secondary actions that shouldn't disrupt the main content flow.

    First, let's create a button to trigger the modal using Trongate's helper functions:

    Here's how you can accomplish the same using standard HTML:

    Full documentation on how to build dynamic modals, with Trongate MX, is available here.

    The corresponding view file for the modal content would look like this using helper functions:

    To implement this using only HTML, see the example below:

    And the controller method to serve the form:

    Hidden Forms with Triggers

    For a cleaner interface, forms can remain hidden until needed. This approach uses triggers to reveal forms dynamically.

    Here's how to implement this using Trongate's helper functions:

    For a pure HTML approach, here's the corresponding code:

    Best Practices for Form Display

    • Use default display for primary page actions where form completion is the main goal.
    • Choose modals for secondary actions that require focused attention.
    • Implement hidden forms when you want to preserve space and provide progressive disclosure.
    • Always ensure clear visual feedback when forms are shown or hidden.

    Summary

    Trongate MX provides flexible options for displaying forms, each suited to different scenarios. The default display method works well for primary forms, while modal windows create focused interactions for secondary tasks. Hidden forms with triggers help maintain a clean interface while providing progressive disclosure. By choosing the right display method and implementing it with Trongate MX's intuitive attributes, you can create engaging and user-friendly form experiences.


    Regarding Form Attributes

    While Trongate MX enhances form handling with dynamic features, it's important to understand how to leverage HTML5's built-in form validation attributes and other useful form properties. These attributes can improve user experience by providing immediate feedback before form submission.

    Making Fields Required

    To make specific fields required in your form, add the 'required' attribute to individual form elements:

    Here's how to implement this using Trongate's helper functions:

    For those who prefer working directly with HTML, here's how to achieve the same functionality:

    Setting Input Lengths

    You can control the minimum and maximum length of text input fields:

    Using Trongate's form helper functions:

    Here's the same implementation using straightforward HTML:

    Numeric Input Ranges

    For numeric inputs, you can specify acceptable minimum and maximum values:

    Here's the implementation using Trongate's helper functions:

    To achieve this using pure HTML, here's the equivalent code:

    Autocomplete Settings

    The autocomplete attribute controls whether browsers should offer to save and auto-fill form data. This can be particularly important for login forms and sensitive information:

    First, let's look at how to implement this using Trongate's helper functions:

    Here's how to achieve the same functionality using standard HTML:

    Common Validation Attributes:

    • required: Field must be filled out before submission
    • minlength: Minimum number of characters for text input
    • maxlength: Maximum number of characters for text input
    • min: Minimum value for numeric inputs
    • max: Maximum value for numeric inputs
    • pattern: Regular expression pattern for validation

    Autocomplete Values:

    • off: Suggests that browsers should not automatically enter or select a value for this field
    • new-password: Indicates this field is for a new password, helping password managers suggest strong passwords
    • email: Indicates this field expects an email address
    • tel: Indicates this field expects a telephone number

    Summary

    HTML form attributes and client-side validation provide an essential first line of defense against invalid data while improving user experience. While client-side validation enhances user experience, remember to always implement server-side validation for security. Each validation attribute serves a specific purpose, and using them appropriately helps create more user-friendly forms.


    Form Submission Feedback

    When a form is submitted in Trongate MX, several automatic behaviors and visual feedback options help create a smooth user experience. This page explores the built-in features and customization options available during form submission.

    Automatic Form Behaviors

    When a form is submitted, Trongate MX automatically:

    These behaviors require no additional attributes - they're built into Trongate MX's form handling system.

    Loading Indicators

    Loading indicators provide visual feedback that a form submission is in progress. Here's how to implement this using Trongate's helper functions:

    For those who prefer working with pure HTML, here's the equivalent implementation:

    The spinner automatically appears during form submission and hides when complete. The mx-indicator class ensures proper initialization and cleanup.

    Target Element Control

    You can control how the form appears during submission using mx-target-loading. Two approaches are available:

    1. Cloaking the Form

    Here's how to implement form cloaking using Trongate's helper functions:

    To achieve the same cloaking effect using standard HTML:

    2. Showing a Loading Message

    Using Trongate's form helper functions:

    Here's how to implement the loading message using pure HTML:

    Combining Multiple Feedback Methods

    You can combine different feedback methods for a comprehensive user experience. Here's how to do it using Trongate's helper functions:

    Here's the same comprehensive feedback implementation in straightforward HTML:

    When using mx-indicator with forms, place the loading indicator outside the form to ensure it remains visible when the form elements are disabled.

    Response Handling

    After submission, Trongate MX automatically:

    When building or testing API integrations, you can use PHP's sleep() function to simulate realistic network latency. This is particularly useful for testing features like loading indicators, ensuring they appear correctly during delayed server responses.

    For example, here's how you can introduce a 2-second delay to mimic a slow API response:

    Summary

    Trongate MX provides a robust set of tools for handling form submissions gracefully. The automatic form element disabling prevents double submissions, while visual feedback options like loading indicators and content replacement keep users informed of the submission status. By combining these features, you can create form submissions that are both user-friendly and resilient.


    Form Validation and Error Handling

    Displaying form validation errors with Trongate MX is an easy two-step process.

    Step 1

    Step 2

    NOTE: When invoking validation_errors() , replace xxx with an appropriate error status code, such as 400.


    Understanding Different Types of Form Responses

    Trongate MX handles form submissions differently based on the HTTP status code returned by the server:

    Form Validation Errors (400, 422, etc.)

    When validation errors occur and the form has the highlight-errors class, Trongate MX will:

    Security-Related Responses (401, 402, 403)

    For security-related status codes (unauthorized, payment required, or forbidden), Trongate MX will:

    This means you can handle authentication failures, session timeouts, or CSRF protection failures using standard Trongate MX attributes. For example:

    If the server returns a 401 status code (e.g., due to an expired session), Trongate MX will process the redirect instead of trying to display validation errors. Similarly, you could use mx-on-error to display a custom "Session Expired" message.

    Video Tutorial

    Below is a short video tutorial demonstrating how to add form validation errors when working with Trongate MX.

    YouTube tutorial

    Tutorial Resources

    The starter code for the video tutorial is available on GitHub. Click the button below to access the repository and download the starter code.

    Get Starter Code

    Prerequisites

    To use Trongate's built-in form validation features with Trongate MX, ensure your webpage includes the following:

    1. A base element inside the <head> section with its value set to your website's base URL.
    2. A link element inside the <head> section that loads trongate.css.
    3. Opening and closing script tags with the src attribute pointing to js/trongate-mx.js. *

    * The script tag for loading Trongate MX can be placed either in the <head> section or just before the closing </body> tag.

    Here's an example of a basic HTML template ready to work with Trongate MX:

    When using Trongate's Validation class for form validation, ensure your forms are closed with:

    This is essential because Trongate's Validation class automatically applies CSRF protection to all incoming requests. Using form_close() not only generates a closing form tag but also creates the necessary security token required for Trongate's CSRF protection mechanisms.

    Failing to use form_close() will result in rejected requests due to Trongate's stringent security protocols.

    Summary

    The ability to dynamically render inline form validation errors with just two lines of code is arguably one of Trongate MX's most impressive features.

    Ask yourself:

    "How long would it take to build this kind of functionality without Trongate MX?"

    Even for an experienced developer, building such functionality would almost certainly take several hours or would require depending upon third-party libraries.

    What truly sets Trongate MX apart is that it allows you to leverage Trongate's Validation class, security features, and form helpers - all out of the box. Not only can you build beautiful, highly interactive single-page applications without writing JavaScript, but you can also do so without relying on any third-party libraries!

    And there's more!

    With Trongate MX, it's also possible to invoke your own custom JavaScript functions after validation errors have occurred. Full details on how to take advantage of this functionality are covered on the next page.


    After Validation Operations

    The mx-after-validation attribute in Trongate MX allows you to execute custom JavaScript functions immediately after form validation errors are displayed.

    Usage

    Here's a simple example showing how to use the mx-after-validation attribute:

    When the form is submitted with invalid data, Trongate MX automatically displays validation errors next to the relevant form fields. Once these errors are displayed, the showErrorCount function is called. In this example, it counts the validation errors and displays a summary message to help users understand how many issues need to be addressed.

    Alternative Syntax

    If you prefer working directly with HTML instead of using Trongate's form helpers, here's the equivalent code:

    More Examples

    Custom Error Styling

    You might want to draw attention to validation errors when they appear. Here's how you can temporarily make erroneous fields blink:

    Understanding the customEvent Parameter

    When Trongate MX calls your validation handler function, it passes a customEvent parameter containing useful information about the validation event. The customEvent.detail object includes:

    • element: The form element that triggered the validation
    • originalEvent: The original form submission event

    You only need to include this parameter if you plan to use this contextual information in your handler function.

    Analytics and Error Tracking

    You can use mx-after-validation to track validation errors for analytics or debugging purposes. This example demonstrates using the customEvent parameter to access form information:

    • Validation Context: The function receives a customEvent parameter with validation details
    • Error Elements: Use .form-field-validation-error to find invalid fields
    • Error Messages: Find error messages in .validation-error-report elements
    • User Experience: Focus on helping users correct their input efficiently

    Summary

    The mx-after-validation attribute provides a powerful way to customize how your application handles form validation errors. By executing JavaScript after validation errors are displayed, you can enhance the user experience with custom animations, helpful UI behaviors, and error tracking capabilities. This makes form validation more user-friendly and helps you maintain better insight into validation issues in your application.


    Advanced Features

    Dynamic URL Construction

    Trongate MX now supports dynamic URL construction for all HTTP method attributes, allowing you to create more flexible and responsive user interfaces. This feature enables you to include dynamic values in your request URLs, making your web applications more interactive and data-driven.

    Basic Usage

    The HTTP method attributes (mx-get, mx-post, mx-put, mx-patch, and mx-delete) now support placeholders in the URL that will be replaced with the current value of the element. The syntax uses ${this.value} to indicate where the element's value should be inserted.

    In the following example, if the user selects "User 2", the GET request will be sent to "api/users/2".

    The code below demonstrates the same solution, but written using Trongate's form_dropdown() function.

    How It Works

    When an HTTP request is triggered, Trongate MX will:

    1. Detect the ${this.value} placeholder in the URL
    2. Replace it with the current value of the element
    3. Send the HTTP request to the resulting URL

    Supported HTTP Methods

    This feature works with all HTTP method attributes in Trongate MX:

    More Examples

    The code sample below demonstrates how to create a dropdown menu that fetches product details dynamically. When a user selects a different product from the dropdown, it triggers a GET request to fetch that specific product's information, which is then displayed in an element with the ID 'product-details'.

    Fetching Product Details

    Checkbox Example

    The code sample below demonstrates how to toggle the visibility of archived items. When the checkbox is clicked, it sends a GET request using the checkbox's value (1 when checked, 0 when unchecked) to fetch the appropriate content.

    Hotel Booking Example

    The code sample below demonstrates a hotel booking scenario. When the user changes the number of nights, it triggers a GET request to fetch the total price, which then updates in the price-display element.

    Best Practices

    Note: While this feature allows for dynamic URL construction, it's important to ensure that your server-side routing can handle these dynamic segments appropriately.

    Limitations

    Summary

    The dynamic URL construction feature enhances Trongate MX's capabilities by enabling interactive, data-driven interfaces without custom JavaScript. It's particularly useful for creating dynamic filters, toggles, and real-time calculations. The feature works best with form elements that naturally provide values, such as select dropdowns, checkboxes, and number inputs.


    Managing Browser URL State

    Trongate MX introduces the ability to manage the browser's URL state directly from your HTML, eliminating the need for custom JavaScript. This feature is perfect for creating dynamic, URL-driven interfaces such as filtering, sorting, or navigating through content-rich web applications.

    Basic Usage

    The mx-push-url attribute lets you update the browser's URL dynamically whenever an element is interacted with. When set to "true", it will push the request URL into the browser's history, making your application behave like a true single-page application (SPA). For example, you can use it with a dropdown menu to update the URL dynamically:

    Here's how to create a category selector using pure HTML:

    The same category selector can be created using Trongate's form_dropdown() function:

    In this example, when the user selects "Fashion," the browser URL will update to match the request URL (/products/fetch_by_category/fashion), and a GET request fetches the corresponding products for display in the #product-list element.

    Technical Information

    When mx-push-url="true" is used, Trongate MX integrates with the browser's History API to create a seamless single-page navigation experience. After a successful AJAX request (status codes 200-299), the request URL is pushed to the browser's history stack. When users click the browser's back/forward buttons, Trongate MX intercepts these navigation events and automatically triggers the appropriate requests to restore the previous state - all without requiring page reloads. If the application state cannot be restored, the system falls back to a standard page reload to ensure consistent behavior.

    Pagination Example

    The example below demonstrates using mx-push-url for pagination. When a user clicks on a page number, the URL updates dynamically to match the request URL.

    Using pure HTML:

    The same pagination button can be created using Trongate's form_button() function:

    Pure HTML Form Example

    The code sample below demonstrations the mx-push-url attribute being used with pure HTML elements including a form and two buttons.

    • Use mx-push-url="true" when you want the browser URL to reflect the current state of your application.
    • Ensure your server-side routes match the URLs that will be pushed to the browser history.
    • Test browser back/forward navigation thoroughly to ensure a smooth user experience.
    • Remember that the URL is only updated after successful requests (status codes 200-299).
    • Consider using meaningful URL segments that reflect the current application state.

    Limitations

    Summary

    The mx-push-url feature in Trongate MX provides a simple way to manage browser history in single-page applications. By setting mx-push-url="true", you ensure that your application's URLs stay synchronized with its state, enabling proper bookmarking and browser navigation without any custom JavaScript code.


    Throttling HTTP Requests

    The mx-throttle attribute in Trongate MX allows you to limit the frequency of HTTP requests triggered by user interactions. This feature helps optimize performance and reduce server load by preventing rapid successive requests.

    Usage

    Set the mx-throttle attribute on an element to specify the minimum time (in milliseconds) that must pass between successive requests.

    Basic Example:

    Here's the same solution, written in pure HTML:

    In this example, search requests are throttled to a maximum of one request every 300 milliseconds, even if the user types faster.

    The 'input' event is a standard DOM event that fires when the value of an <input>, <select>, or <textarea> element has been changed. It's particularly useful for tracking changes to form fields in real-time. Here are some key points about the 'input' event:

    1. Real-time tracking: Unlike the 'change' event, which typically fires when the element loses focus, the 'input' event fires immediately whenever the value changes.
    2. Covers multiple input methods: It triggers for various types of input, including:
      • Typing on a keyboard
      • Pasting text (via mouse or keyboard)
      • Drag-and-drop actions
      • Speech input
      • Autocomplete suggestions
    3. Works with different input types: It's not just for text inputs. It works with other input types like number, range, color, etc.
    4. Doesn't fire for all changes: The 'input' event doesn't fire for changes that don't alter the element's value, like hitting the shift or ctrl keys.
    5. Can't be canceled: Unlike some other events, the 'input' event can't be canceled. It's purely informative.

    Here's a simple example of how it might be used in vanilla JavaScript:

    In the context of an autocomplete feature, using the 'input' event allows Trongate MX to react immediately to any changes in the input field, making it ideal for triggering suggestion requests as the user types.

    The 'input' event is widely supported across modern browsers and provides a more responsive user experience compared to events like 'keyup' or 'change' for this kind of functionality.

    How It Works

    When an event that would normally trigger a request occurs:

    1. Trongate MX checks if the time since the last request is greater than or equal to the throttle time.
    2. If sufficient time has passed, the request is made and the timestamp is updated.
    3. If not enough time has passed, the request is skipped.

    Use Cases

    Considerations

    • Choose appropriate throttle times: Balance between responsiveness and server load. Typical values range from 200ms to 1000ms.
    • Combine with debouncing: For some use cases, client-side debouncing in addition to throttling can provide better user experience.
    • Feedback to users: Consider providing visual feedback when requests are throttled to maintain a responsive feel.
    • Server-side considerations: Implement server-side rate limiting as well for comprehensive protection against excessive requests.

    Advanced Example: Throttled Country Search Input

    The code below demonstrates a throttled text input that updates country suggestions as the user types, with a minimum interval of 300ms between POST requests. In this example, the typed phrase is sent as 'country' in the request body.

    Prefer HTML over helper functions? Here's the equivalent solution:

    If you intend to use Trongate's to perform server-side form validation tests then usage of the method is essential since it generates a hidden CSRF token input field as well as a closing form tag.

    Explanation of Key Attributes:

    This example uses HTML5's datalist element, which provides a built-in autocomplete feature. As the user types, the datalist is populated with matching country suggestions.

    How It Works:

    1. As the user types in the form field, it triggers the 'input' event.
    2. Trongate MX checks if 300ms have passed since the last request. If not, it skips the request.
    3. If 300ms have passed, a POST request is sent to the 'submit_country' method of the 'countries' controller.
    4. The server processes the request and returns a list of matching countries.
    5. The response updates the datalist element, providing autocomplete suggestions to the user.

    In instances where an element invokes a form submission (for example, by usage of mx-post) and the element is within a form, Trongate MX will automatically fetch all of the values within the form and send those to the endpoint as posted values. This mimics standard form submission behavior. As a result, there is no requirement to use the mx-vals attribute in this instance, as all form data is automatically included in the HTTP request.

    Server-Side Implementation:

    Here's an example of how the controller method might be implemented in Trongate:

    This method performs the following steps:

    1. Retrieves the posted 'country' value using Trongate's post() helper function.
    2. If the posted value is empty, it returns a 200 status code with an empty response body, which will clear the suggestions.
    3. Constructs an SQL query to find countries that start with the posted 'country' value.
    4. Executes the query using Trongate's Model class query_bind() method, which handles parameter binding for security.
    5. Loads a view file ('autocomplete_suggestions.php') to display the results as datalist options.

    View File (autocomplete_suggestions.php):

    The view file, containing the list of potential matches, is rendered by invoking the view() method.

    Inside the view file, a simple FOR loop is used to display the results, from our database query, as option elements for the datalist:

    This generates a list of option elements, one for each matching country, which will be used as autocomplete suggestions in the datalist.

    Note: This approach uses HTML5's datalist element, which provides built-in autocomplete functionality. It's particularly efficient for smaller datasets (typically less than 1000 items) and offers a native user experience across modern browsers. For more information, visit W3Schools - datalist.

    Additional Notes

    Summary

    By using the mx-throttle attribute, you can create more efficient and performant web applications with Trongate MX, ensuring smooth user experiences while managing server load effectively.


    Polling With Trongate MX

    Polling is a powerful feature in Trongate MX that allows you to periodically fetch updates from the server without user interaction. This can be particularly useful for real-time updates, live data feeds, or any scenario where you need to keep your web application's content fresh and up-to-date.

    Usage

    Polling in Trongate MX is implemented using the mx-trigger attribute. By specifying a polling interval, you can instruct Trongate MX to automatically send requests to the server at regular intervals.

    Basic Example:

    In this example, the content of the <div> will be updated with data from the specified URL every 5 seconds.

    Polling Options

    Trongate MX supports several polling options to provide flexibility in how and when updates are fetched:

    OptionDescriptionExample Syntax
    Basic PollingPolls at a regular interval starting immediately.mx-trigger="every 10s"
    Load PollingStarts polling after an initial delay.mx-trigger="load delay:3s"
    Polling with Initial DelayCombines an initial delay with a different interval for subsequent requests.mx-trigger="load delay:2s, every 7s"

    Time Interval Specification

    Trongate MX allows you to specify time intervals using different units:

    This flexibility allows you to set up polling intervals that best suit your application's needs.

    Examples:

    Basic Polling (every X seconds):

    The code sample below fetches updates from the server every 3 seconds, providing real-time data without page refresh:

    Load Polling (delay then poll every X minutes):

    This code initiates polling after a 5-minute delay, then continues to poll every 5 minutes, useful for less frequent updates:

    Polling with Initial Delay:

    This example waits for 1 hour before the first poll, then polls every 30 minutes thereafter, ideal for long-term data tracking:

    • Consider server load: Be mindful of the polling frequency to avoid overwhelming your server with requests.
    • Use appropriate intervals: Choose polling intervals that make sense for your data's update frequency.
    • Combine with other attributes: Use polling with mx-target and mx-swap for more dynamic updates.
    • Error handling: Implement proper error handling to manage failed requests gracefully.

    Additional Notes

    Summary

    By leveraging polling in Trongate MX, you can create dynamic, real-time experiences for your users without the need for complex JavaScript or WebSocket implementations. This feature allows your web applications to stay current and responsive with minimal effort.


    Trongate Mx Security

    Key Security Principles

    The Trongate PHP framework incorporates a comprehensive suite of security features to ensure your applications are secure from the ground up. These features include:

    For Trongate MX users, these security features are available out of the box and require no additional configuration, enabling developers to immediately work within a secure and cohesive ecosystem. By seamlessly integrating security with all aspects of modern web development - including the construction of secure API endpoints - Trongate empowers developers to achieve unparalleled efficiency and confidence in their projects.

    Securing API Endpoints

    API endpoints serve as crucial interaction points between your application and external systems or users. Securing these endpoints is essential to prevent unauthorized access and protect sensitive data.

    Strategies for Securing Endpoints

    There are a variety of strategies that developers can use to secure API endpoints. The strategies covered in this chapter include:

    Developer Flexibility and Broader Security Considerations

    While Trongate MX provides powerful built-in security features, developers should consider the following:

    1. Flexibility in Security Implementation: You're not restricted to using Trongate's built-in security tools. If needed, you can integrate custom or third-party security solutions to meet your specific requirements.
    2. Foundational Security Practices: Beyond using tools, developers should maintain a strong understanding of essential web security principles. These include hosting applications over SSL to encrypt data transmission, securing server configurations, and staying informed about emerging vulnerabilities.

    By combining Trongate MX's security tools with these best practices, developers can build robust, secure applications capable of meeting the demands of modern web development.


    Custom Headers

    The mx-headers attribute allows you to add custom HTTP headers to your Trongate MX requests. This feature is particularly useful when you need to send additional information to your server endpoints, such as authentication tokens, API keys, or custom metadata.

    Basic Usage

    The mx-headers attribute accepts a JSON object containing key-value pairs that represent your custom headers. Each key-value pair will be sent as an HTTP header with your request.

    Here's a basic example using Trongate's form_button() helper function:

    And here's the equivalent using pure HTML:

    The example above is for illustration purposes only. Never hardcode security tokens or API keys directly into HTML source code. These credentials would be visible in the page source and could pose significant security risks.

    Cleaner Syntax for Advanced Use

    To avoid syntax errors and improve maintainability when working with multiple headers, you can combine Trongate's form_button() function with PHP's json_encode():

    This approach uses PHP's json_encode() function to ensure properly formatted JSON for the mx-headers attribute while keeping the code maintainable.

    For those who prefer to work primarily with HTML, here's an alternative syntax:

    Important Technical Considerations

    • The mx-headers value must be valid JSON - malformed JSON will cause the request to fail
    • When using HTML attributes directly, use single quotes around the attribute value since JSON requires double quotes for properties
    • Header names are case-insensitive according to the HTTP specification, but conventionally written in Title-Case
    • Some headers (like Content-Length) are automatically managed by browsers and cannot be set via JavaScript

    Common Use Cases

    1. Authentication Headers

    Authentication is a primary use case for custom headers. Here's a secure implementation using the form_button() function:

    Authentication Best Practices:

    • Use Bearer authentication for JWTs and OAuth 2.0 access tokens
    • Implement CSRF protection for POST requests
    • Store tokens securely (e.g., in HTTP-only cookies for session tokens)
    • Use short-lived tokens and implement proper token rotation

    2. API Version Headers

    Version headers help manage API compatibility:

    3. Request Tracking Headers

    Custom headers can help with request tracking and debugging:

    Security Considerations

    Critical Security Guidelines:

    • Always use HTTPS for requests containing sensitive headers
    • Validate and sanitize all header values on both client and server sides
    • Store sensitive tokens securely
    • Implement rate limiting on endpoints that accept custom headers

    Conclusion

    The mx-headers attribute provides a flexible way to include custom HTTP headers in your Trongate MX requests. When implemented with proper security considerations, it enables robust authentication, versioning, and request tracking capabilities in your applications.


    CSRF Protection

    Cross-Site Request Forgery (CSRF) is a type of security vulnerability that allows malicious websites to execute unwanted actions on behalf of authenticated users. This attack occurs when a user visits a malicious website while being authenticated on another site, and the malicious site tricks the user's browser into making unwanted requests to the legitimate site.

    How CSRF Attacks Work

    Consider these common scenarios:

    1. Financial Attack:
      • You log into your bank account and stay logged in.
      • In another tab, you visit a malicious website.
      • The malicious site contains hidden code that sends a request to your bank to transfer money.
      • Since you're still authenticated with your bank, the request includes your valid session cookie.
      • The bank processes the request because it appears legitimate.
    2. Form Submission Attack:
      • You're logged into your website's admin panel.
      • A malicious user sets up a fake form on their website that matches your site's form structure.
      • They trick you into submitting their form (maybe disguised as something else).
      • The form submits to your website, carrying your valid authentication.
      • Your website processes the unwanted form submission.

    Built-in Protection in Trongate MX

    Trongate provides robust CSRF protection out of the box through its Validation class and form helpers. The framework uses a token-based approach where:

    Implementing CSRF Protection

    To implement CSRF protection in your Trongate MX applications, you need two key ingredients:

    1. Use the Validation Class

    The Validation class automatically includes CSRF protection for all form submissions. This ensures that form submissions are only accepted from your legitimate website.

    2. Use form_close() Helper

    The form_close() helper function is crucial for CSRF protection as it automatically generates and includes a CSRF token in your forms. Here's a complete example:

    The above code generates HTML that includes a hidden CSRF token:

    For more information about form handling with Trongate MX, refer to the Form Handling Overview.

    How It Works Behind the Scenes

    When you use form_close() , Trongate:

    1. Generates a secure random token using random_bytes(32).
    2. Stores the token in the user's session.
    3. Adds the token to the form as a hidden field.

    When the form is submitted, the Validation class:

    1. Checks for the presence of the CSRF token in the request data.
    2. Compares it with the token stored in the session.
    3. Blocks the request if the tokens don't match or if the token is missing.
    4. Uses hash_equals() for secure string comparison to prevent timing attacks.

    Always use form_close() and Trongate's Validation class when working with forms in Trongate MX. These two elements provide automatic CSRF protection and helps prevent security vulnerabilities.

    Automatic Protection

    CSRF protection in Trongate MX is automatic when you follow these best practices:

    • CSRF tokens are automatically regenerated for each form.
    • Tokens are session-specific and can't be used across different sessions.
    • CSRF protection is mandatory for all POST requests processed by the Validation class.

    Best Practices

    While Trongate MX handles CSRF protection automatically, following these best practices will ensure maximum security:

    At the time of writing, Trongate MX is able to apply automatic CSRF protection to API endpoints where:

    1. A form has been submitted.
    2. Trongate's Validation class is being used to validate submitted form data.

    Of course, it's possible that you may wish to have CSRF protection applied to endpoints that neither handle form submissions nor make use of Trongate's Validation class. For those kinds of situations, you'll have to write your own custom CSRF protection solution.

    Such a solution would involve generating a unique token for each session or request, storing it securely (e.g., in a session or a database), and ensuring that the token is sent along with requests that modify server-side data. You would then validate the token on the server before processing any sensitive actions to ensure that the request is legitimate and not forged.

    At the time of writing, this kind of functionality has not been built into Trongate MX. However, if it's something that you think would add value to Trongate MX, let us know. If enough people ask for a feature, we'll build it!


    Working with Trongate Tokens

    The mx-token attribute in Trongate MX provides a mechanism for seamlessly integrating Trongate's authentication and authorisation system by attaching Trongate Tokens to outgoing HTTP requests.

    Implementation Overview

    The Trongate PHP framework includes a powerful module named trongate_tokens. This module facilitates authentication and authorisation tasks, enabling you to secure API endpoints with customisable rules. With the trongate_tokens module, you can enforce granular control over who can interact with your API.

    Trongate's authorisation system supports a variety of access control patterns. Examples of possible API authorisation rules are:

    1. Allow access to an API endpoint for users who have a user level of 'admin'.
    2. Allow access to an API endpoint for users who either have a user level of 'admin' or a user level of 'member'.
    3. Allow access to an API endpoint for any logged in user.
    4. Allow access to an API endpoint for users who signed up within the last half hour.

    What Are 'Trongate Tokens'?

    Trongate Tokens are unique, cryptographically generated strings managed by the trongate_tokens module. These tokens act as secure identifiers for users within your application, enabling robust stateful authentication mechanisms. Below is an example of a Trongate Token:

    With a valid Trongate Token, you can:

    1. Verify if a user is authenticated
    2. Retrieve associated user details, such as:
      • Username
      • Email address
      • User role/level
      • Additional user metadata

    Using Trongate Tokens With Trongate MX

    Developers working with Trongate MX can easily take advantage of Trongate's inbuilt token-based security system.

    Usage revolves around a three-step process:

    1. Attach a Trongate Token to an element that triggers an HTTP response.
    2. Attempt to read a submitted token from your API endpoint.
    3. Have your API endpoint grant or deny access based on the presence or absence of a valid Trongate Token.

    Let's go through each of these three steps, one at a time.


    1: Attaching Tokens to Elements

    To attach a Trongate Token to an element, we need to first attempt to fetch a valid Trongate Token using PHP. This can be achieved by loading the 'trongate_tokens' module and invoking the _attempt_get_valid_token() method. For example:

    Passing The Token Into The View File

    Having fetched a Trongate Token, our next task is to pass the fetched token into the associated view file. It's worth noting that the _attempt_get_valid_token() method will return a boolean of false if no valid token is found for the user. With that being the case, it's a good idea to make sure the value of your token is a (variable of a type) string - regardless of the response from the 'trongate_tokens' module. This can be achieved by using PHP's settype() function. For example:

    The lines of code, shown above, achieve two things:

    1. They convert the value of $token to a type of string.
    2. They add the value of the token onto a $data array - giving it a property of 'trongate_token'.

    As is normal practice, with Trongate, your corresponding view file or template can then be loaded having the $data array passed in. For example:

    Accessing The Token From The View File

    Having fetched a token and passed it into your view file, your Trongate Token should now be available via a $trongate_token variable.

    As a reminder, if you failed to fetch a valid token for the user then the value for $trongate_token will be an empty string (since we used settype() in the controller file).

    Appending The Token To An Element

    We can then attach the fetched Trongate Token (which may or may not be a valid token) to an HTML element using the mx-token attribute. For example,

    If you prefer working with a more HTML-centered syntax, the same result can be achieved with:

    Regardless of whether or not you choose to use Trongate's form helper functions the result will be the same - any HTTP request that gets invoked by clicking on the button will have a Trongate Token attached to the request header.

    Understanding HTTP Request Headers

    HTTP request headers are key-value pairs sent with every HTTP request that provide essential information about the request being made. They act like metadata that helps both the client and server better understand and process the communication.

    Request headers serve multiple purposes:

    • They can provide context about the request (like what type of browser is making it)
    • They can specify how the server should respond (such as preferred content format)
    • They can contain authentication and security information
    • They can help to manage caching behavior

    Accessing header values depends on your environment. In most PHP setups, you can use getallheaders() or the $_SERVER superglobal to access HTTP headers.

    With Trongate, you can render an array of headers information with:

    2: Fetching Sent Tokens From The API

    Having attached a Trongate Token onto your request header, the next task is to have your API endpoint fetch the Trongate Token from the header.

    There's actually two ways to do this:

    1. By using the Trongate Tokens module.
    2. By using pure PHP.

    Let's go through both of these options.

    Fetching Tokens Using The Trongate Tokens Module

    If you've been following along with this example, you'll know that we used the Trongate Tokens module to (attempt to!) fetch a Trongate Token which could then be passed into a view file and - ultimately - attached to an HTTP request.

    You can use the same methodology to fetch the token from your API endpoints. Here's a reminder of the syntax:

    The _attempt_get_valid_token() method, within the Trongate Tokens module, attempts to return a Trongate Token for a signed in user by checking:

    1. The request headers
    2. The user's session data
    3. The user's cookie data

    That's three different places where Trongate Tokens can potentially be stored for any given user.

    This means that there's a hypothetical possibility of _attempt_get_valid_token() returning a false positive (i.e., signifying a user to be logged in) even if the user has failed to successfully attach a valid token to the HTTP request.

    In a live situation this is unlikely to be a problem. In a development environment, however, it could make the job of testing API endpoints quite difficult.

    Fetching Tokens Using Pure PHP

    Instead of using the Trongate Tokens module to attempt to fetch the Trongate Token from the header, you can use pure PHP. This can be achieved with the following:

    Of course, this is not a perfect solution since an error would be thrown in instances where a Trongate Token has not been attached to the HTTP request header.

    This can be mitigated by using the ternary operator. For example, with the code below, we attempt to read a Trongate Token from an HTTP request header. However, if a token is not found in the header, the $trongate_token value will be assigned with an empty string.

    Learning More About Trongate's Token System

    A full, in-depth explanation of Trongate's Token based security system is beyond the scope of the documentation for Trongate MX. However, if you require more information about this topic, please refer to: How Trongate's Token System Works.

    With the assumption that you know how to authenticate a user, based on the presence or lack of a valid Trongate Token, it's then for you - the developer - to decide whether or not to grant or allow access to an API endpoint.

    Granting Or Denying API Access

    Once you've validated (or invalidated) a Trongate Token, your API endpoint should respond appropriately using standard HTTP response codes. Here's how to handle common scenarios:

    Successful Access

    When a valid token is provided and meets all authorization requirements, your endpoint should return an HTTP response code within the success range. For example:

    Example of granting access:

    Access Denied

    When access needs to be denied, use appropriate status codes to indicate why. Examples include but are not limited to the following:

    Example of denying access:

    When implementing token-based access control:

    1. Always use appropriate HTTP status codes to indicate the result
    2. Include clear error messages in the response body
    3. Log failed access attempts for security monitoring
    4. Consider implementing rate limiting for your API endpoints
    5. Use environment variables for any sensitive configuration

    Remember that proper error handling and clear response messages help both security and developer experience. Your API should be both secure and user-friendly.


    Reference

    Trongate MX Attributes

    The table below offers a quick reference for all Trongate MX attributes.

    Attribute Description

    In addition to the above attributes, the Trongate PHP framework also has the from_trongate_mx() function. This function can be used on API endpoints to determine if an HTTP request came from Trongate MX or not. Full details are available from, Identifying Trongate MX Requests.